
Managing Tax Exemptions
This tutorial provides step-by-step instructions on how to add, edit, and manage tax exemptions for employees in XandaPay.
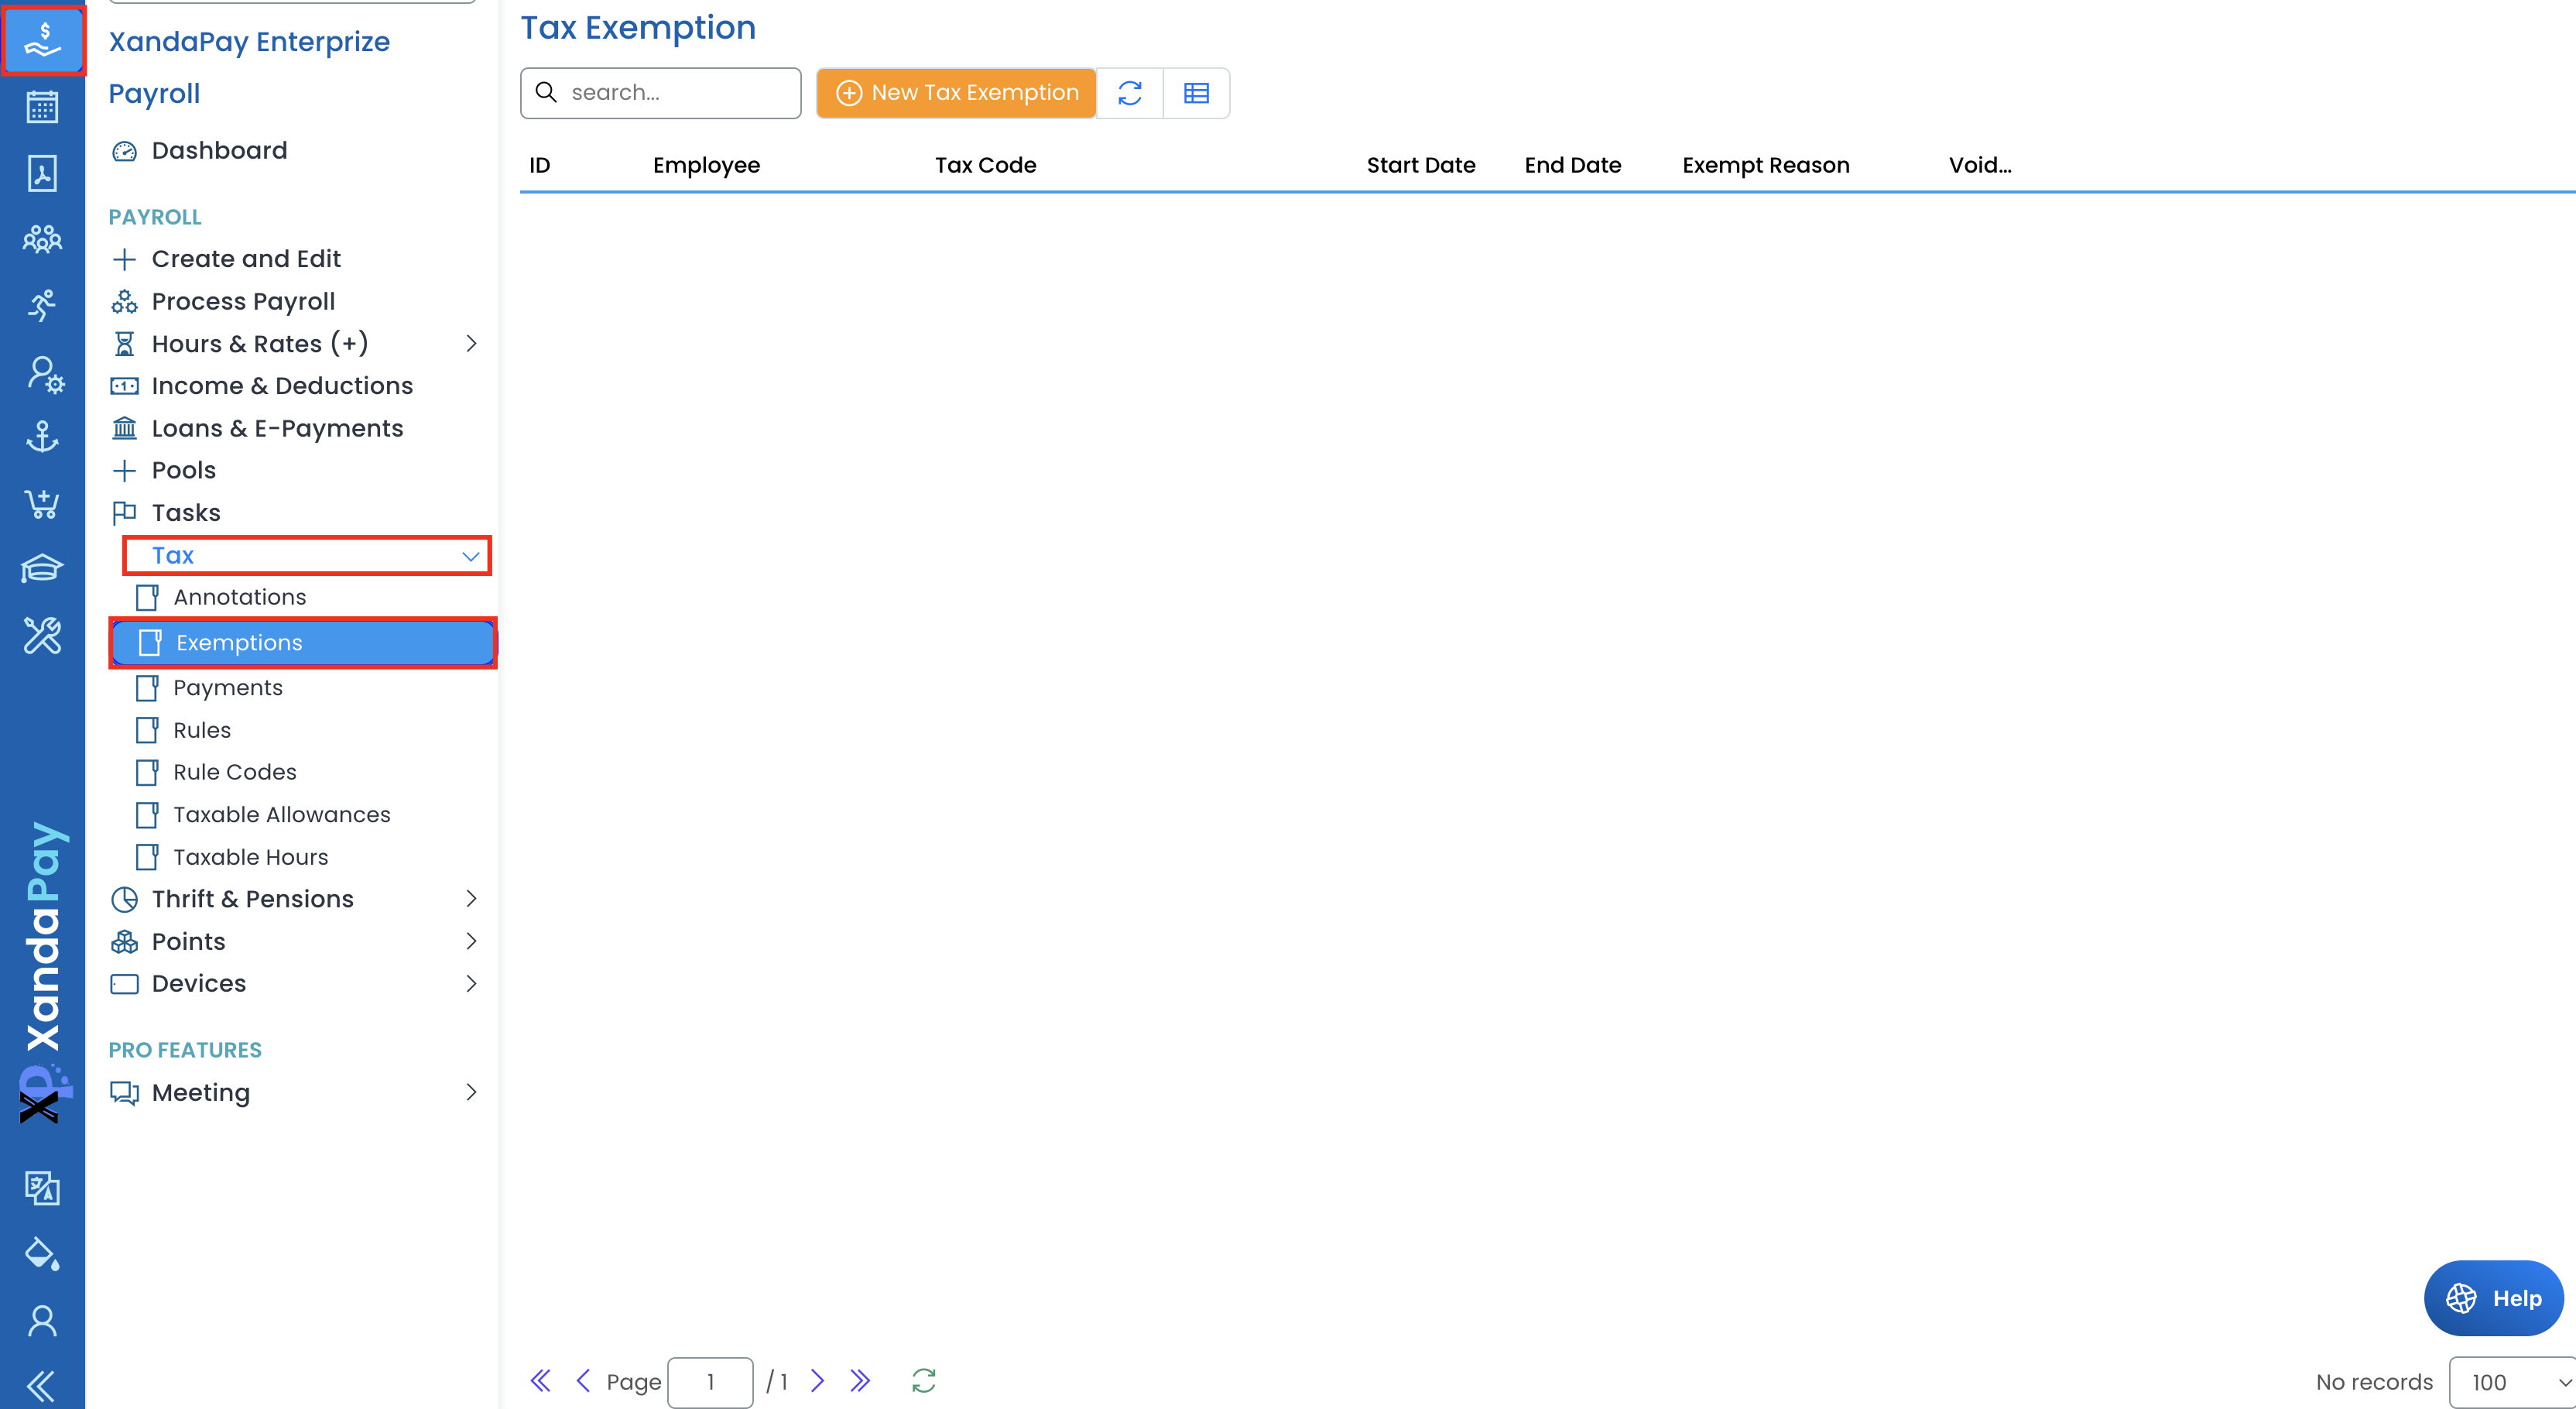
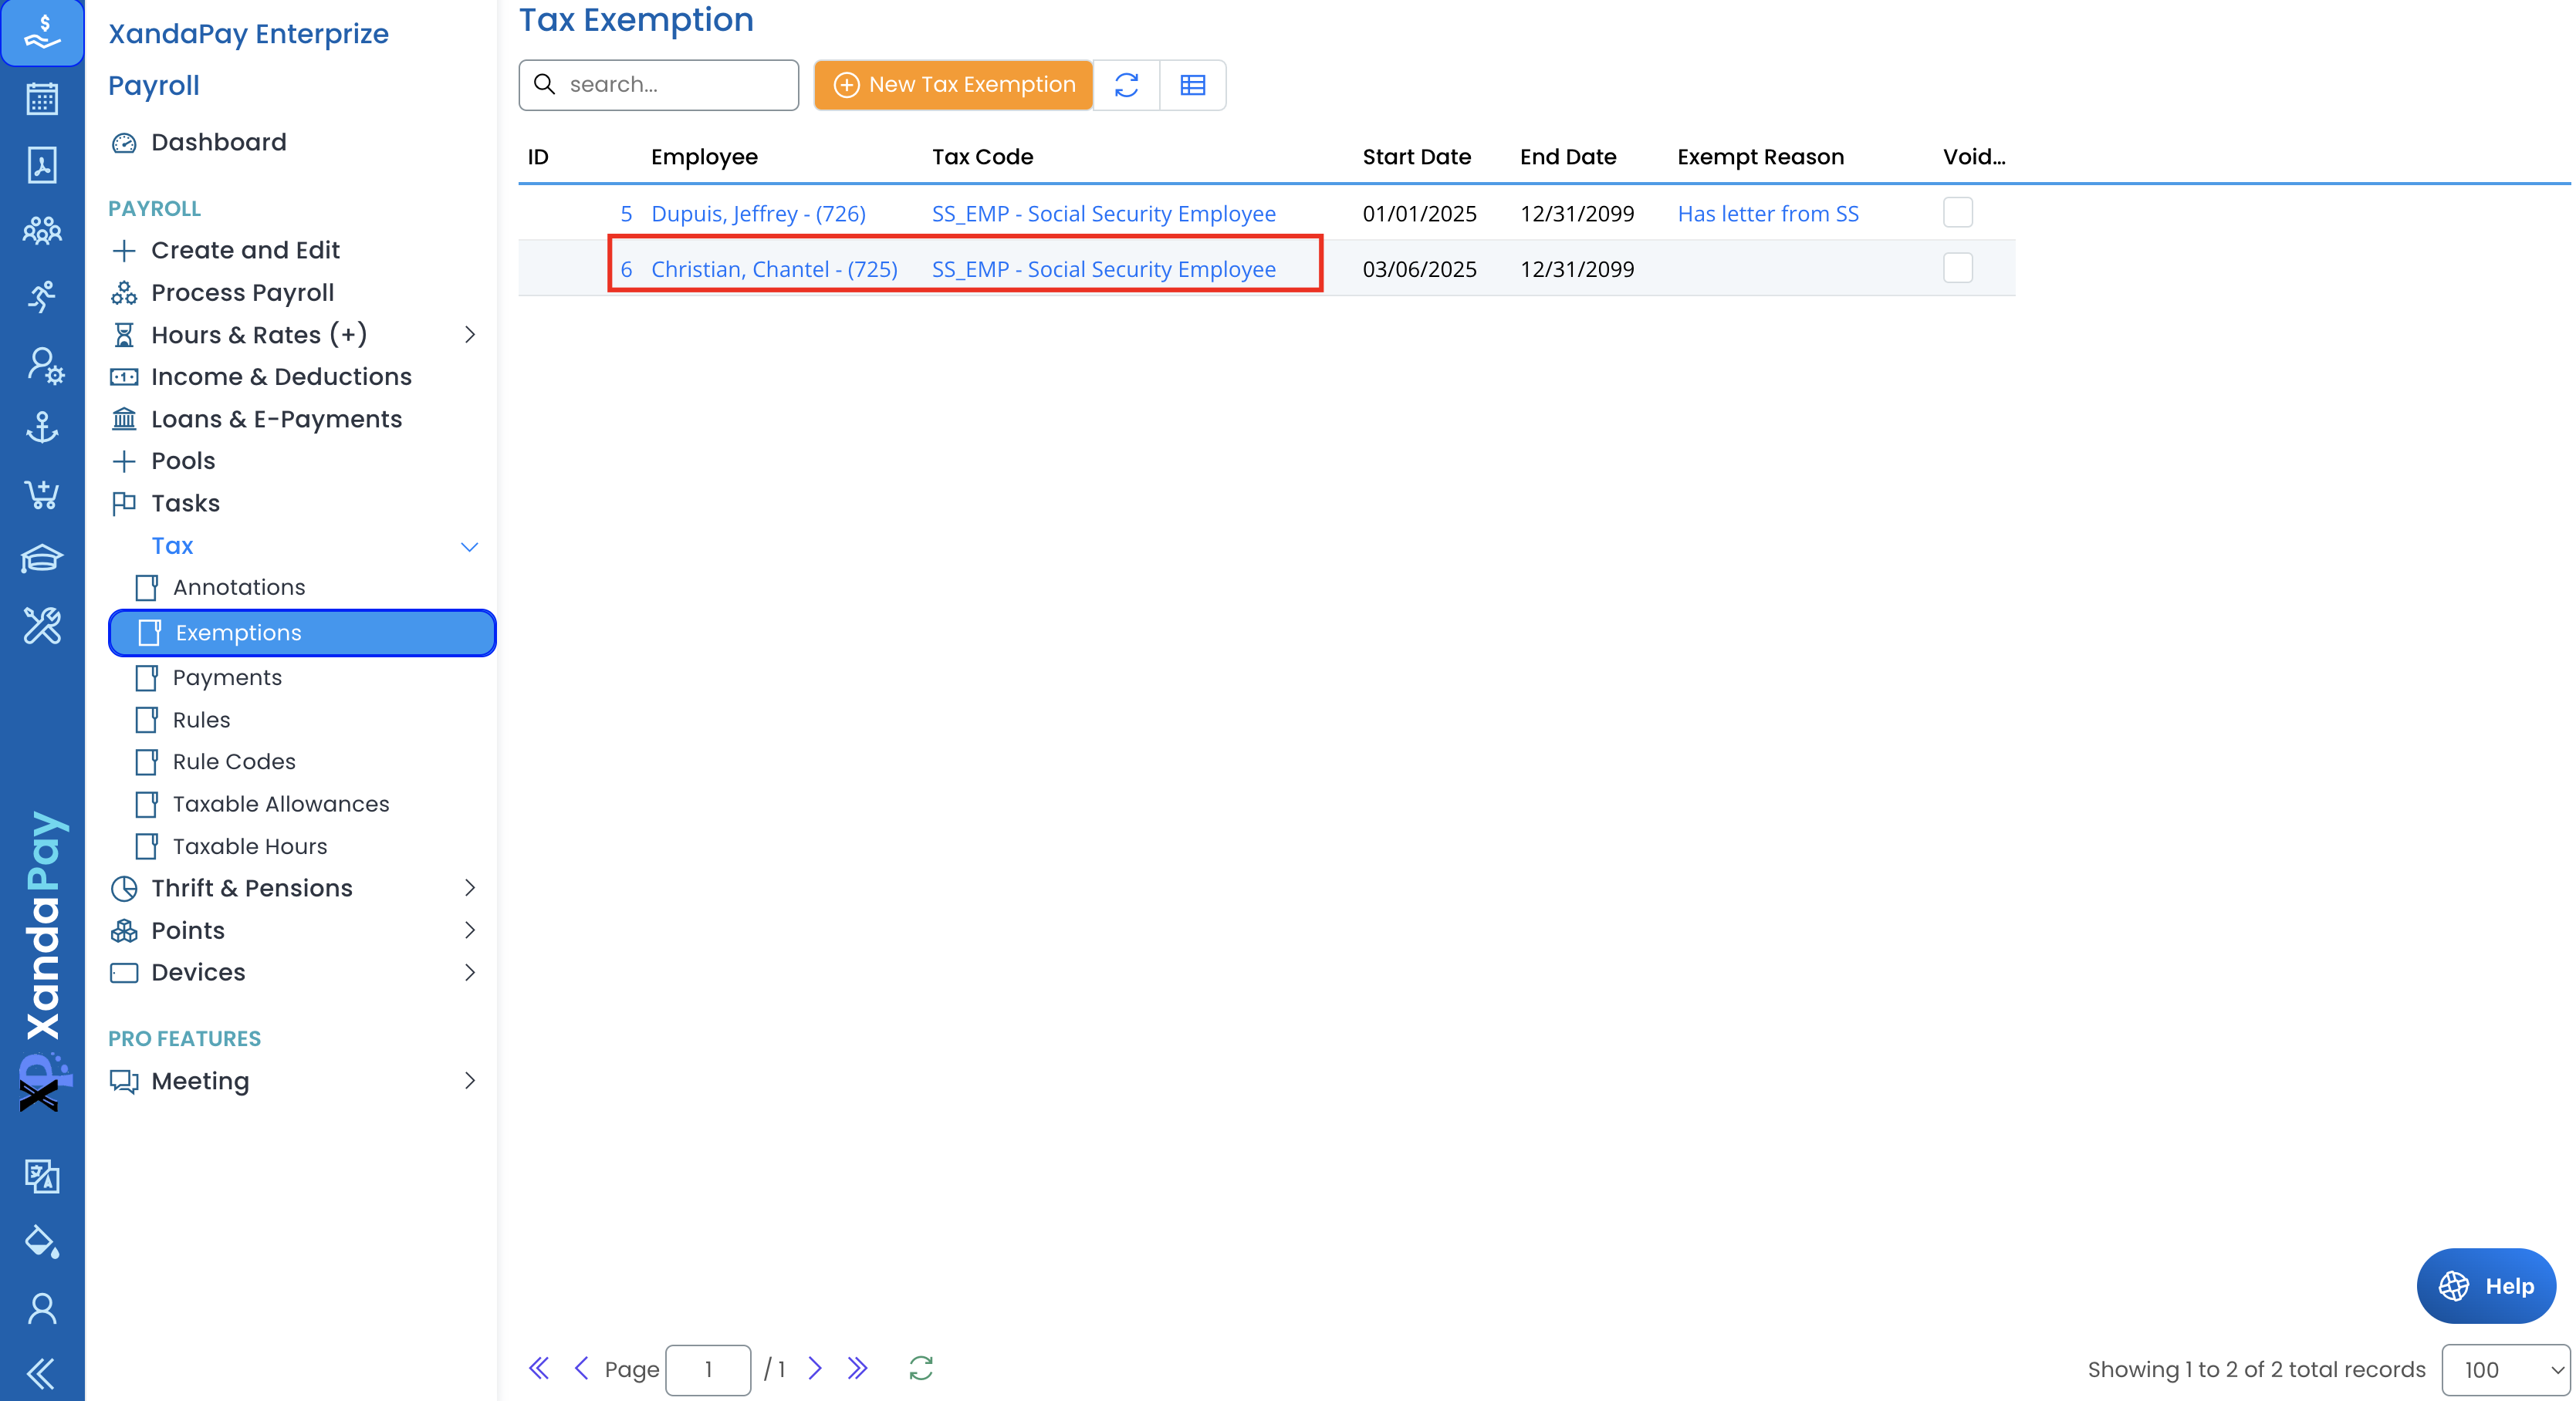
Accessing the Tax Exemptions Module
- Log into XandaPay.
- Navigate to the Payroll section in the left-side menu.
- Click on Tax to expand the options.
- Select Exemptions to open the tax exemption management screen.
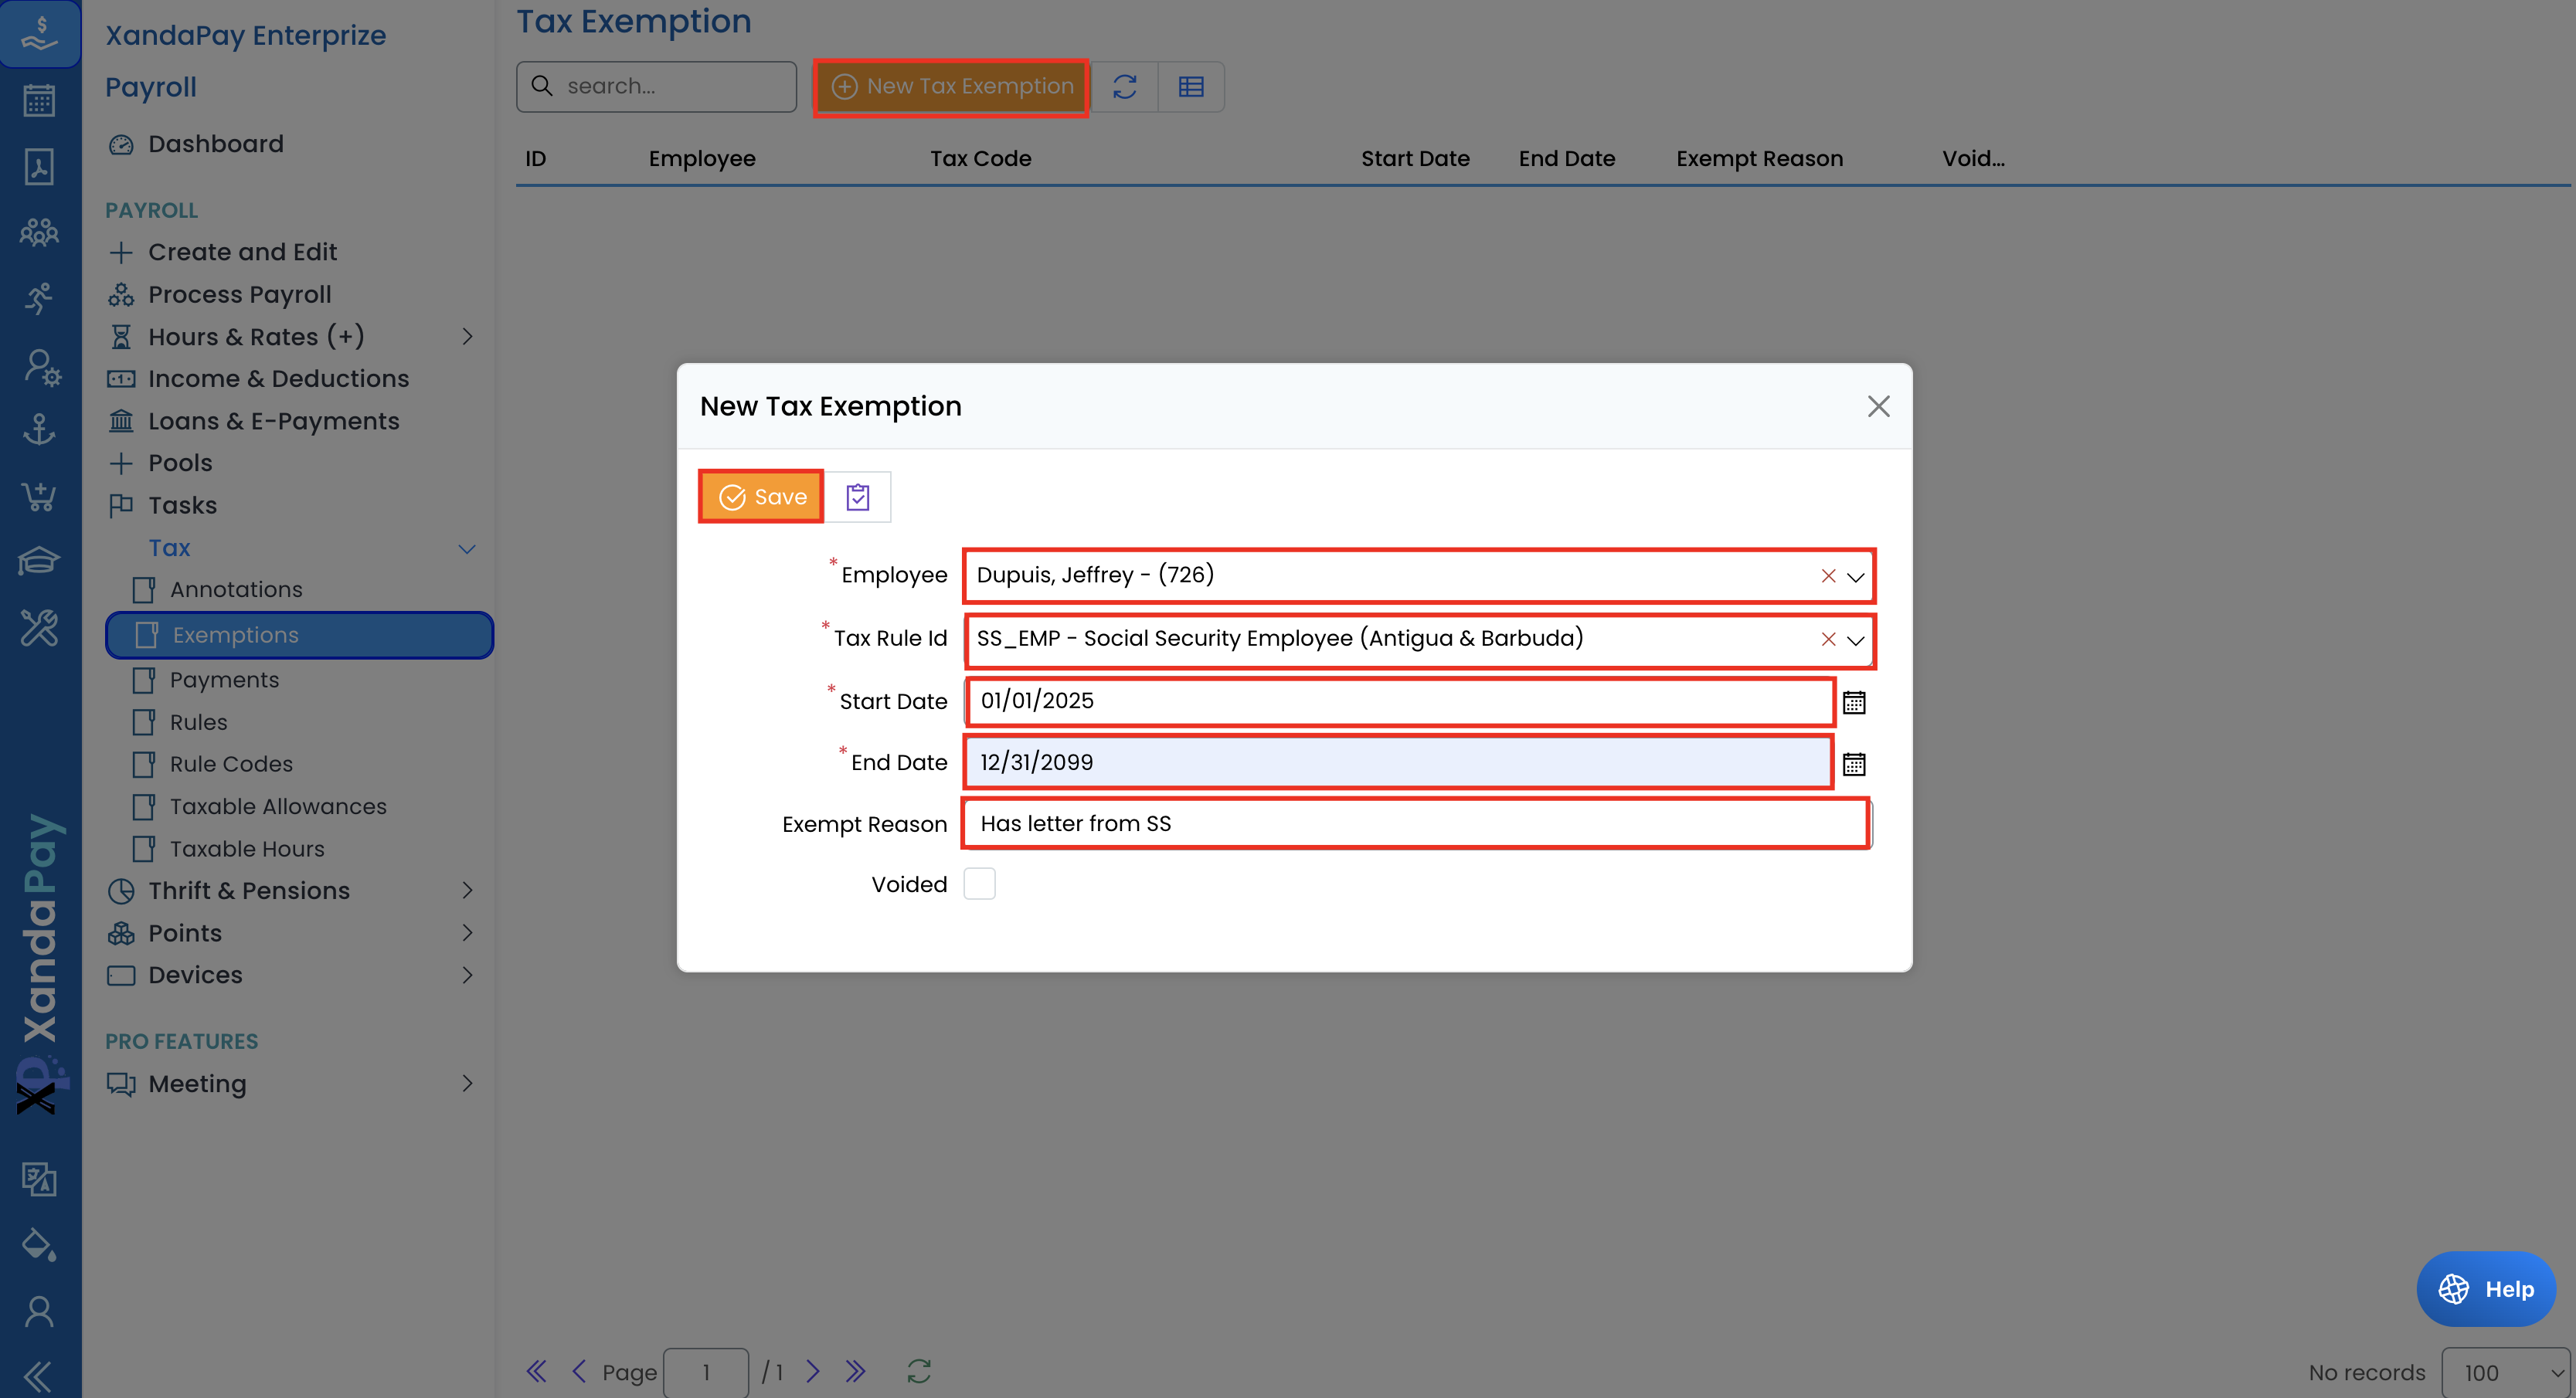
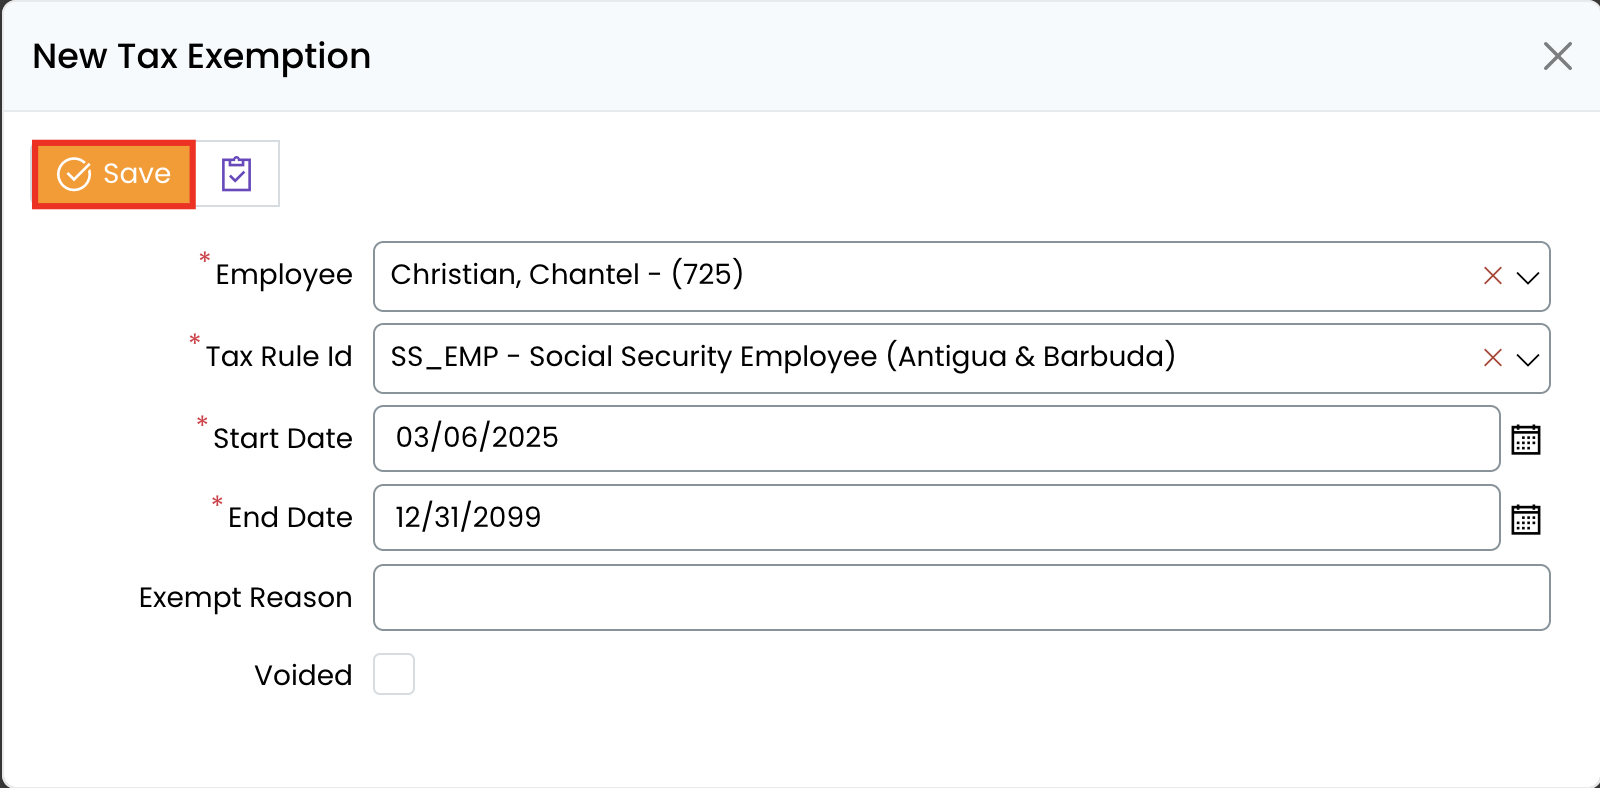
Adding a New Tax Exemption
- Click on the New Tax Exemption button at the top of the screen.
- In the Edit Tax Exemption form:
- Select the Employee from the dropdown list.
- Choose the Tax Rule ID (e.g., Social Security Employee, Social Security Company).
- Enter the Start Date and End Date of the exemption.
- Provide the Exempt Reason (e.g., "Receives pension", "Exempted by Age").
- Click Save to apply the exemption.
Editing an Existing Tax Exemption
- In the tax exemptions list, find the employee whose exemption you want to edit.
- Click on the linked Tax Code to open the exemption details.
- Make necessary changes to the fields (e.g., update the End Date if the exemption is extended).
- Click Save to confirm the changes.
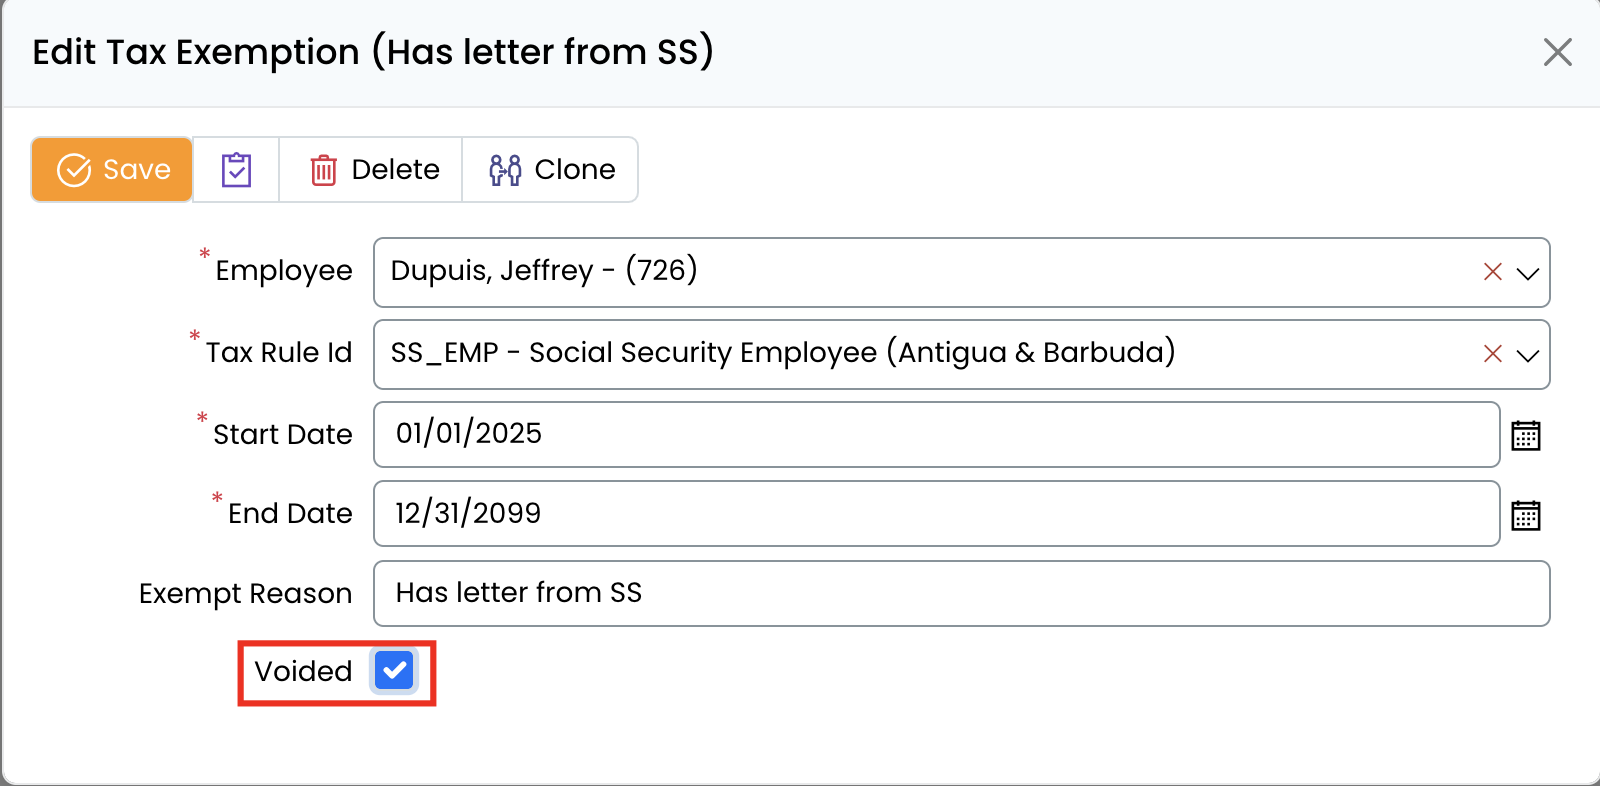
Voiding a Tax Exemption
- Open an existing tax exemption record.
- Check the Voided box if the exemption is no longer applicable.
- Click Save to apply the change.
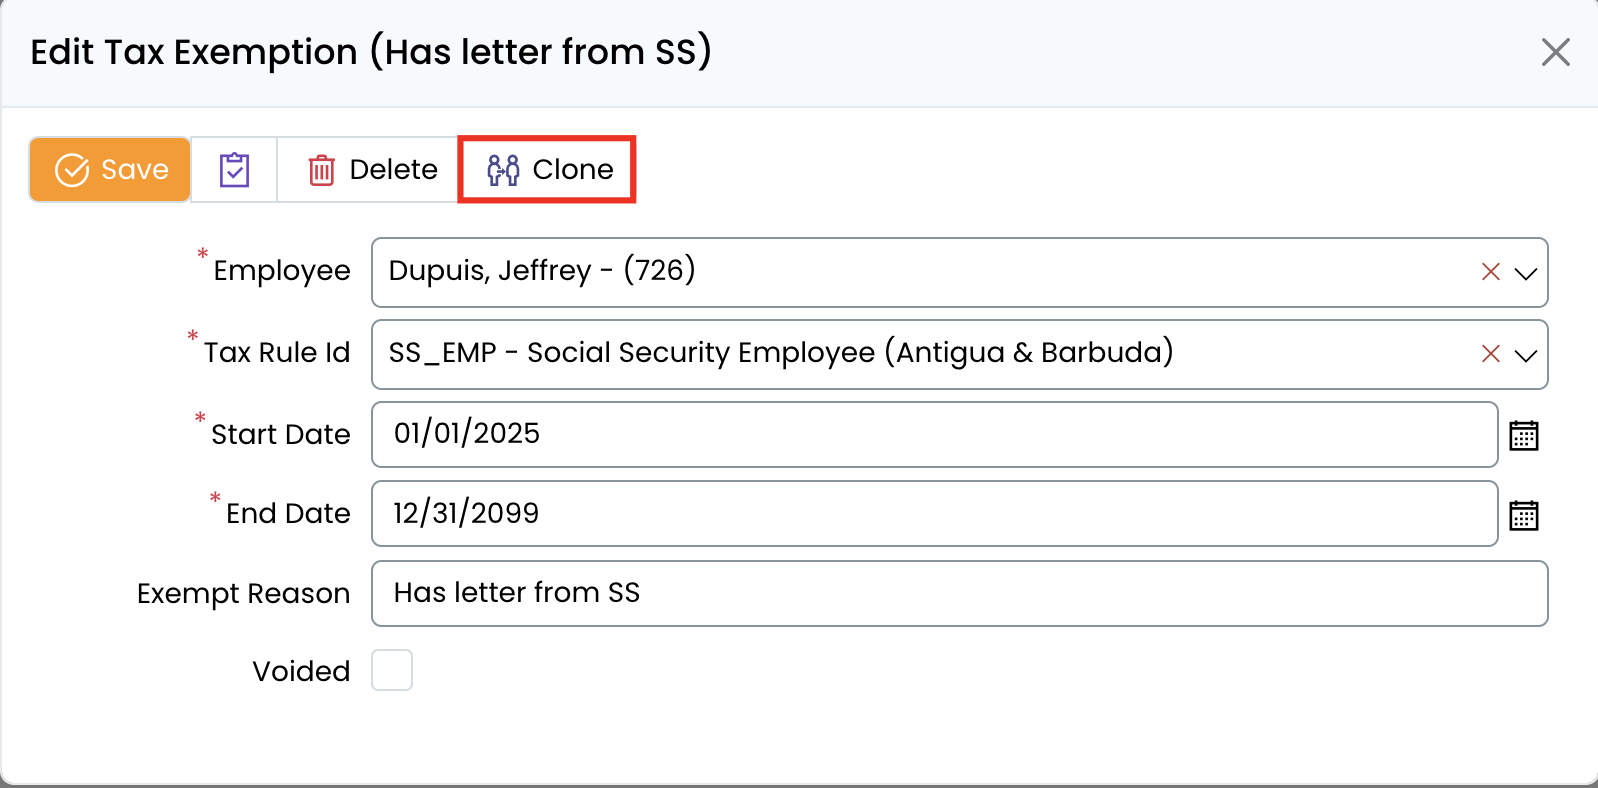
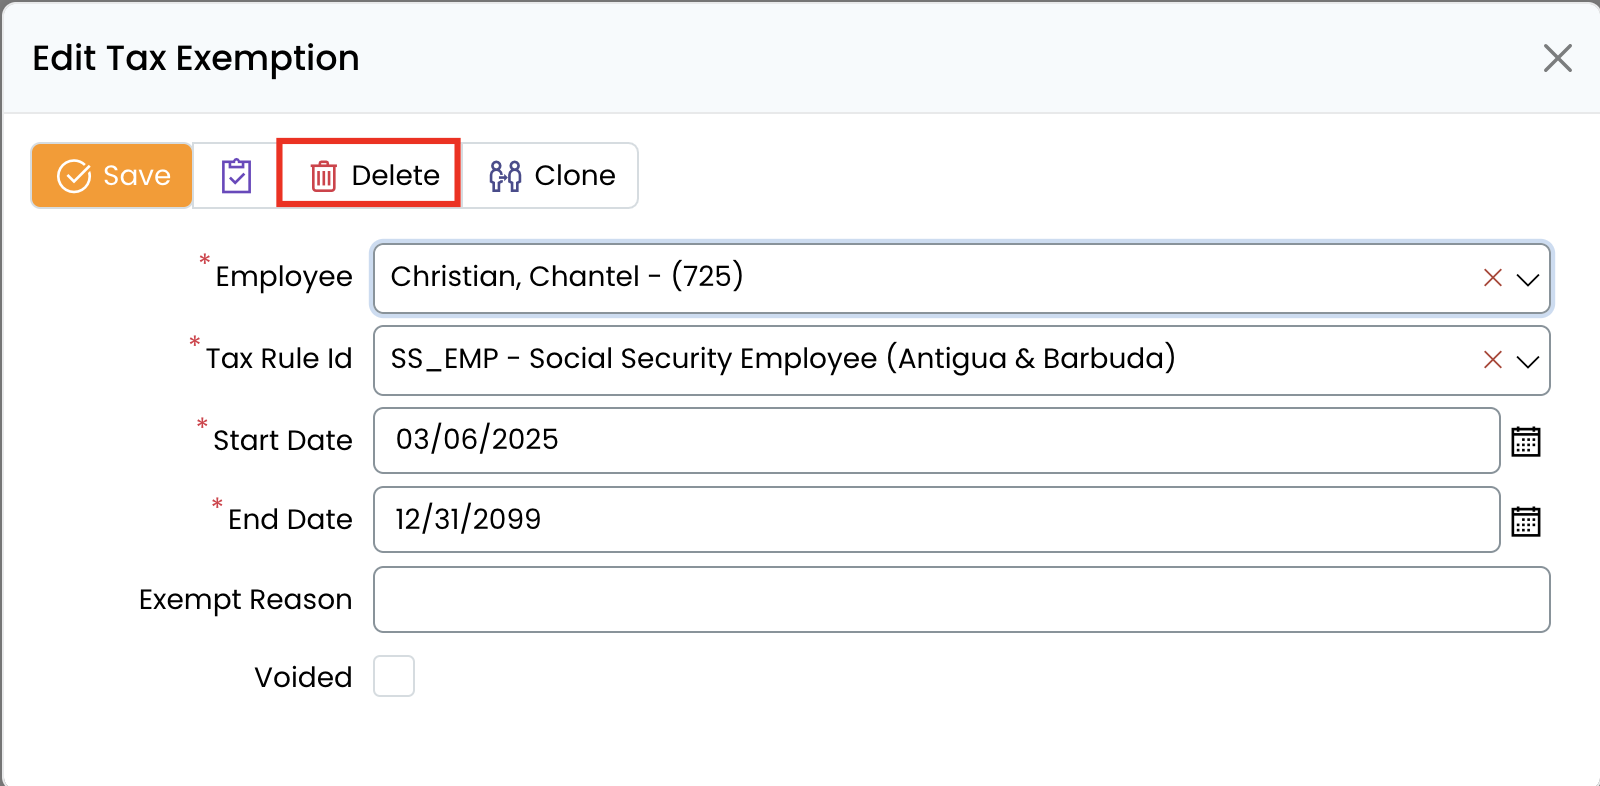
Cloning a Tax Exemption
- Open an existing tax exemption record.
- Click the Clone button to duplicate the exemption details.
- Select a different Employee (if applicable).
- Adjust the Start Date, End Date, and Reason as needed.
- Click Save to confirm the new exemption.
Deleting a Tax Exemption
- Open the exemption you wish to remove.
- Click Delete at the top of the screen.
- Confirm the deletion when prompted.
Key Considerations
- Employees must meet the exemption criteria before being added to the system.
- The Start Date and End Date should align with the company’s tax policies.
- Only authorized personnel can manage tax exemptions.
With these steps, you can efficiently manage employee tax exemptions in XandaPay. 🚀