
How to Manage Leave Balances
Important Notes Before Making Leave Adjustments
- Record all leave activity from the employee’s last anniversary — including any days carried forward and days already taken — so the leave balance is accurate from the date the system begins tracking.
- If the adjustment is to reduce the balance (days already taken), enter a positive number.
- If the adjustment is to increase the balance (days not taken), enter a negative number.
- Ensure all entries are accurate before saving any adjustment — incorrect entries may affect entitlement calculations.
- Record the reason for each adjustment in the Narrative field to maintain clear documentation and audit history.
- Use the Show Data As At filter to view the leave balance as of a specific date.
- The End Date drives the adjustment and ensures the correct reflection of days taken. Use the Start Date in both fields when applicable.
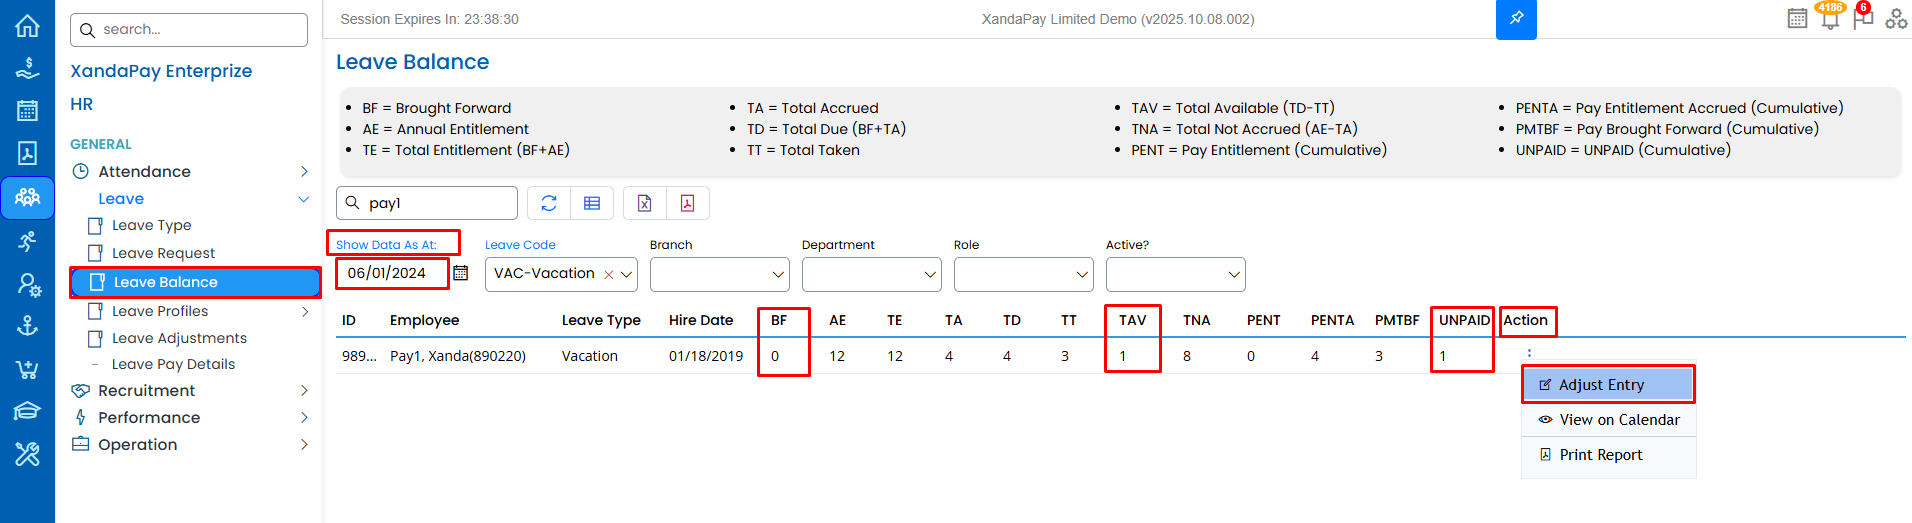
Step 1: Navigate to the Leave Balance Tab
- Log in to your XandaPay Enterprise portal.
- Go to HR → Attendance → Leave → Leave Balance.
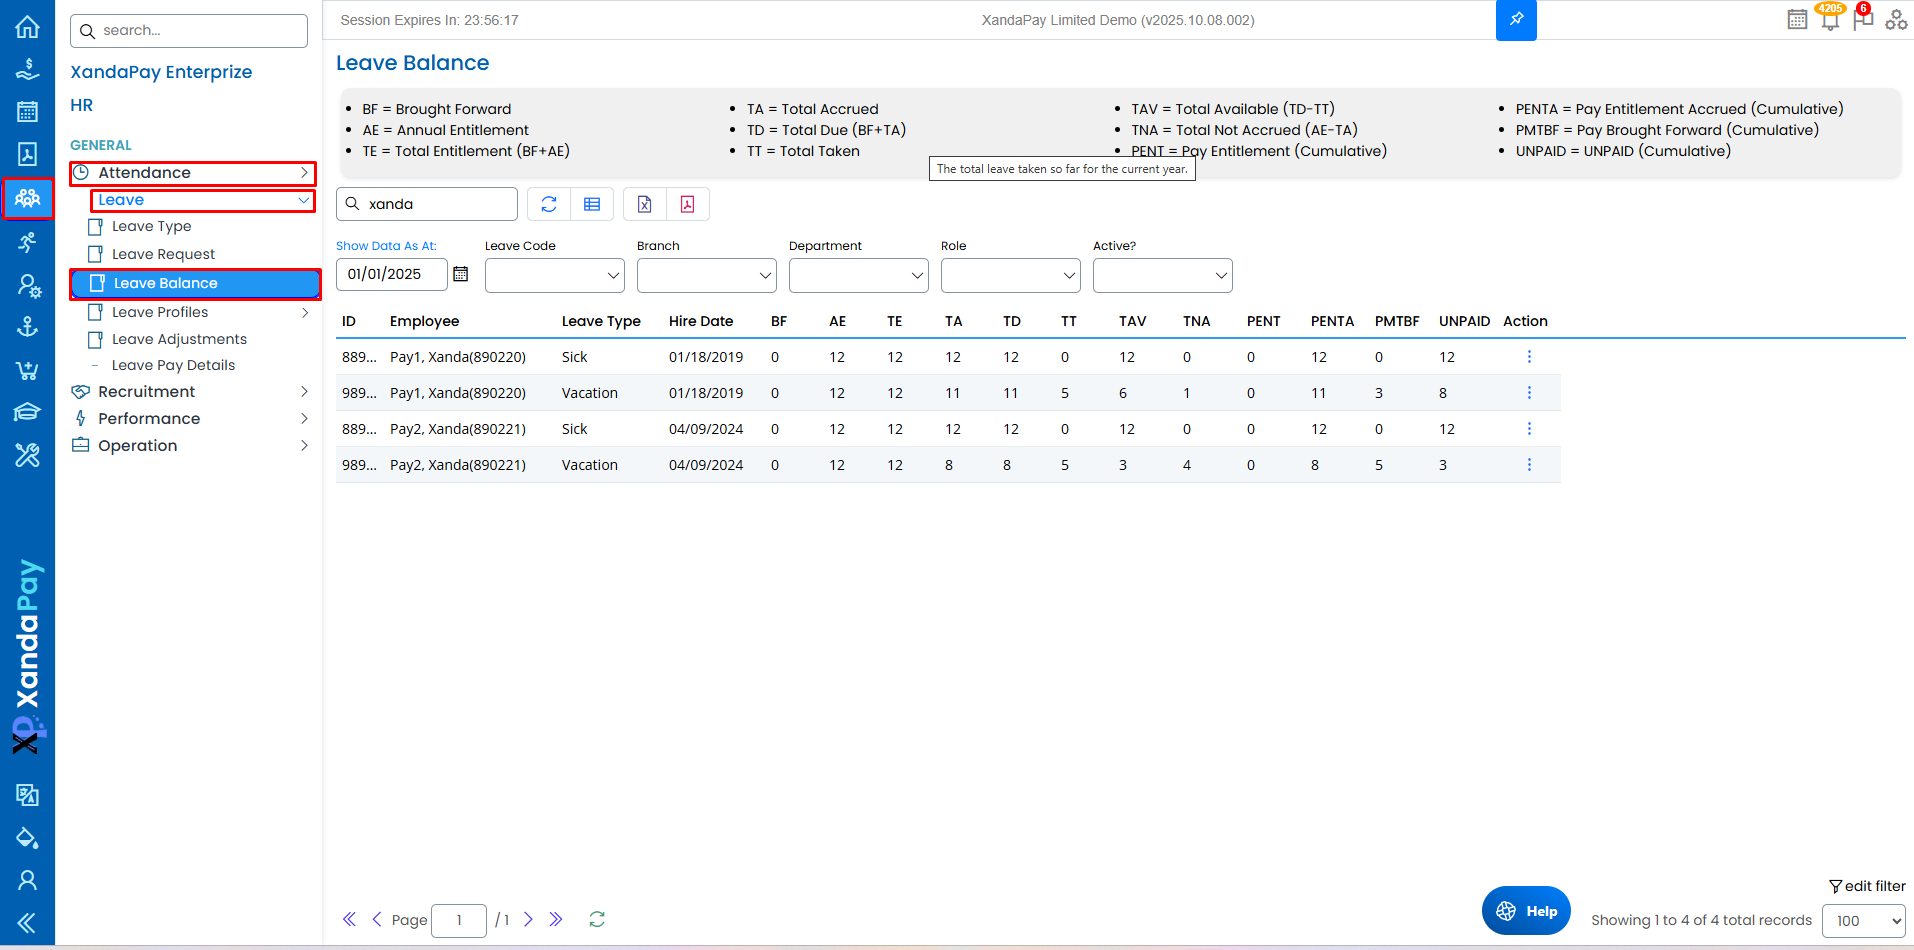
Step 2: Use the available filters to search for an employee
- Search bar: Search by employee name or ID
- Leave Code: Select a Leave Code (e.g. Vac, Sick)
- Branch: Select a branch
- Department: Select a Department (e.g. Accounts)
- Role: Search: Select a role (e.g. Accountant)
- Active Status: Select Yes for active employees, select No for Inactive employees.

Step 2: View Current Leave Data
- Click Show Data As At and select a reference date.
- Review the employee’s leave balance information such as:
- BF – Brought Forward
- AE – Annual Entitlement
- TE – Total Entitlement (BF + AE)
- TA – Total Accrued
- TD – Total Due (BF + TA)
- TT – Total Taken
- TAV – Total Available (TD – TT)
- TNA – Total Not Accrued
- PENT / PENTA / PMTBF / UNPAID – Pay and accrual details

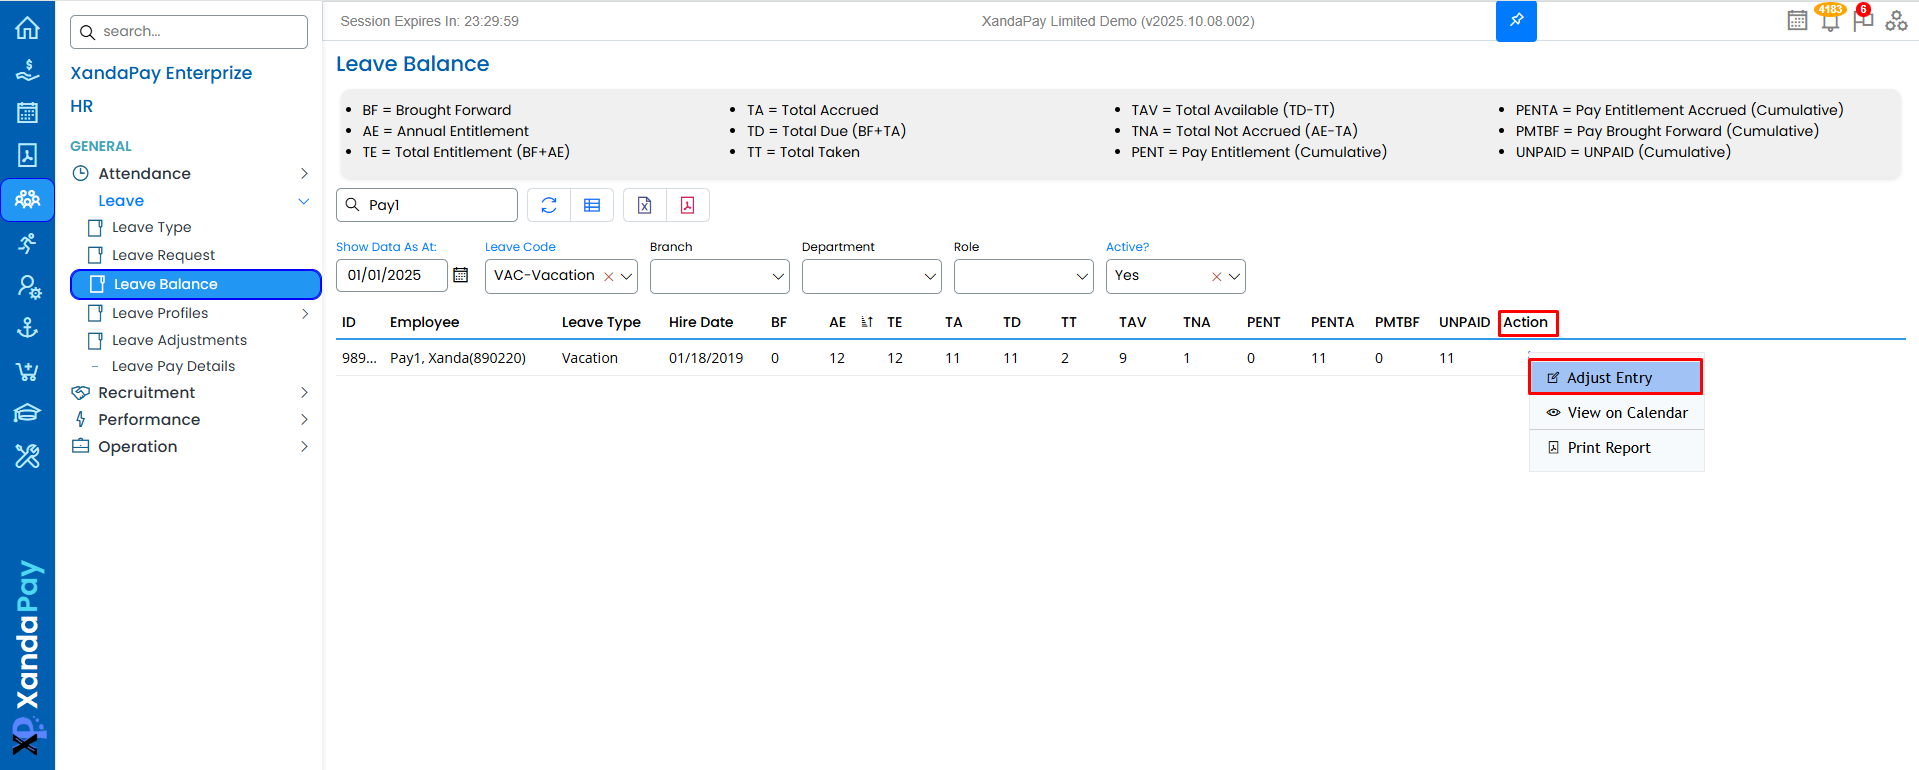
Step 3: Adjusting Leave Entries
- Click on the three dots under the Action column.
- Select Adjust Entry to open the adjustment form.
Depending on the type of correction required, follow the appropriate scenario below:
Scenario 1: Balance Adjustment for Leave Taken Prior the Start of Tracking on the XandaPay Application
Example:
In this example, the employee had taken 3 days of leave between February 19, 2024 and May 19, 2024, and was paid for those days prior to the Start of tracking on XandaPay. Therefore, adjustments must be made to ensure the leave balance accurately reflects this information.
XandaPay Tracking Start Date: June 1, 2024
Days Taken: 3
Days Paid: 3
These entries ensure that the employee’s leave usage and payments before XandaPay tracking start date are correctly represented in the system going forward.
To make these adjustments, follow the steps below:
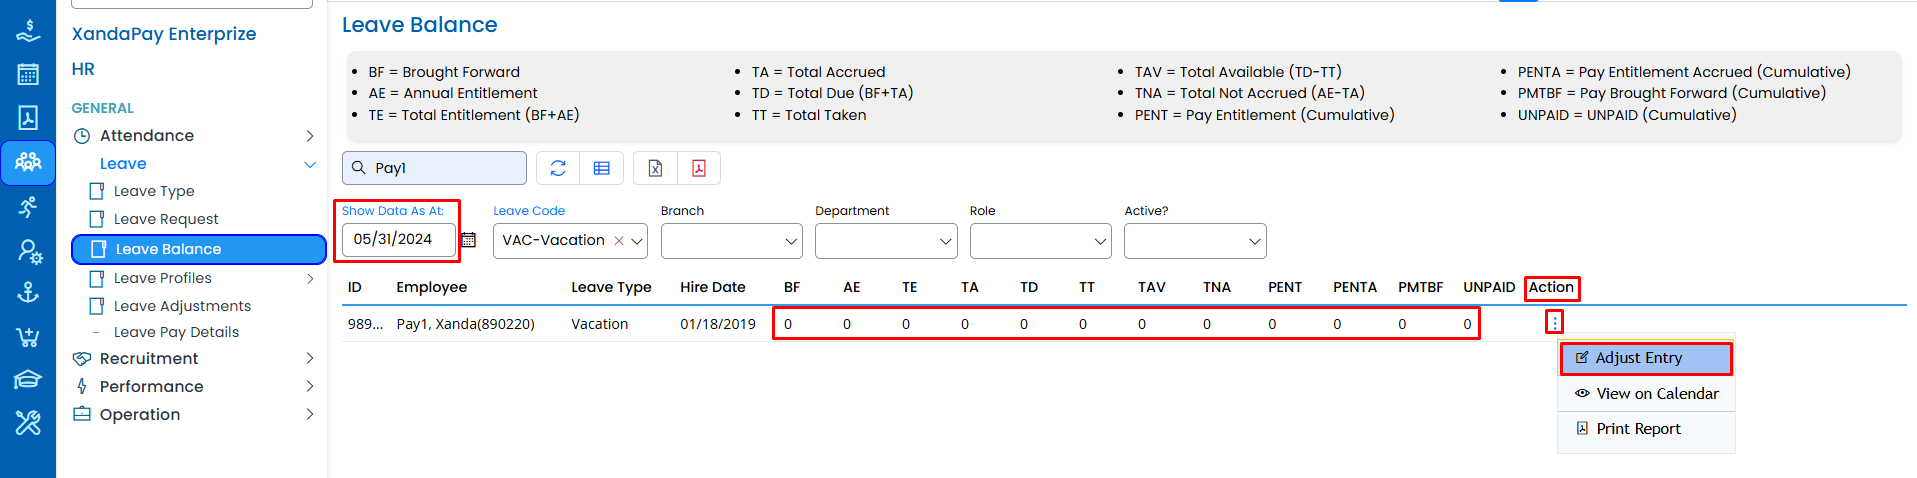
- Select the employee and use the filters to find their record.
- Click Show Data As At and set the date prior to the company’s start date in XandaPay.
- Under Action, select Adjust Entry.
- Update Days Taken: Enter total days taken. Use positive number if the leave was already taken.
- Update Days Paid: Enter total days paid.Use positive number if the leave was already taken.
- Start/End Date: Use the start date of your adjustment for both fields (the end date drives the adjustment).
- Add a brief narrative explaining the reason for the adjustment.
- Click Save.
- Return to Leave Balance to verify the adjustment.
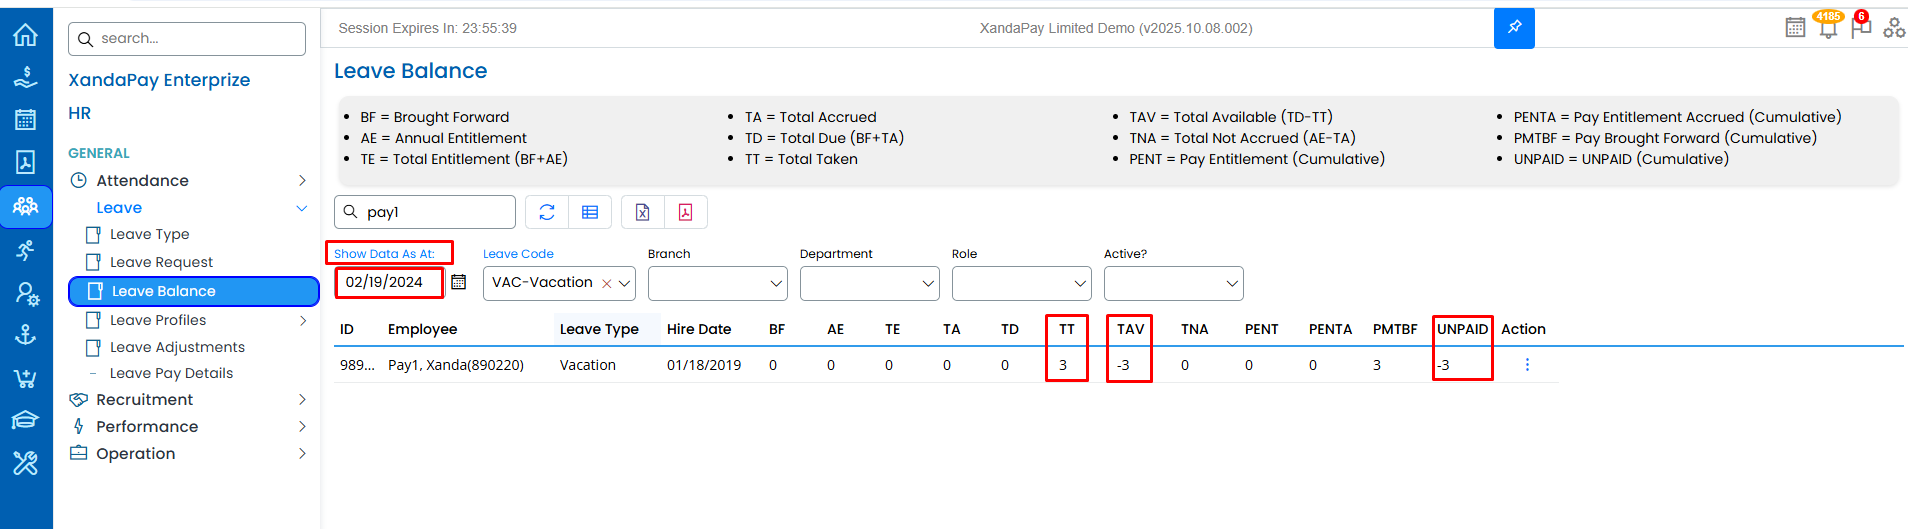
The below image displays the adjustments made for days taken and days paid as at the selected reference date.
Observe the changes under TT (3), TAV (–3), and UNPAID (–3) as reflected under the date selected in Show Data As At.

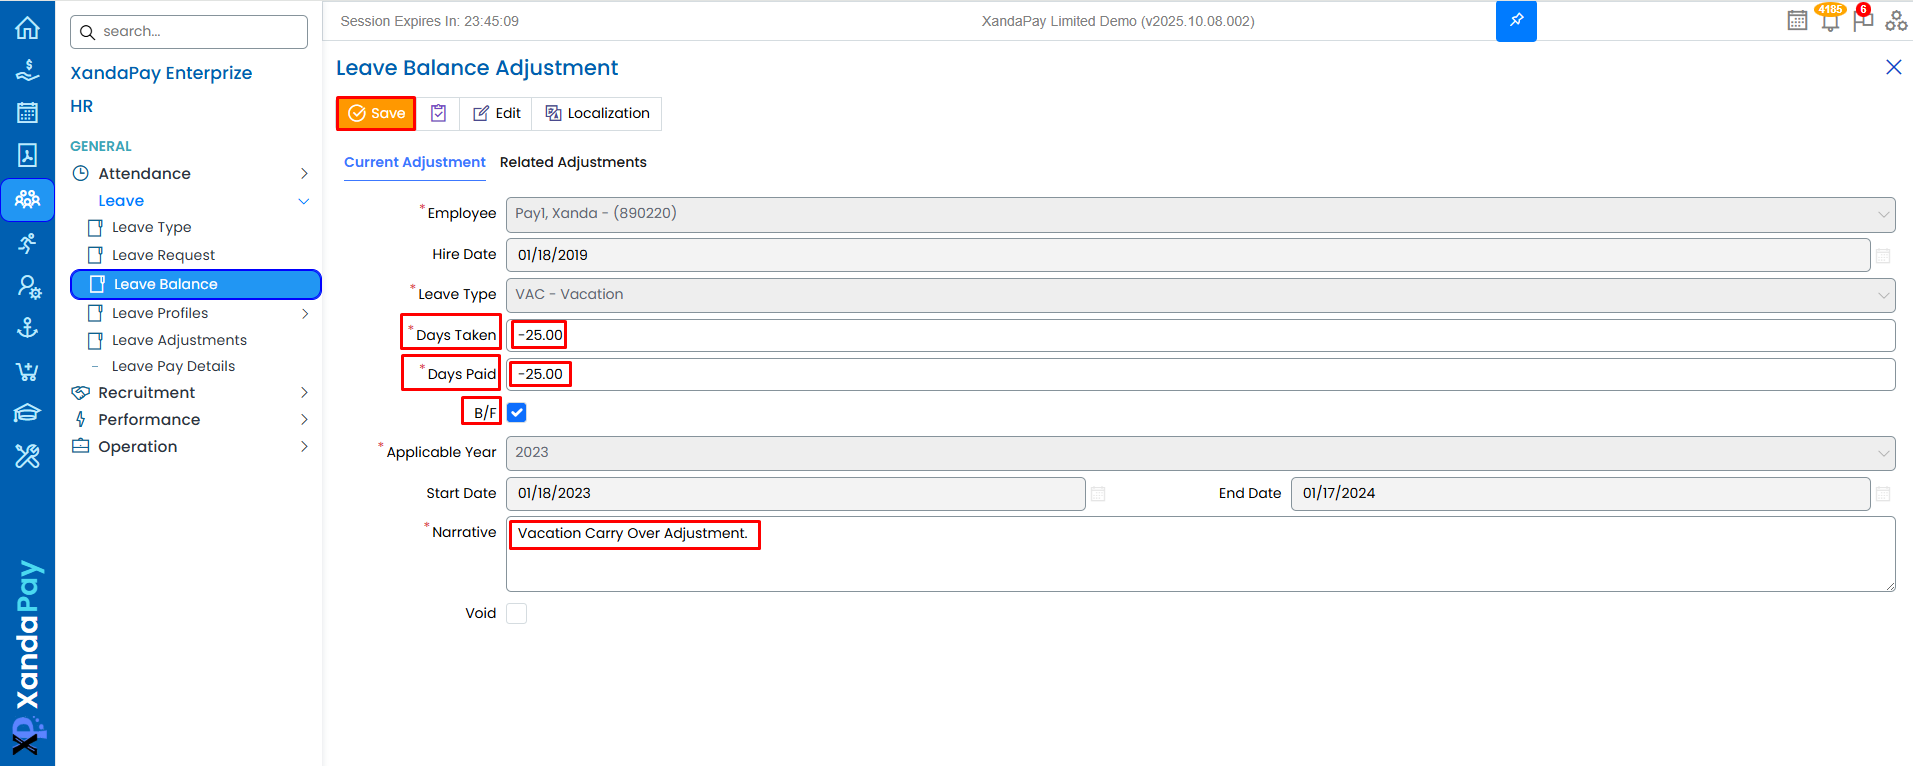
Scenario 2: Brought Forward (BF) Adjustment
Example:
In this example, the employee has 25 leave days carried over, as well as 25 unpaid leave days that must be reflected in the current balance for future use.
Days Taken: -25
Days Paid: -25
Enter the number of days BF as (–) in the adjustment, it will add these days to the employee’s balance.
To make these adjustments, follow the steps below:
- Go to Leave Balance and locate the employee.
- Select a date under Show Data As At to confirm the balance before adjusting .
- Under Action, click Adjust Entry.
- Select the BF checkbox.
- Update Days Taken: Enter total days taken.Use a negative (-) number,this will add to available balance.
- Update Days Paid: Enter total days paid.Use a negative (-) number,this will add to available balance.
- Add a brief narrative explaining the reason for the adjustment.
- Click Save.
- Return to Leave Balance to verify the adjustment.
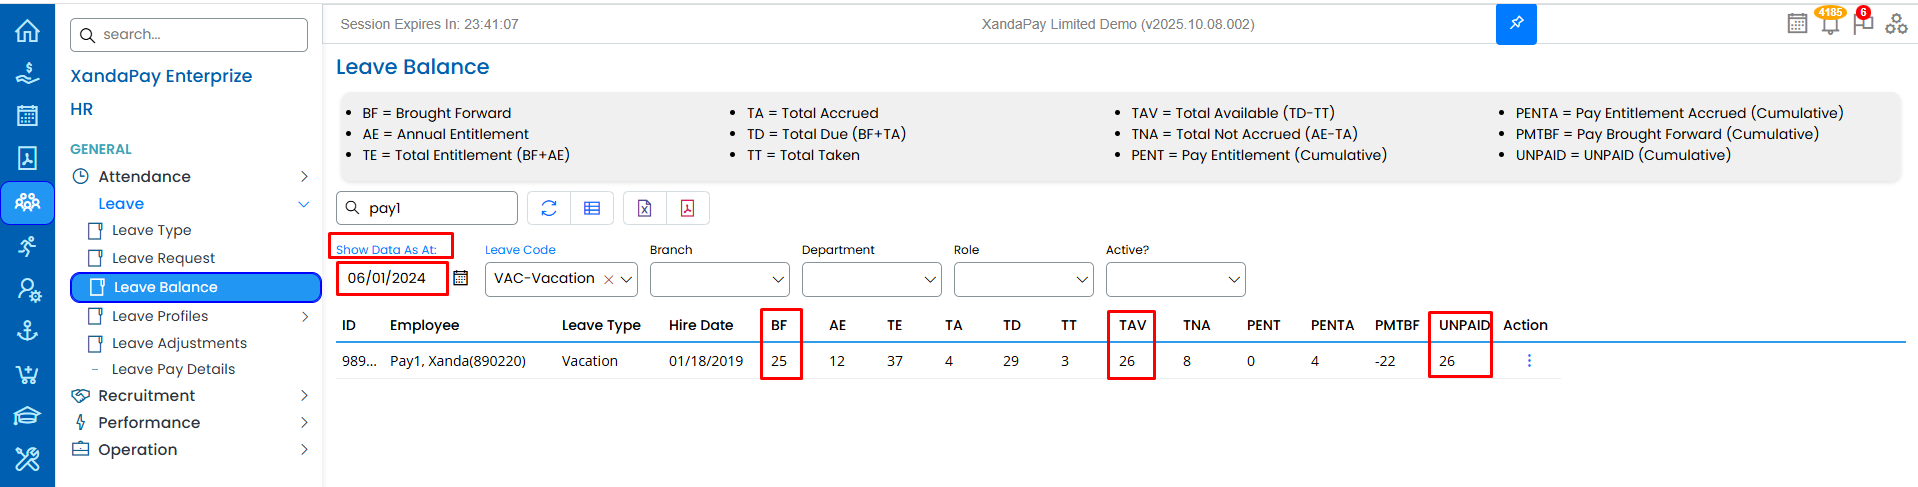
The below image displays the adjustments made for Brought Forward (BF) days as at the selected reference date.
When compared with the previous image, you will notice that the BF value has been updated, which in turn adjusted the Total Entitlement (TE). The Total Due (TD) was automatically recalculated as BF + TA, and the Total Available (TAV) was updated automatically to 26 (TD – TT).
Additionally, the Unpaid balance was automatically updated to 26, which includes 25 unpaid BF days plus 1 unpaid day that existed prior to the adjustment.
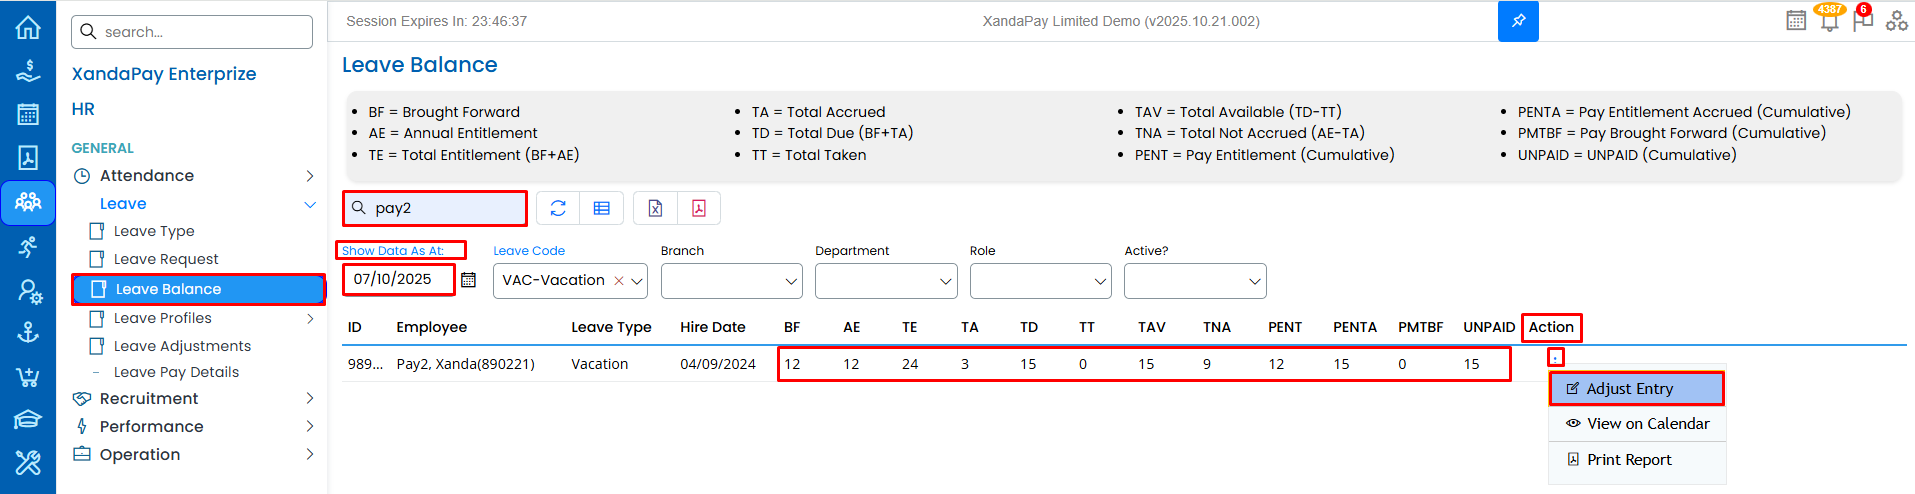
Scenario 3: Adjustments For Total Days Taken/Total Days Paid.
Example:
In this example,the Total Taken (TT) on the employee’s leave balance shows 0, even though the employee had previously taken 5 days of vacation starting from May 10.
To correct this, adjustments need to be made so that the record accurately reflects the leave taken and paid.
Days Taken: 5
Days Paid: 5
These entries ensure the employee’s leave history correctly shows the total of 5 days taken and 5 days paid that were not previously captured in the system.
To make these adjustments, follow the steps below:
- Go to Leave Balance and find the employee’s record.
- Select a date under Show Data As At to view the balance.
- Under Action, click Adjust Entry.
- Update Days Taken: Enter total days taken.
- Update Days Paid: Enter total days paid.
- Start and End Dates: Use the start date of your adjustment for both fields (the end date drives the adjustment).
- Add a brief narrative explaining the reason for the adjustment.
- Click Save.
- Return to Leave Balance to verify the adjustment.

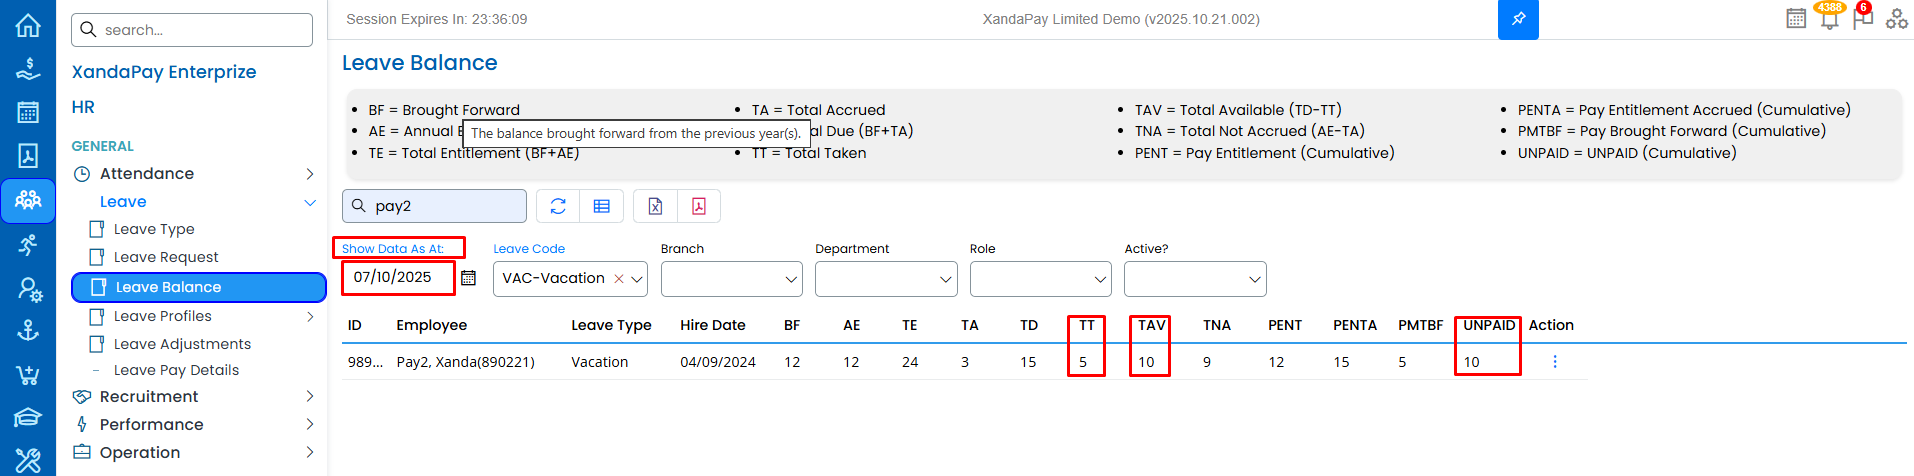
The below image displays the adjustments made for the days taken and days paid as at the selected reference date.
When compared with the previous image, you will notice that the Total Taken (TT) value has been updated to 5, reflecting the adjustment for the days taken.
As a result, the Total Available (TAV) was automatically recalculated to 10 (TD – TT).
Additionally, the Unpaid balance was automatically updated to 10, ensuring consistency with the updated balances after the adjustment.
By following these steps, you can efficiently track and manage leave balance within XandaPay. 🚀