
How to Manage Loans
The Loans module in XandaPay allows HR and payroll administrators to manage employee loans, track balances, and set up automatic payroll deductions. This guide will walk you through adding, editing, and managing loan payments.
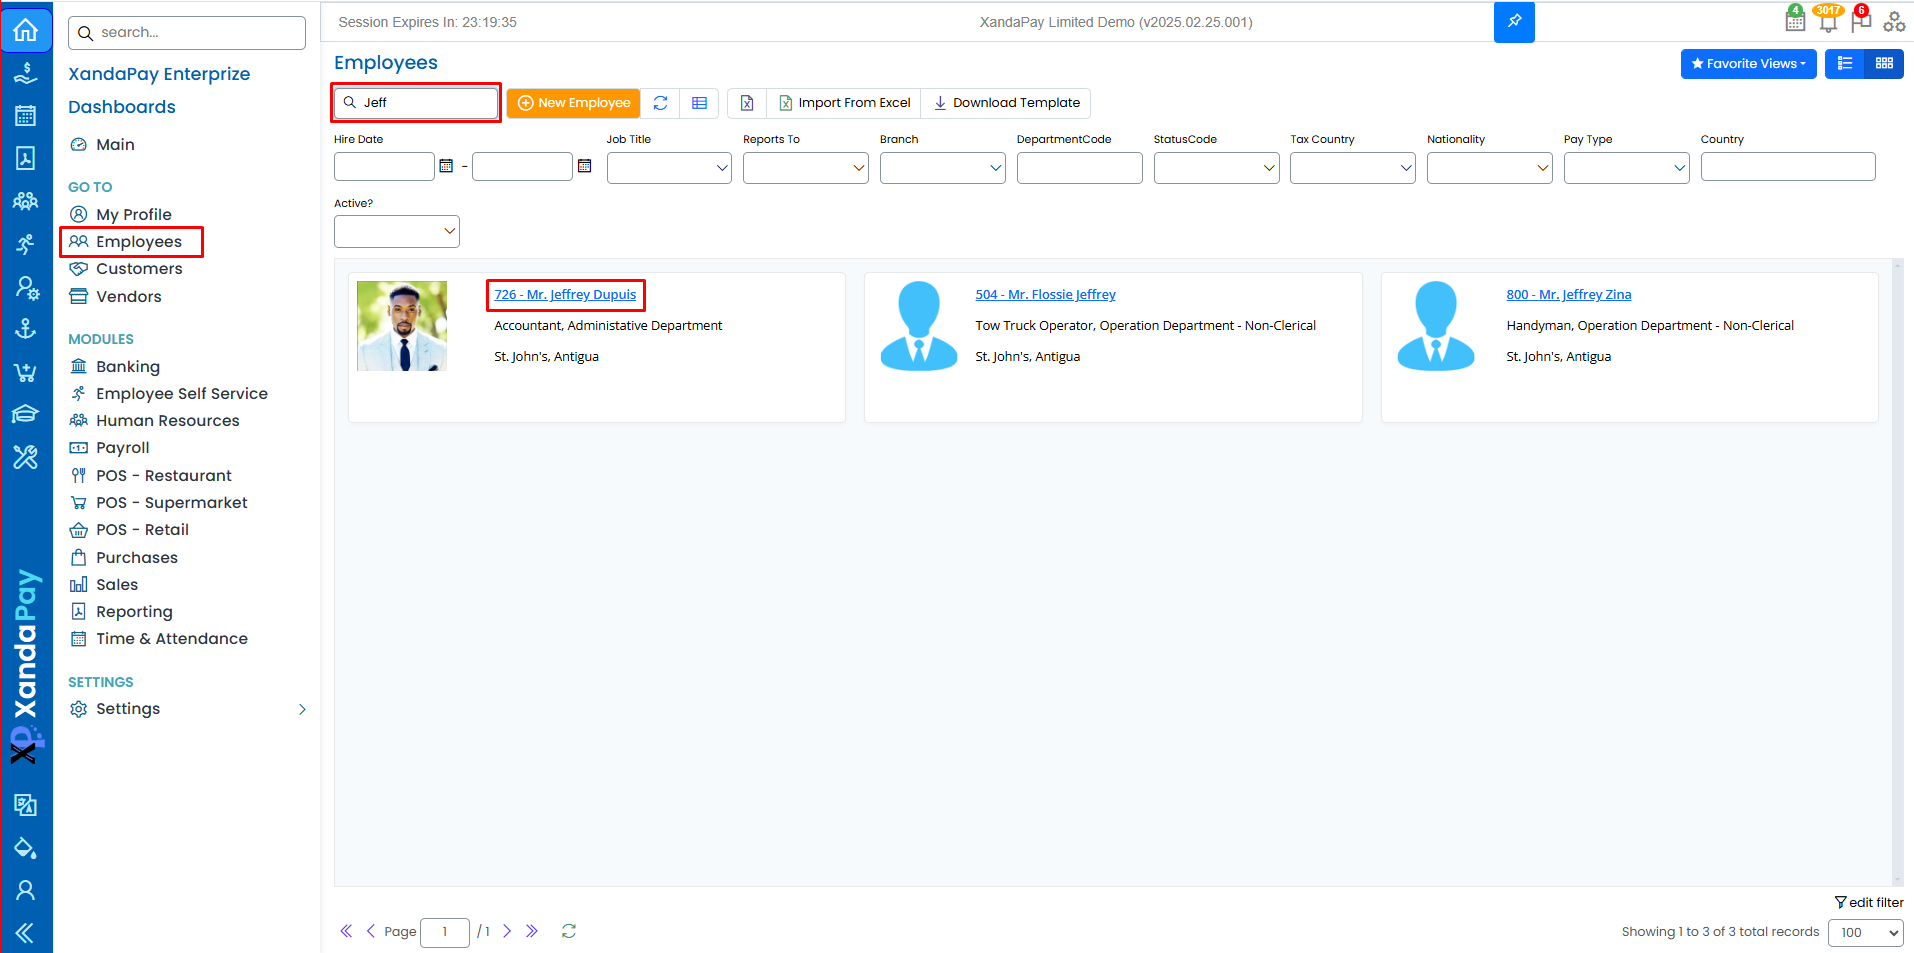
Navigate to the Employee’s Loans Tab
- Log in to XandaPay and go to the Employee Management module.
- Select the employee whose loan details need to be managed.
- Click on the Loans tab in the employee profile.
Viewing Existing Loans
The loans table displays all active loans linked to the employee, including:
- ID: Unique loan identifier.
- Type: The loan category (e.g., BLIND).
- Bank: The financial institution providing the loan.
- AC: The transit account for the Bank/e-Pay institution.
- Amt: The loan principal amount.
- Paid: The total amount the employee has already paid toward the loan.
- Balance: The remaining balance on the loan.
- Description: The final account number of the employee with the Bank/e-Pay institution.
- Start & End Dates: The start and end dates that define the duration of the loan repayment period.
- L-Payment: Last Payment.
- Active?: Whether the loan is currently being deducted.
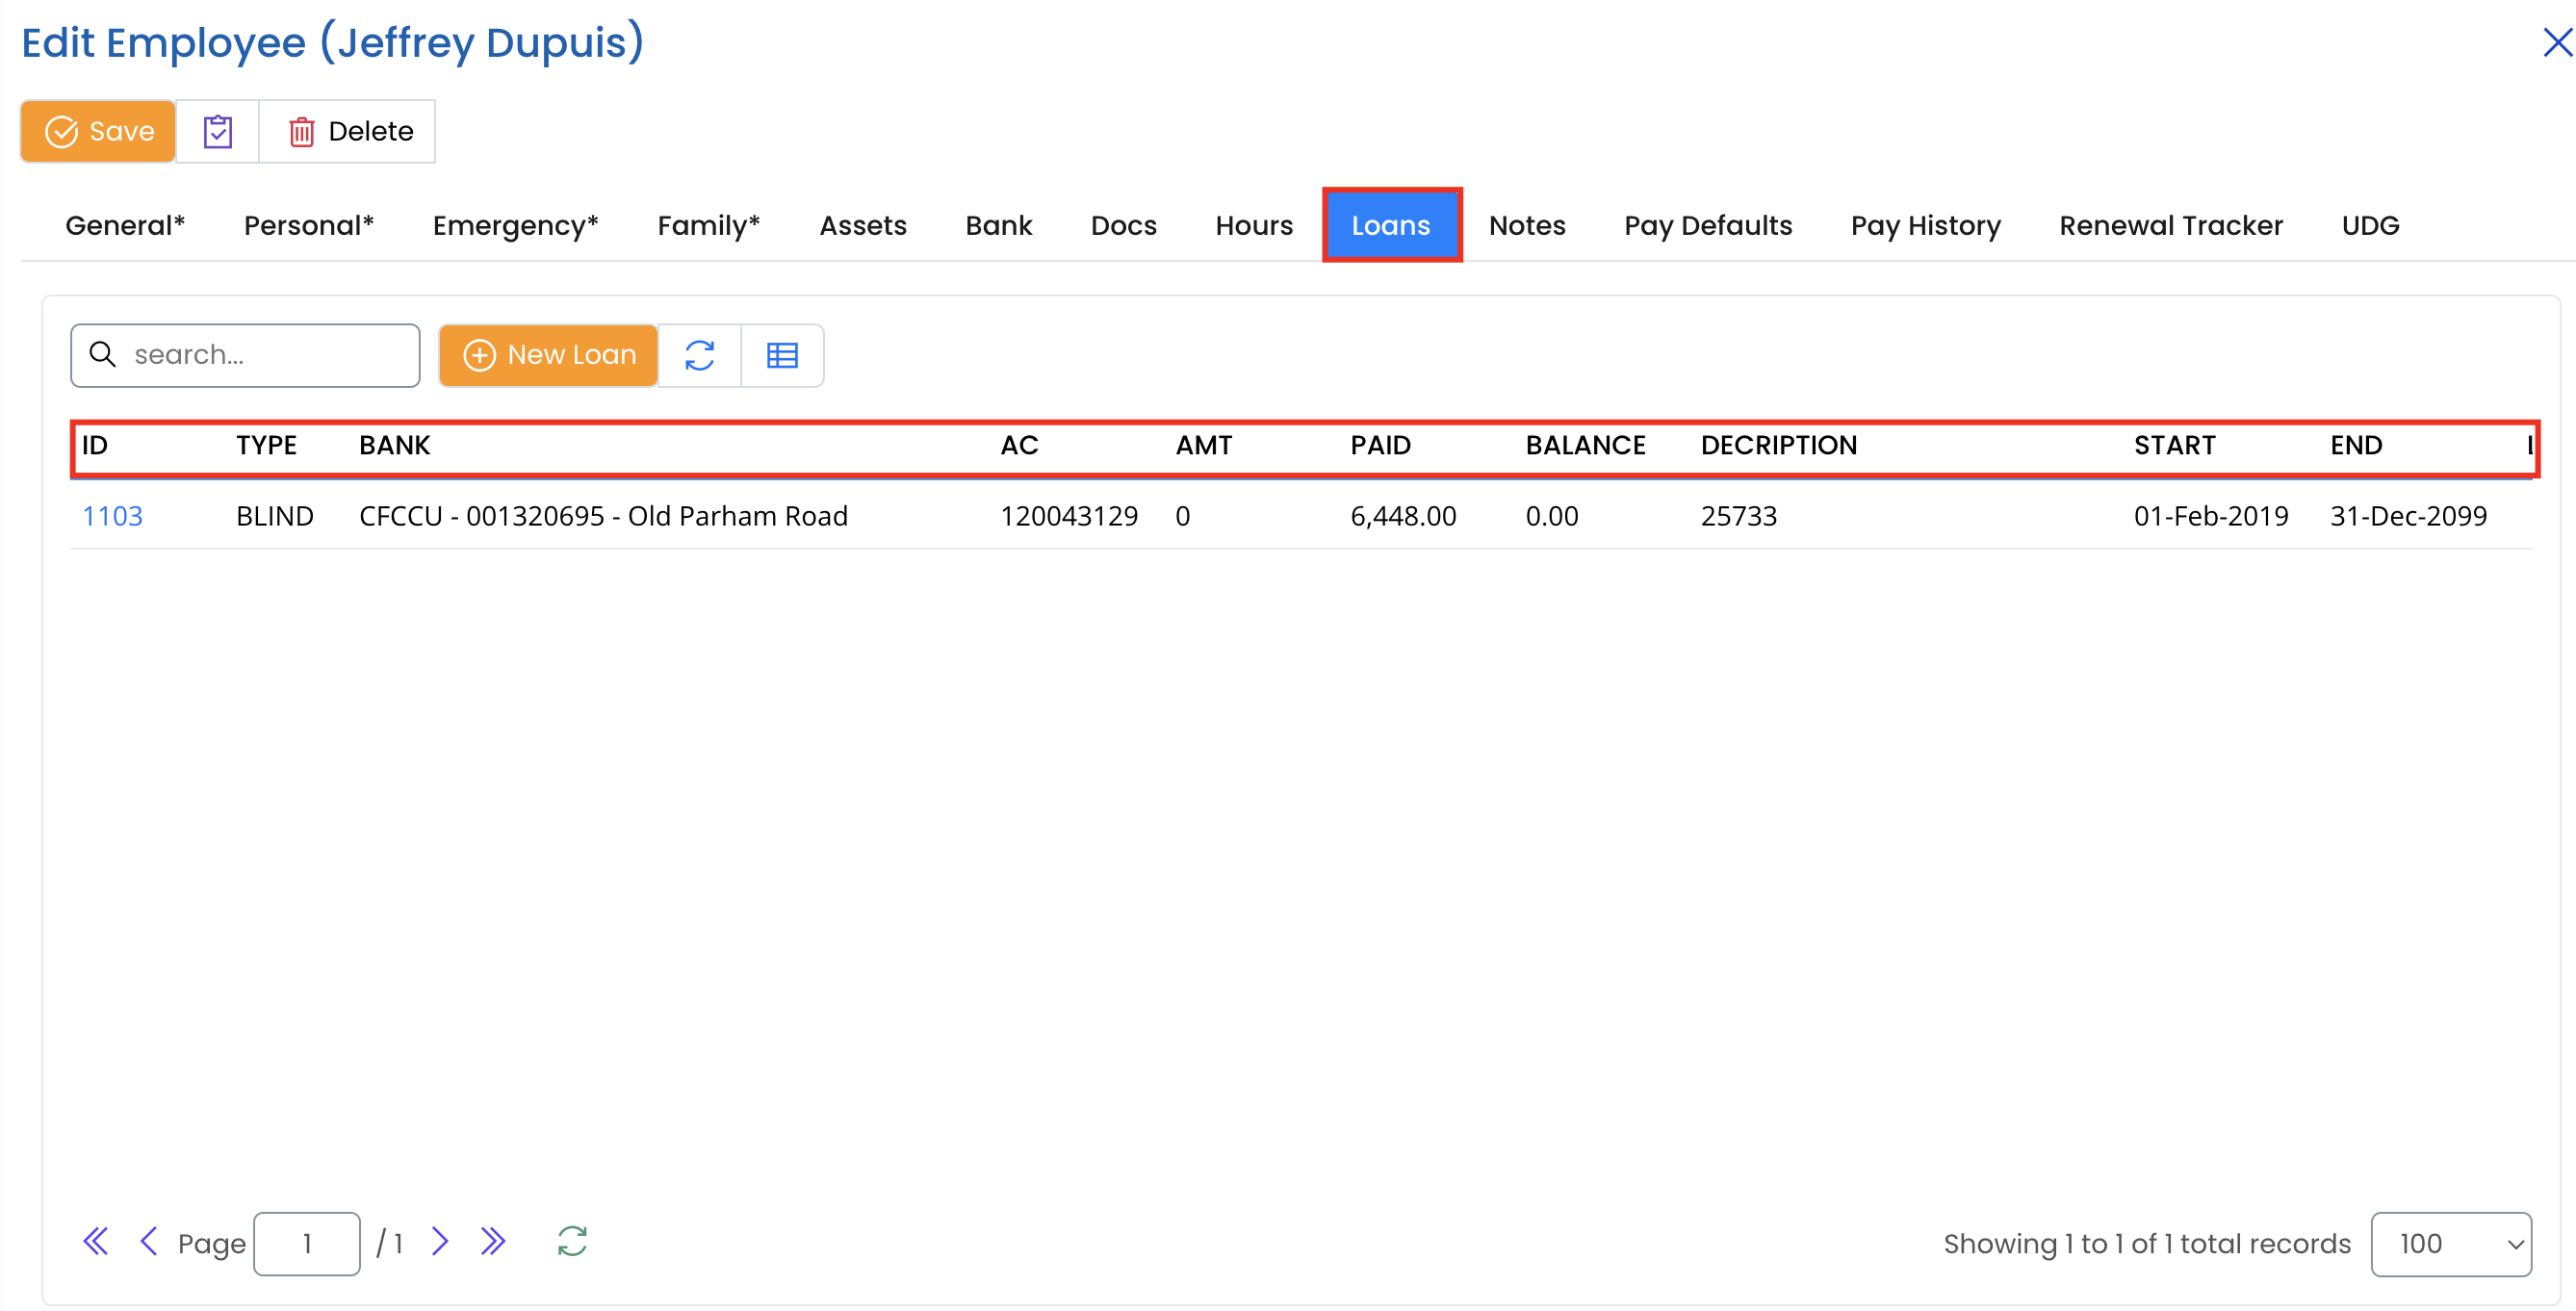
To view loan details, click on the loan ID.
Adding a New Loan
Click the "+ New Loan" button.

Enter the following core details:
- Employee: The employee receiving the loan.
- Loan Type: Select the type of loan from the dropdown.
- Start Date: Enter the loan start date.
- End Date: Specify the final payment date.
- Bank/Loan Provider: Choose the financial institution.
- Direct Deposit Bank: Select the Bank the e-Pay company banks with.
- Loan Amount: Enter the principal amount of the loan.( If known)
- Amount Paid: If applicable, enter any amount already paid.
- Loan Balance: The remaining loan amount.
- Transit Account & Final Account: Reference fields for loan repayment tracking.
- Account Type: Choose the appropriate loan account type (e.g., DDA).
- Active?: Ensure the loan is marked active if payroll deductions are required.
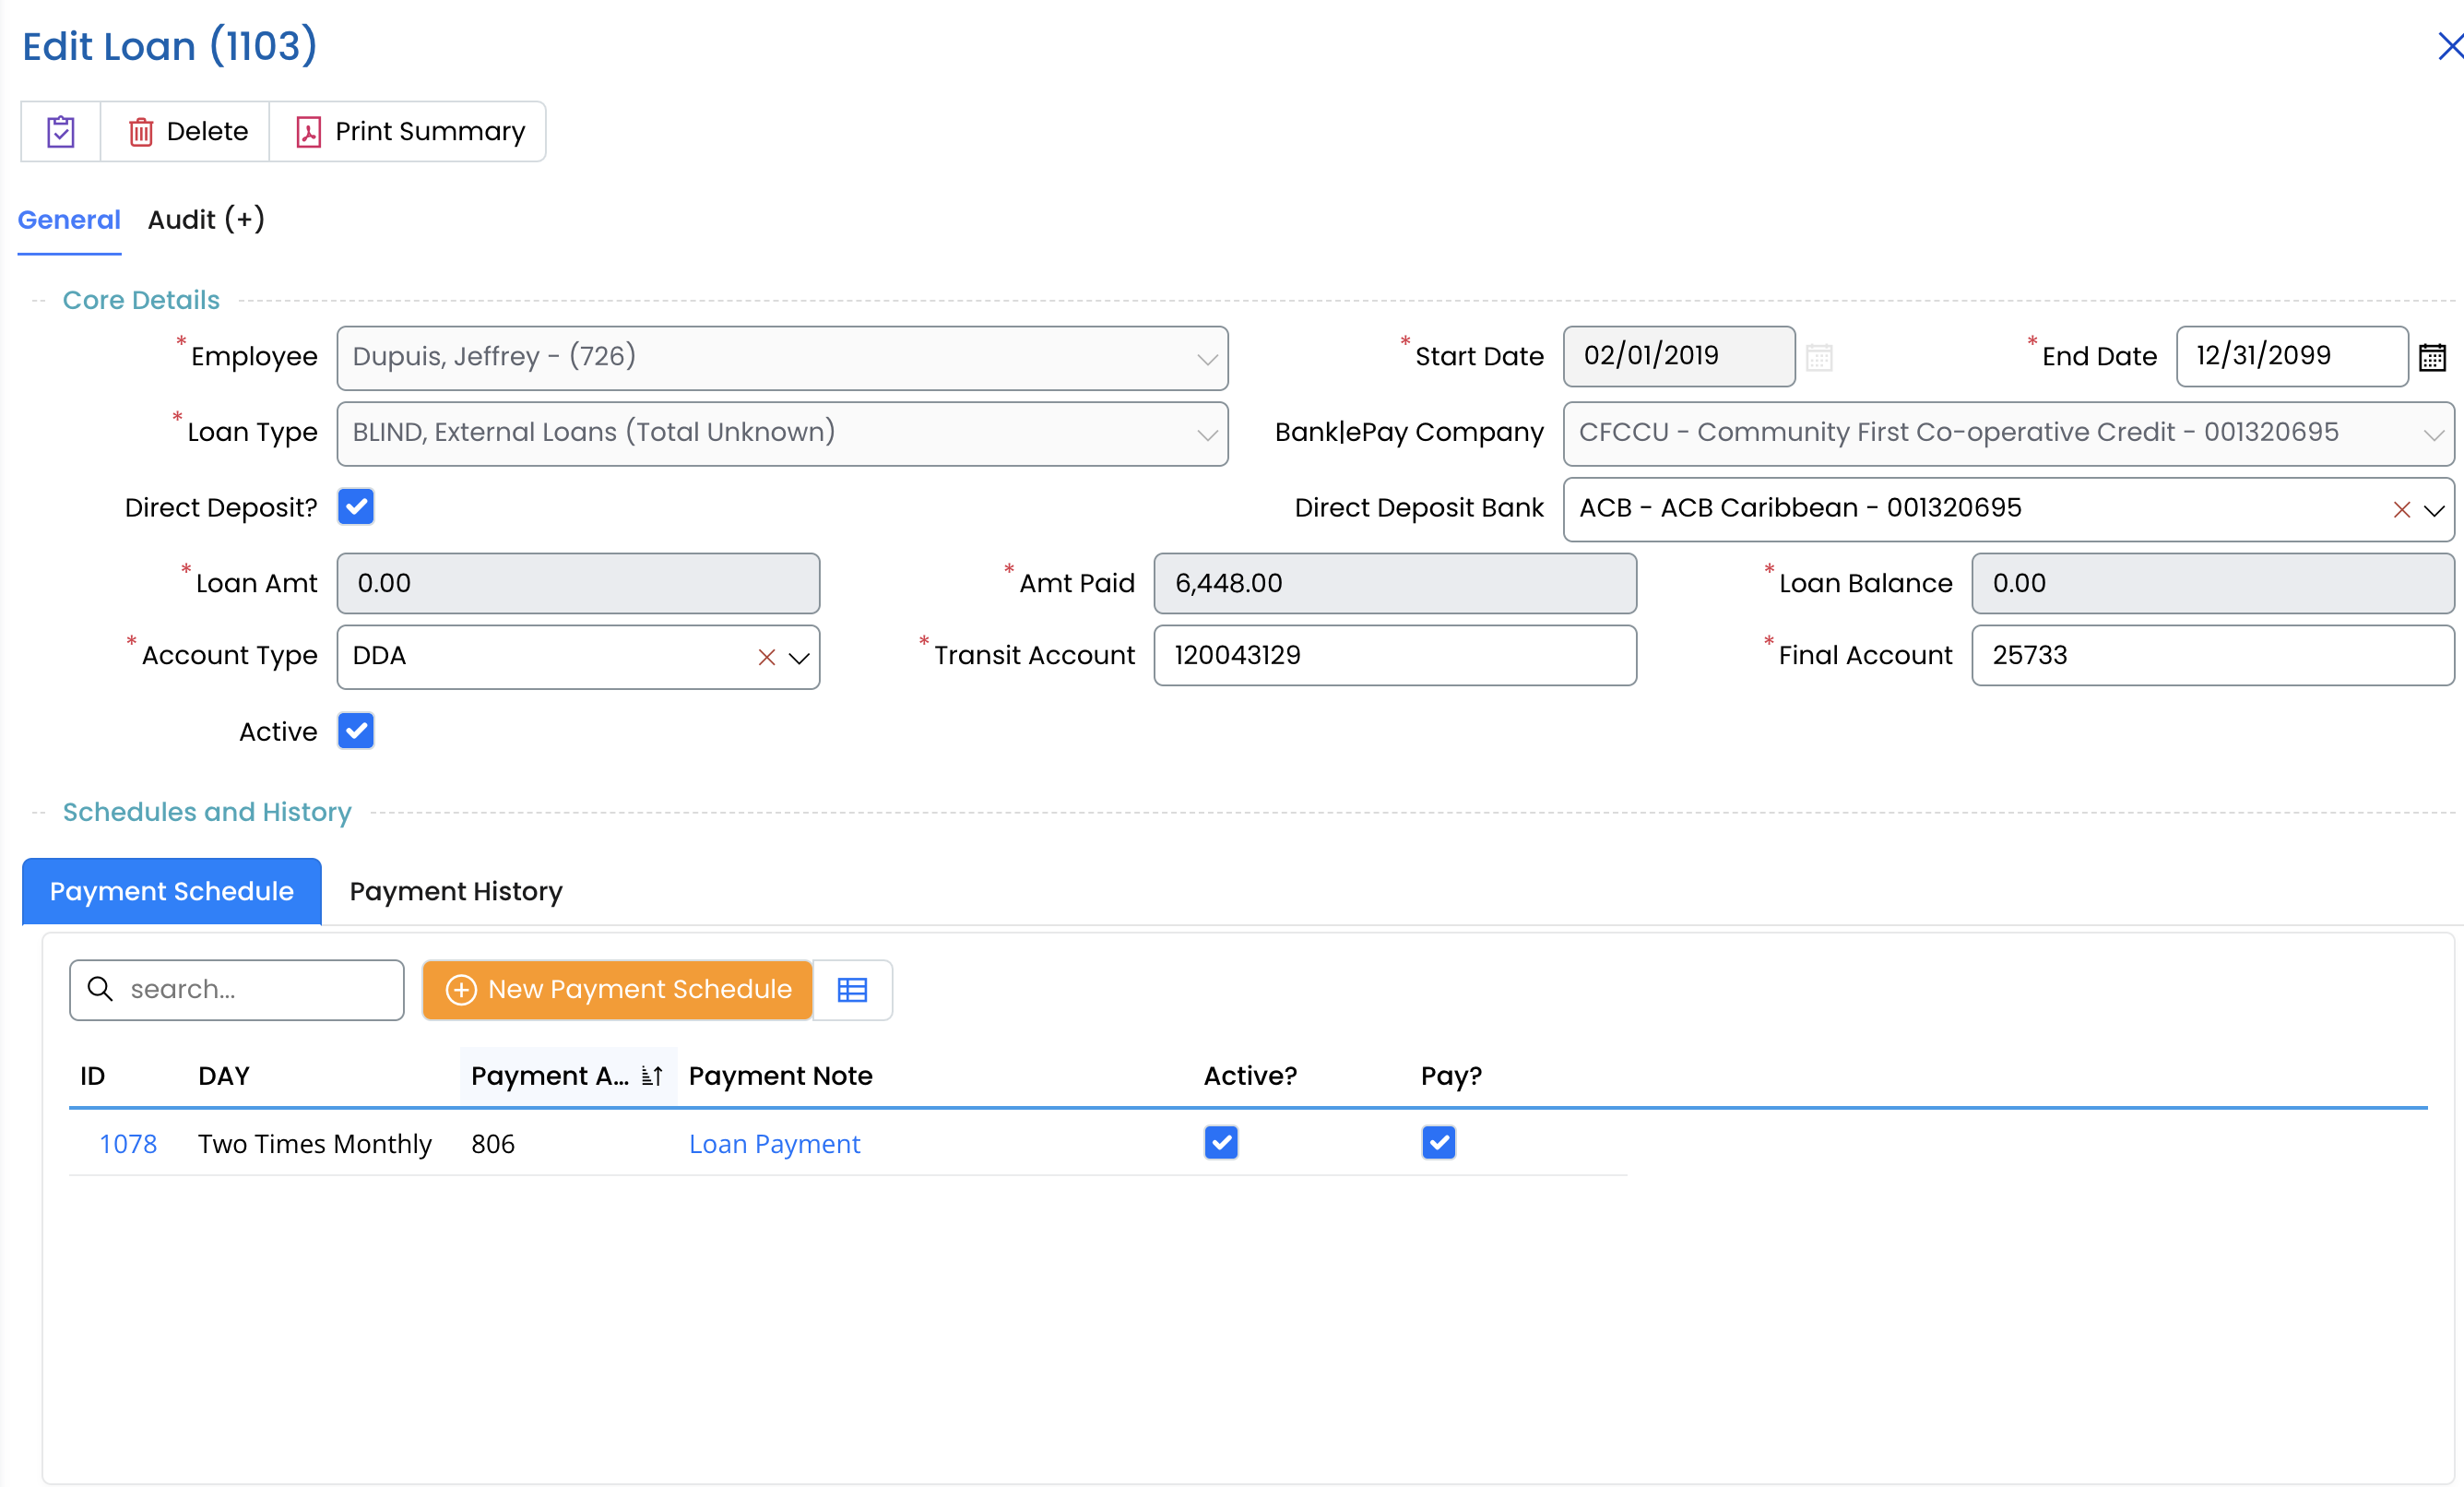
Click Save to store the loan details.
Editing an Existing Loan
- Click on the Loan ID in the loan list.
- Update any necessary fields (e.g., loan balance, bank details).
- Click Save to apply the changes.
Managing Loan Payment Schedules
- Navigate to the Payment Schedule section under the loan details.
- Click the "+ New Payment Schedule" button.
- Enter:
- Payment Amount: The scheduled deduction per payroll cycle.
- Payment Frequency: Define how often payments will be deducted.
- Active?: Ensure this is checked to include the loan in payroll deductions.
- Pay?: If checked, this payment schedule will be processed in the next payroll run.
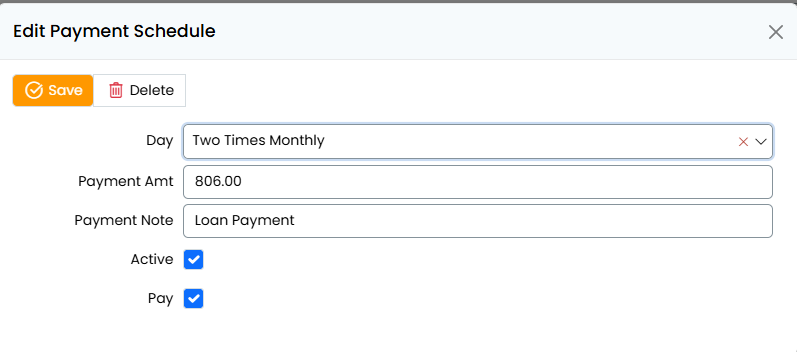
4. Click Save to confirm.
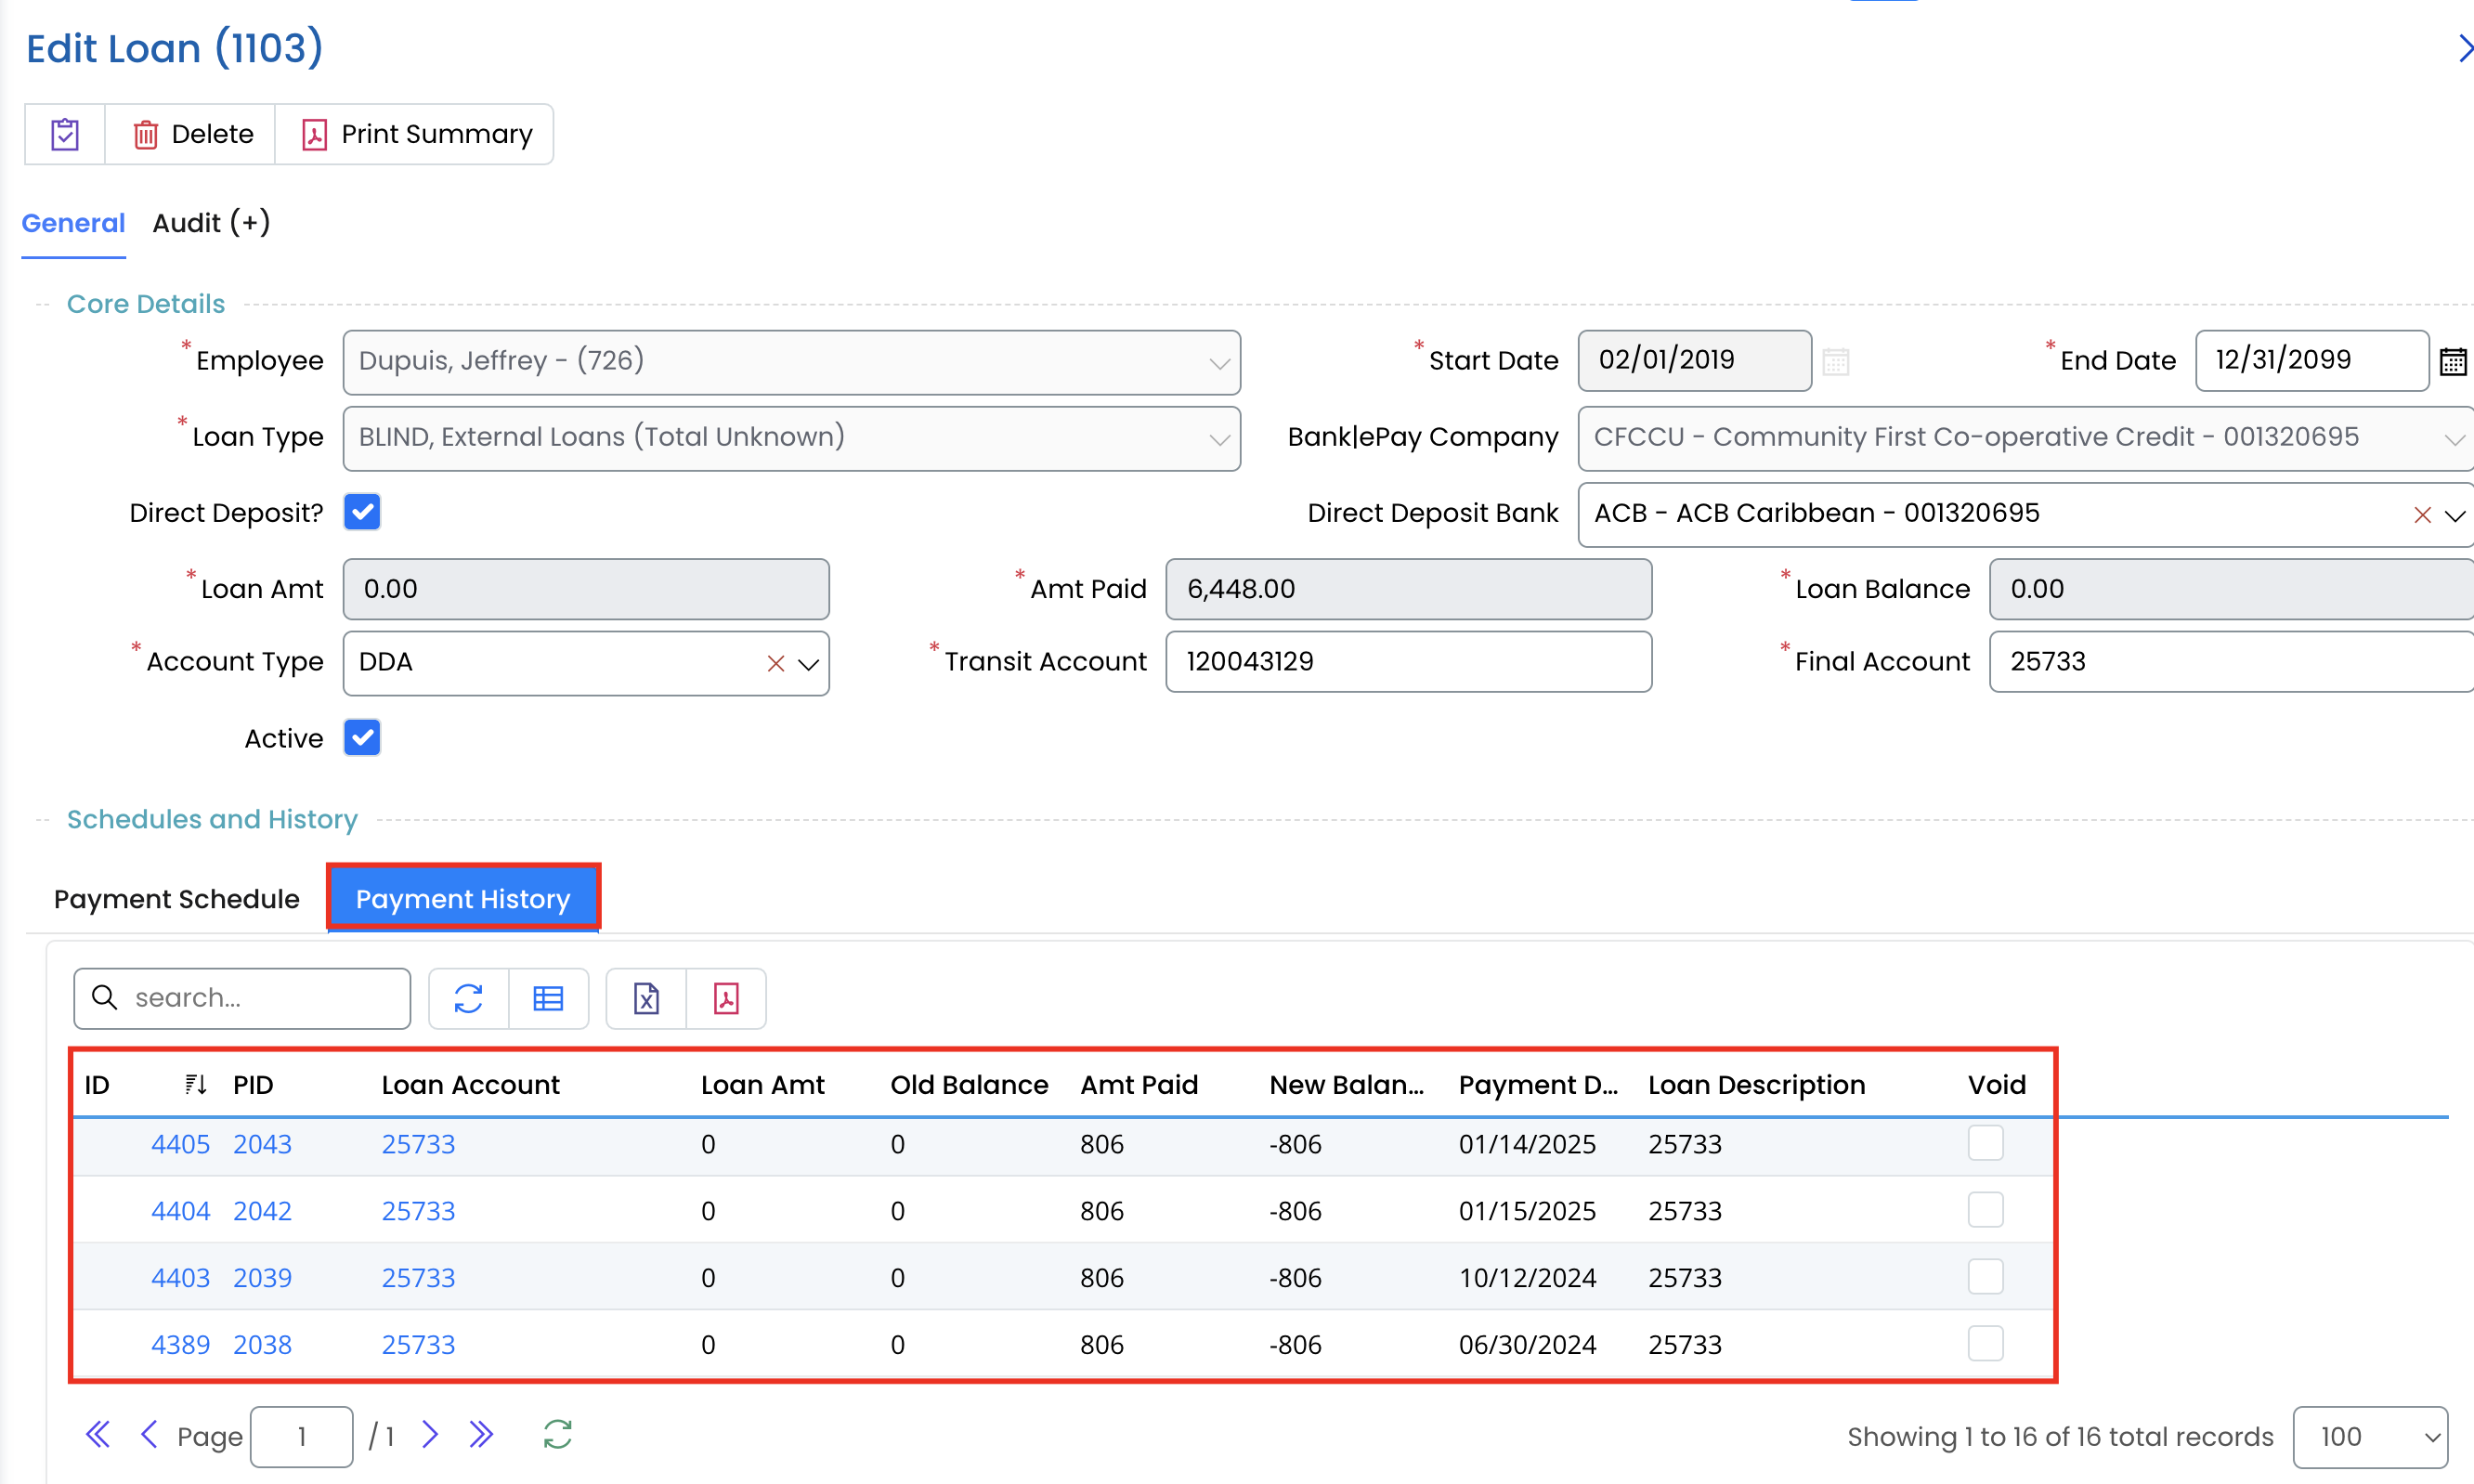
Tracking Loan Payments
- Go to the Payment History tab to review past payments.
- View details such as amounts deducted, dates, and remaining balance.
- If needed, manually update payment records.
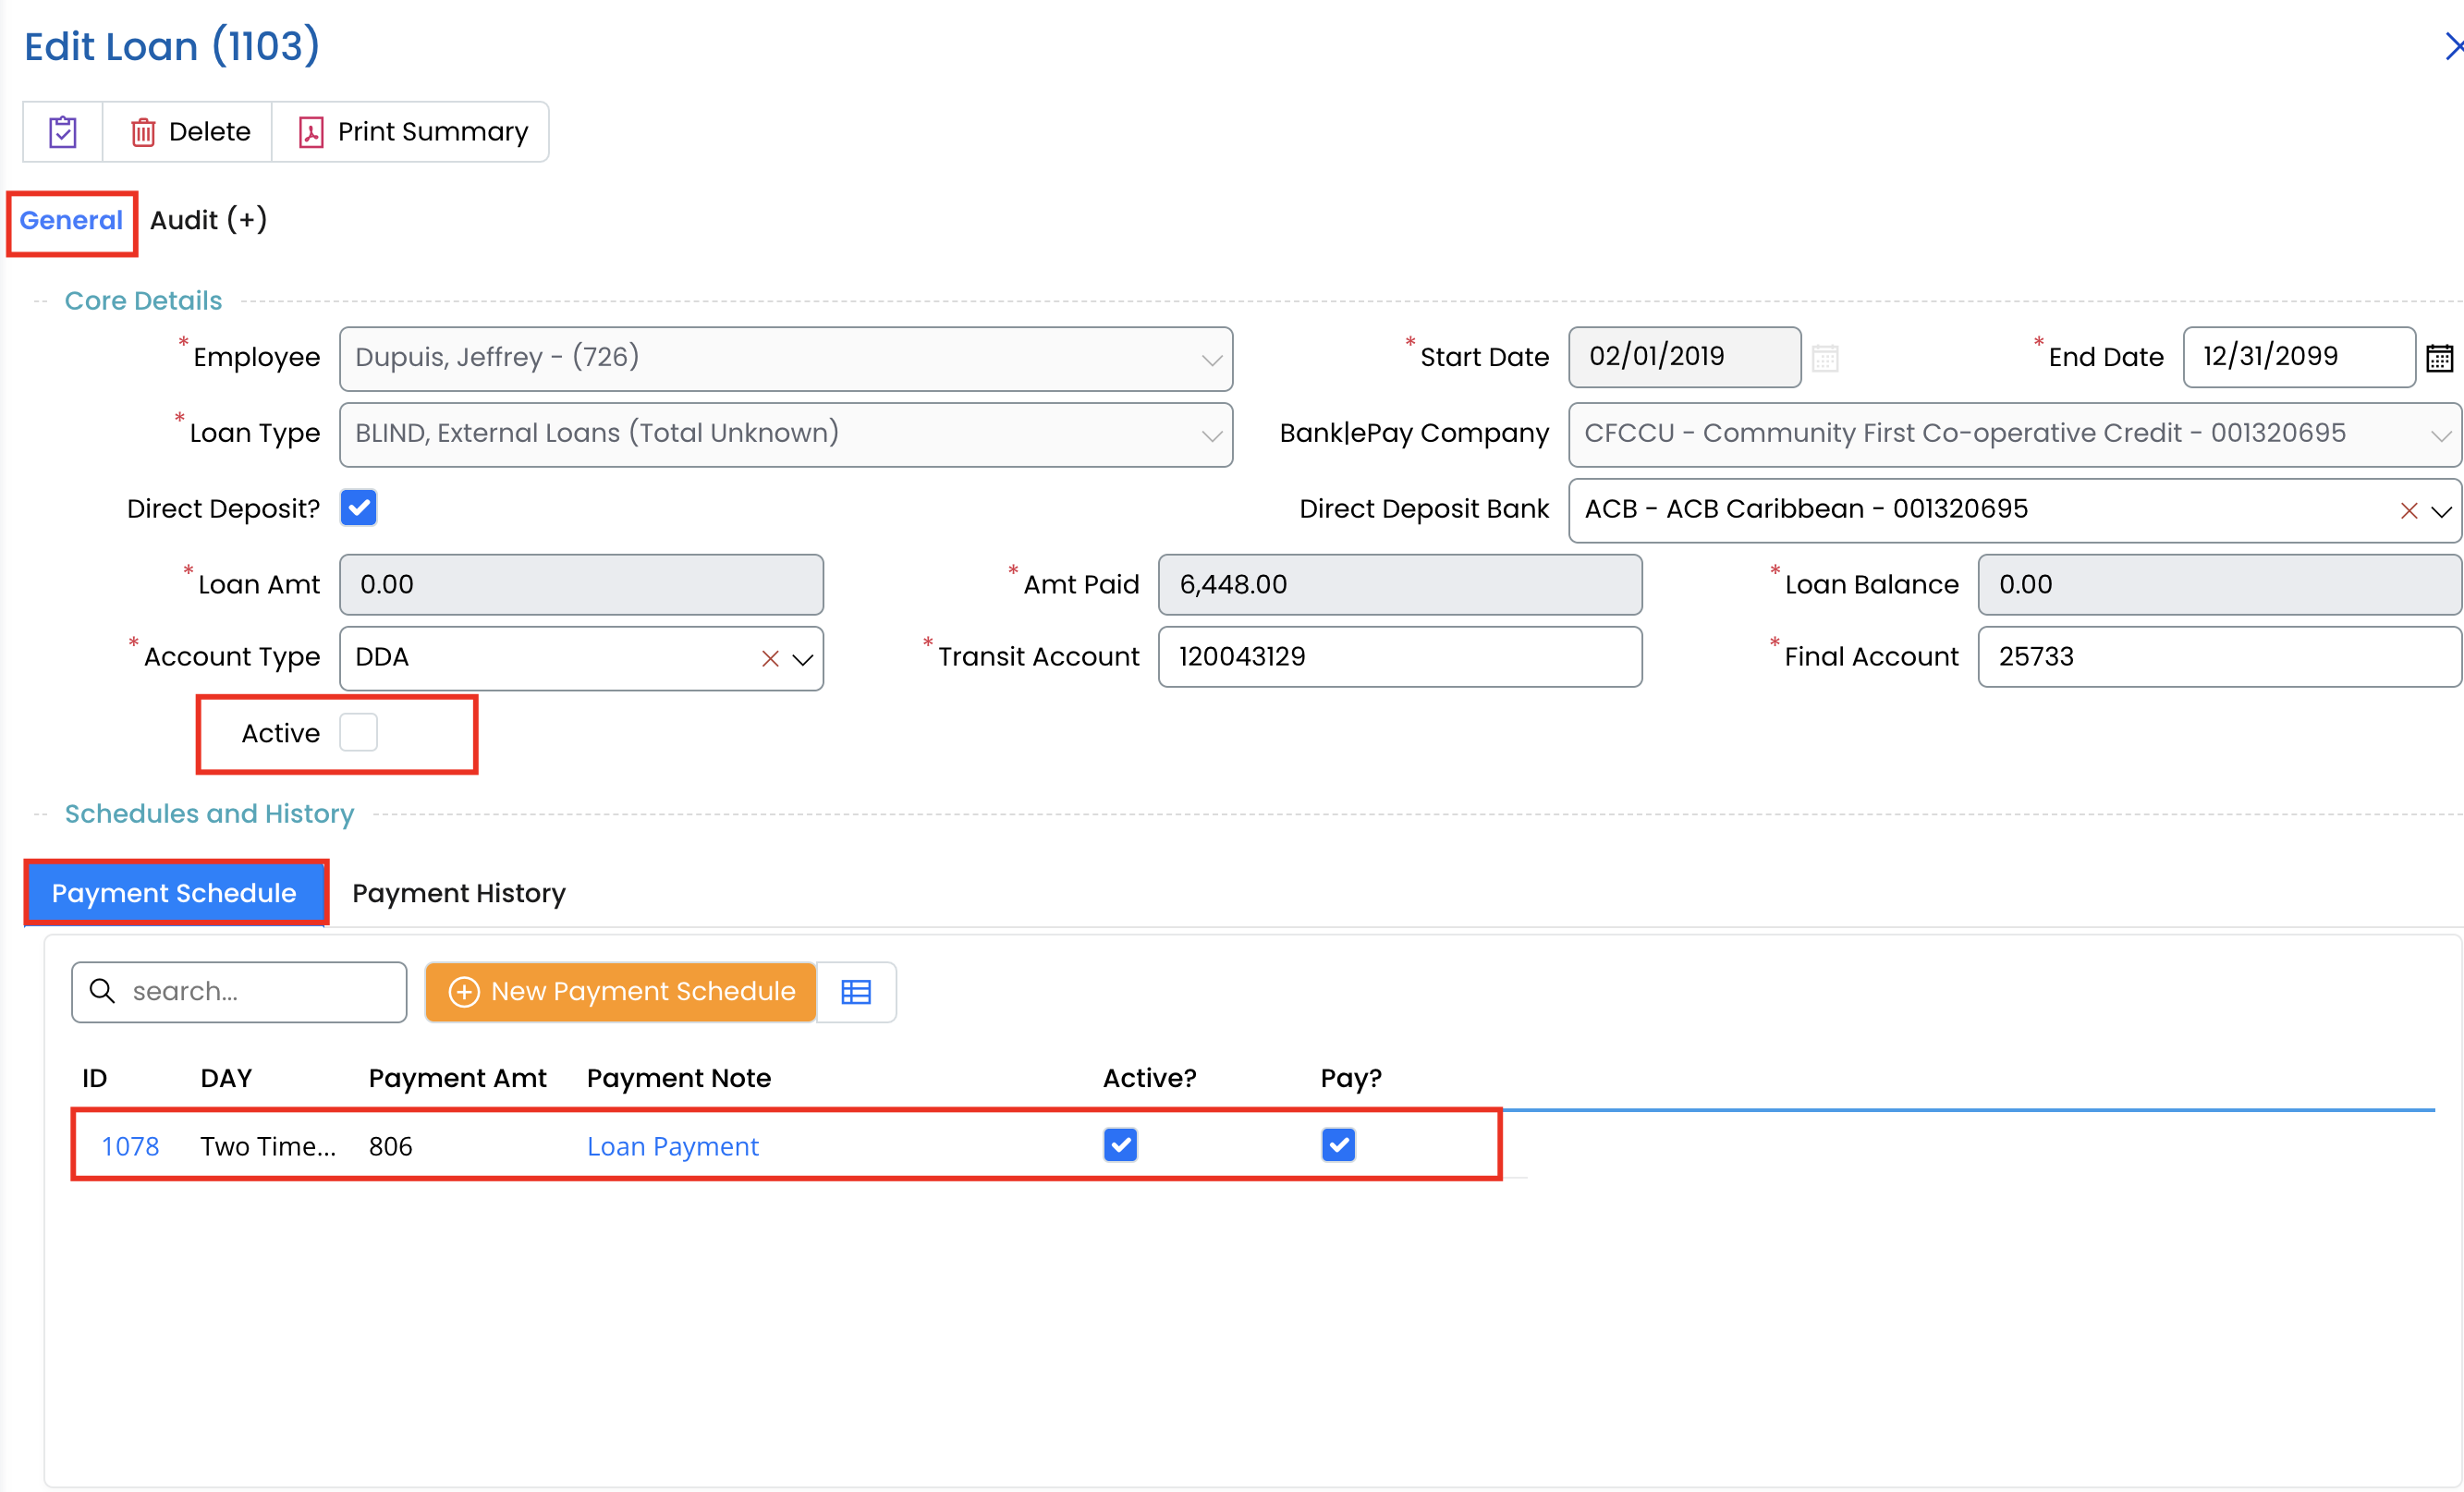
Deactivating or Closing a Loan
- Open the loan details.
- Uncheck the Active box under General Tab to stop payroll deductions.
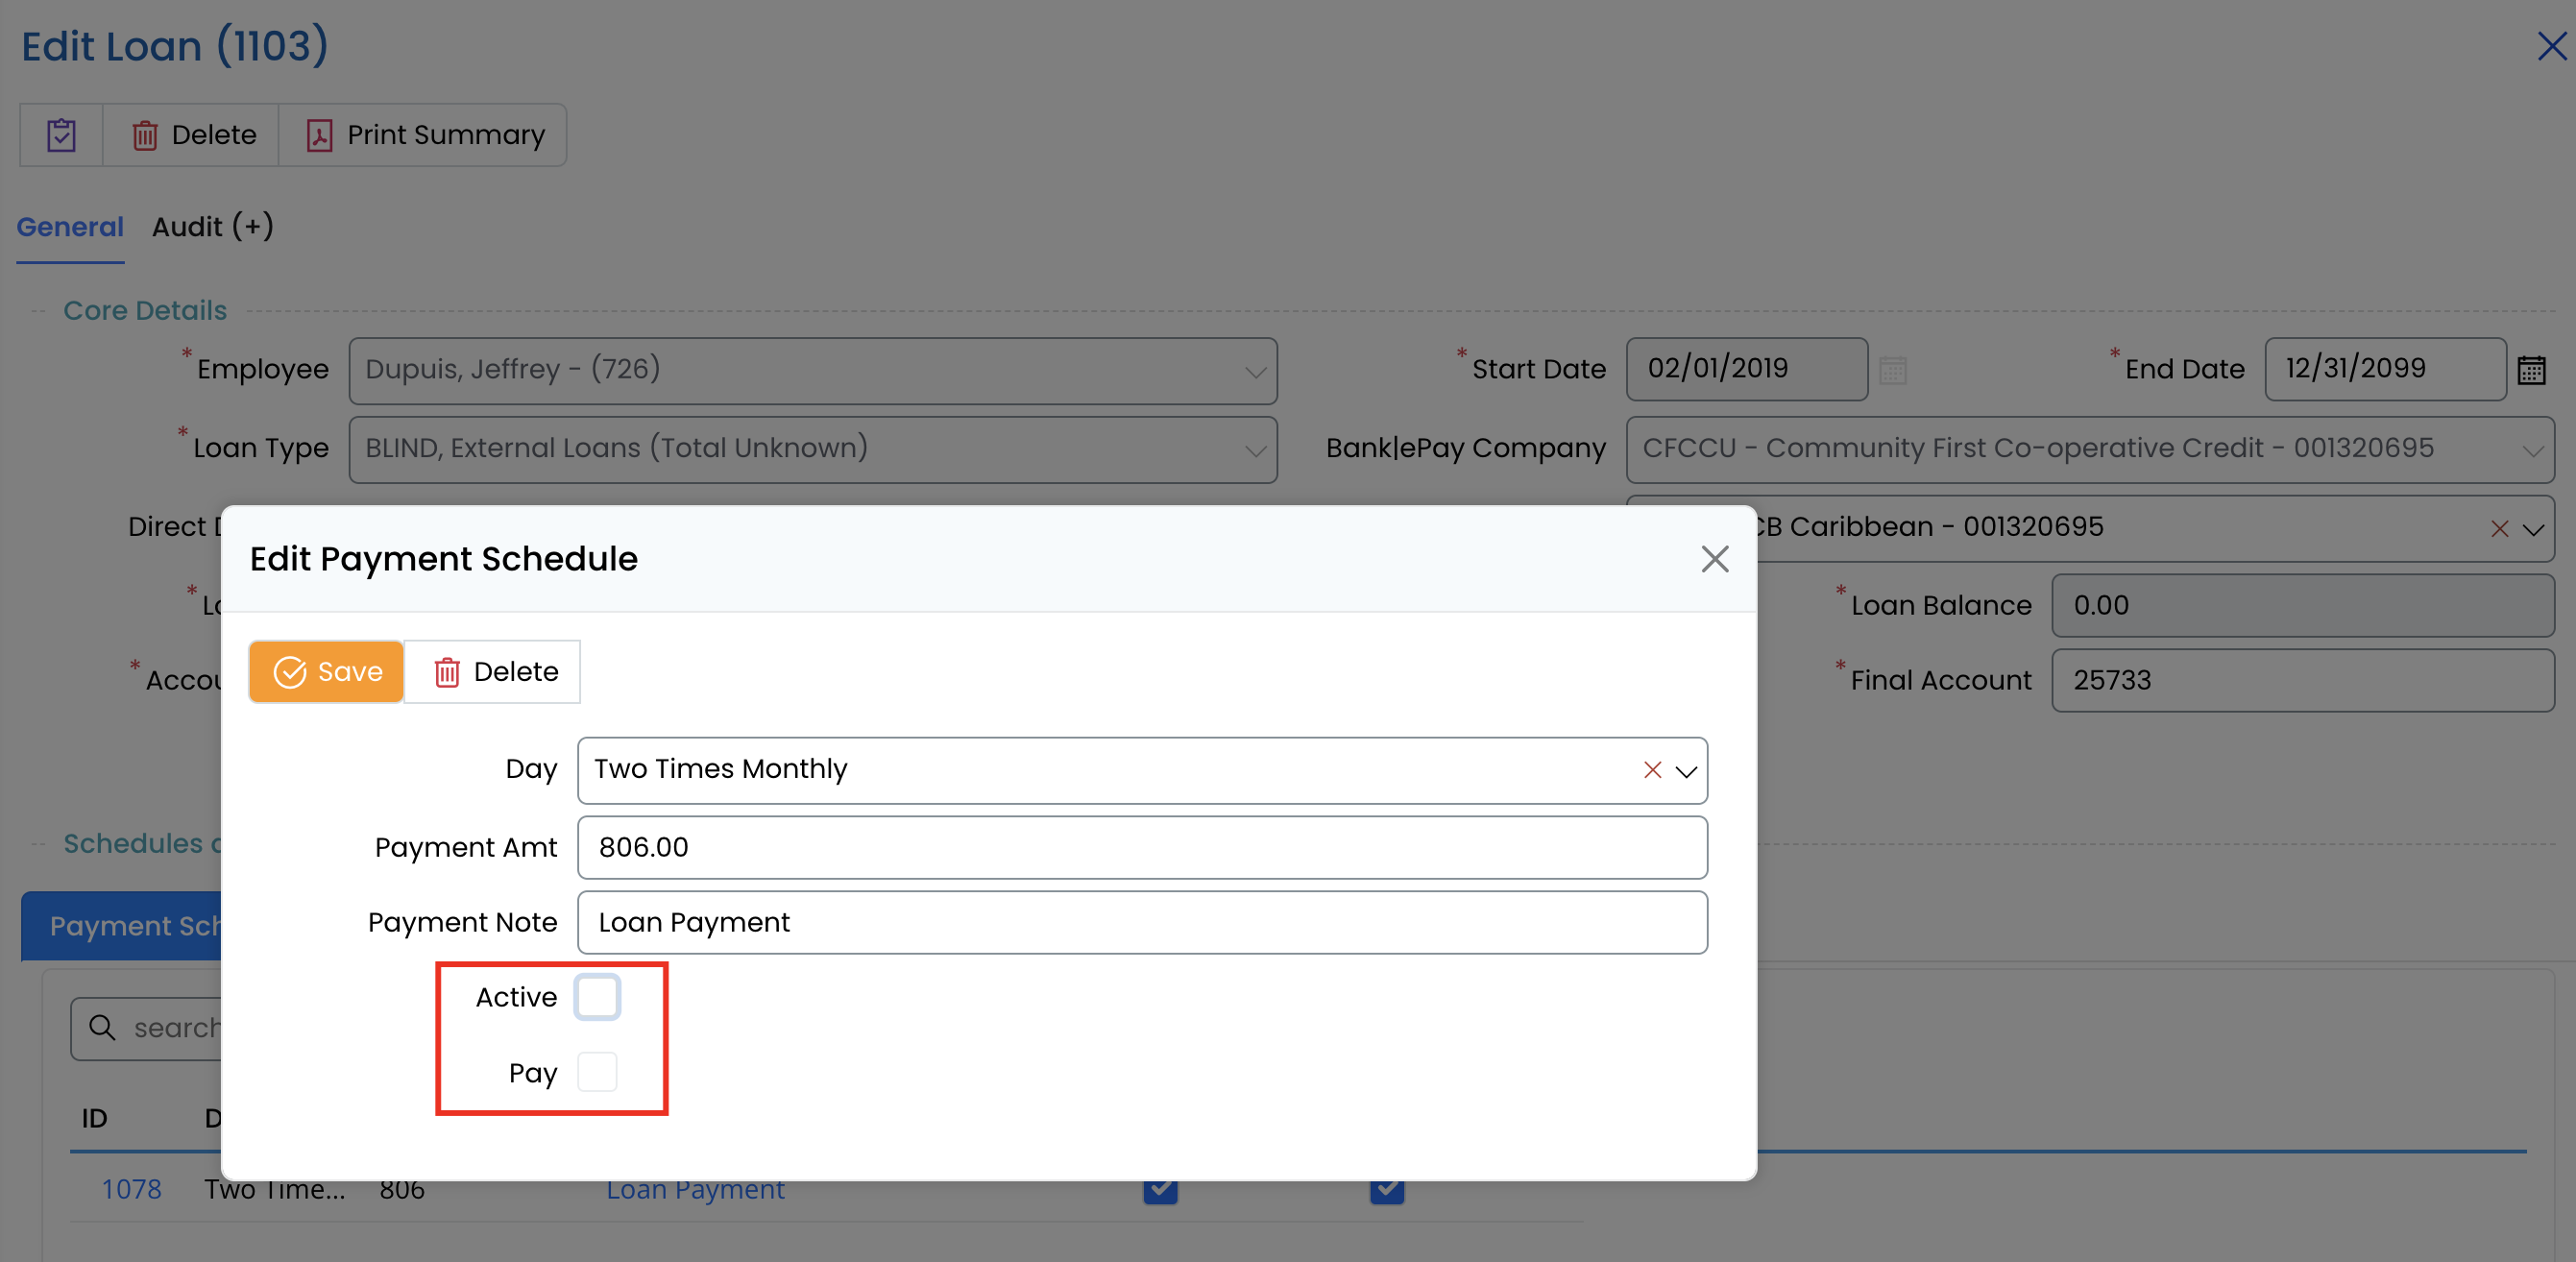
- Uncheck the Active and Pay box under Payment Schedule.
- Click Save to finalize the changes.
Key Notes
✅ Ensure loan payment schedules are correctly set up to avoid payroll errors.
✅ If a loan is paid off early, adjust the loan balance and deactivate the loan.
✅ Use Payment History to verify past deductions and ensure accurate records.
With the Loans module properly configured, you can efficiently track and manage employee loan repayments! 🚀