
How to Process a Payroll (Payroll Workflow)
The Payroll Workflow in XandaPay is a structured process that allows payroll administrators to manage employee payroll step by step. This guide will walk you through the entire payroll process, from selecting the payroll period to finalizing the payroll.
Step 1: Choose Payroll Period
- Navigate to the Payroll Workflow module.
- Select the payroll period you want to process from the dropdown list.
- Click Next to proceed.

Step 2: Choose Employees
- On the left side, you will see a list of Available Employees.
- On the right side, you will see Employees Included in Payroll.
- Use the >> button to move employees to the included list.
- Use the << button to remove employees from the payroll.
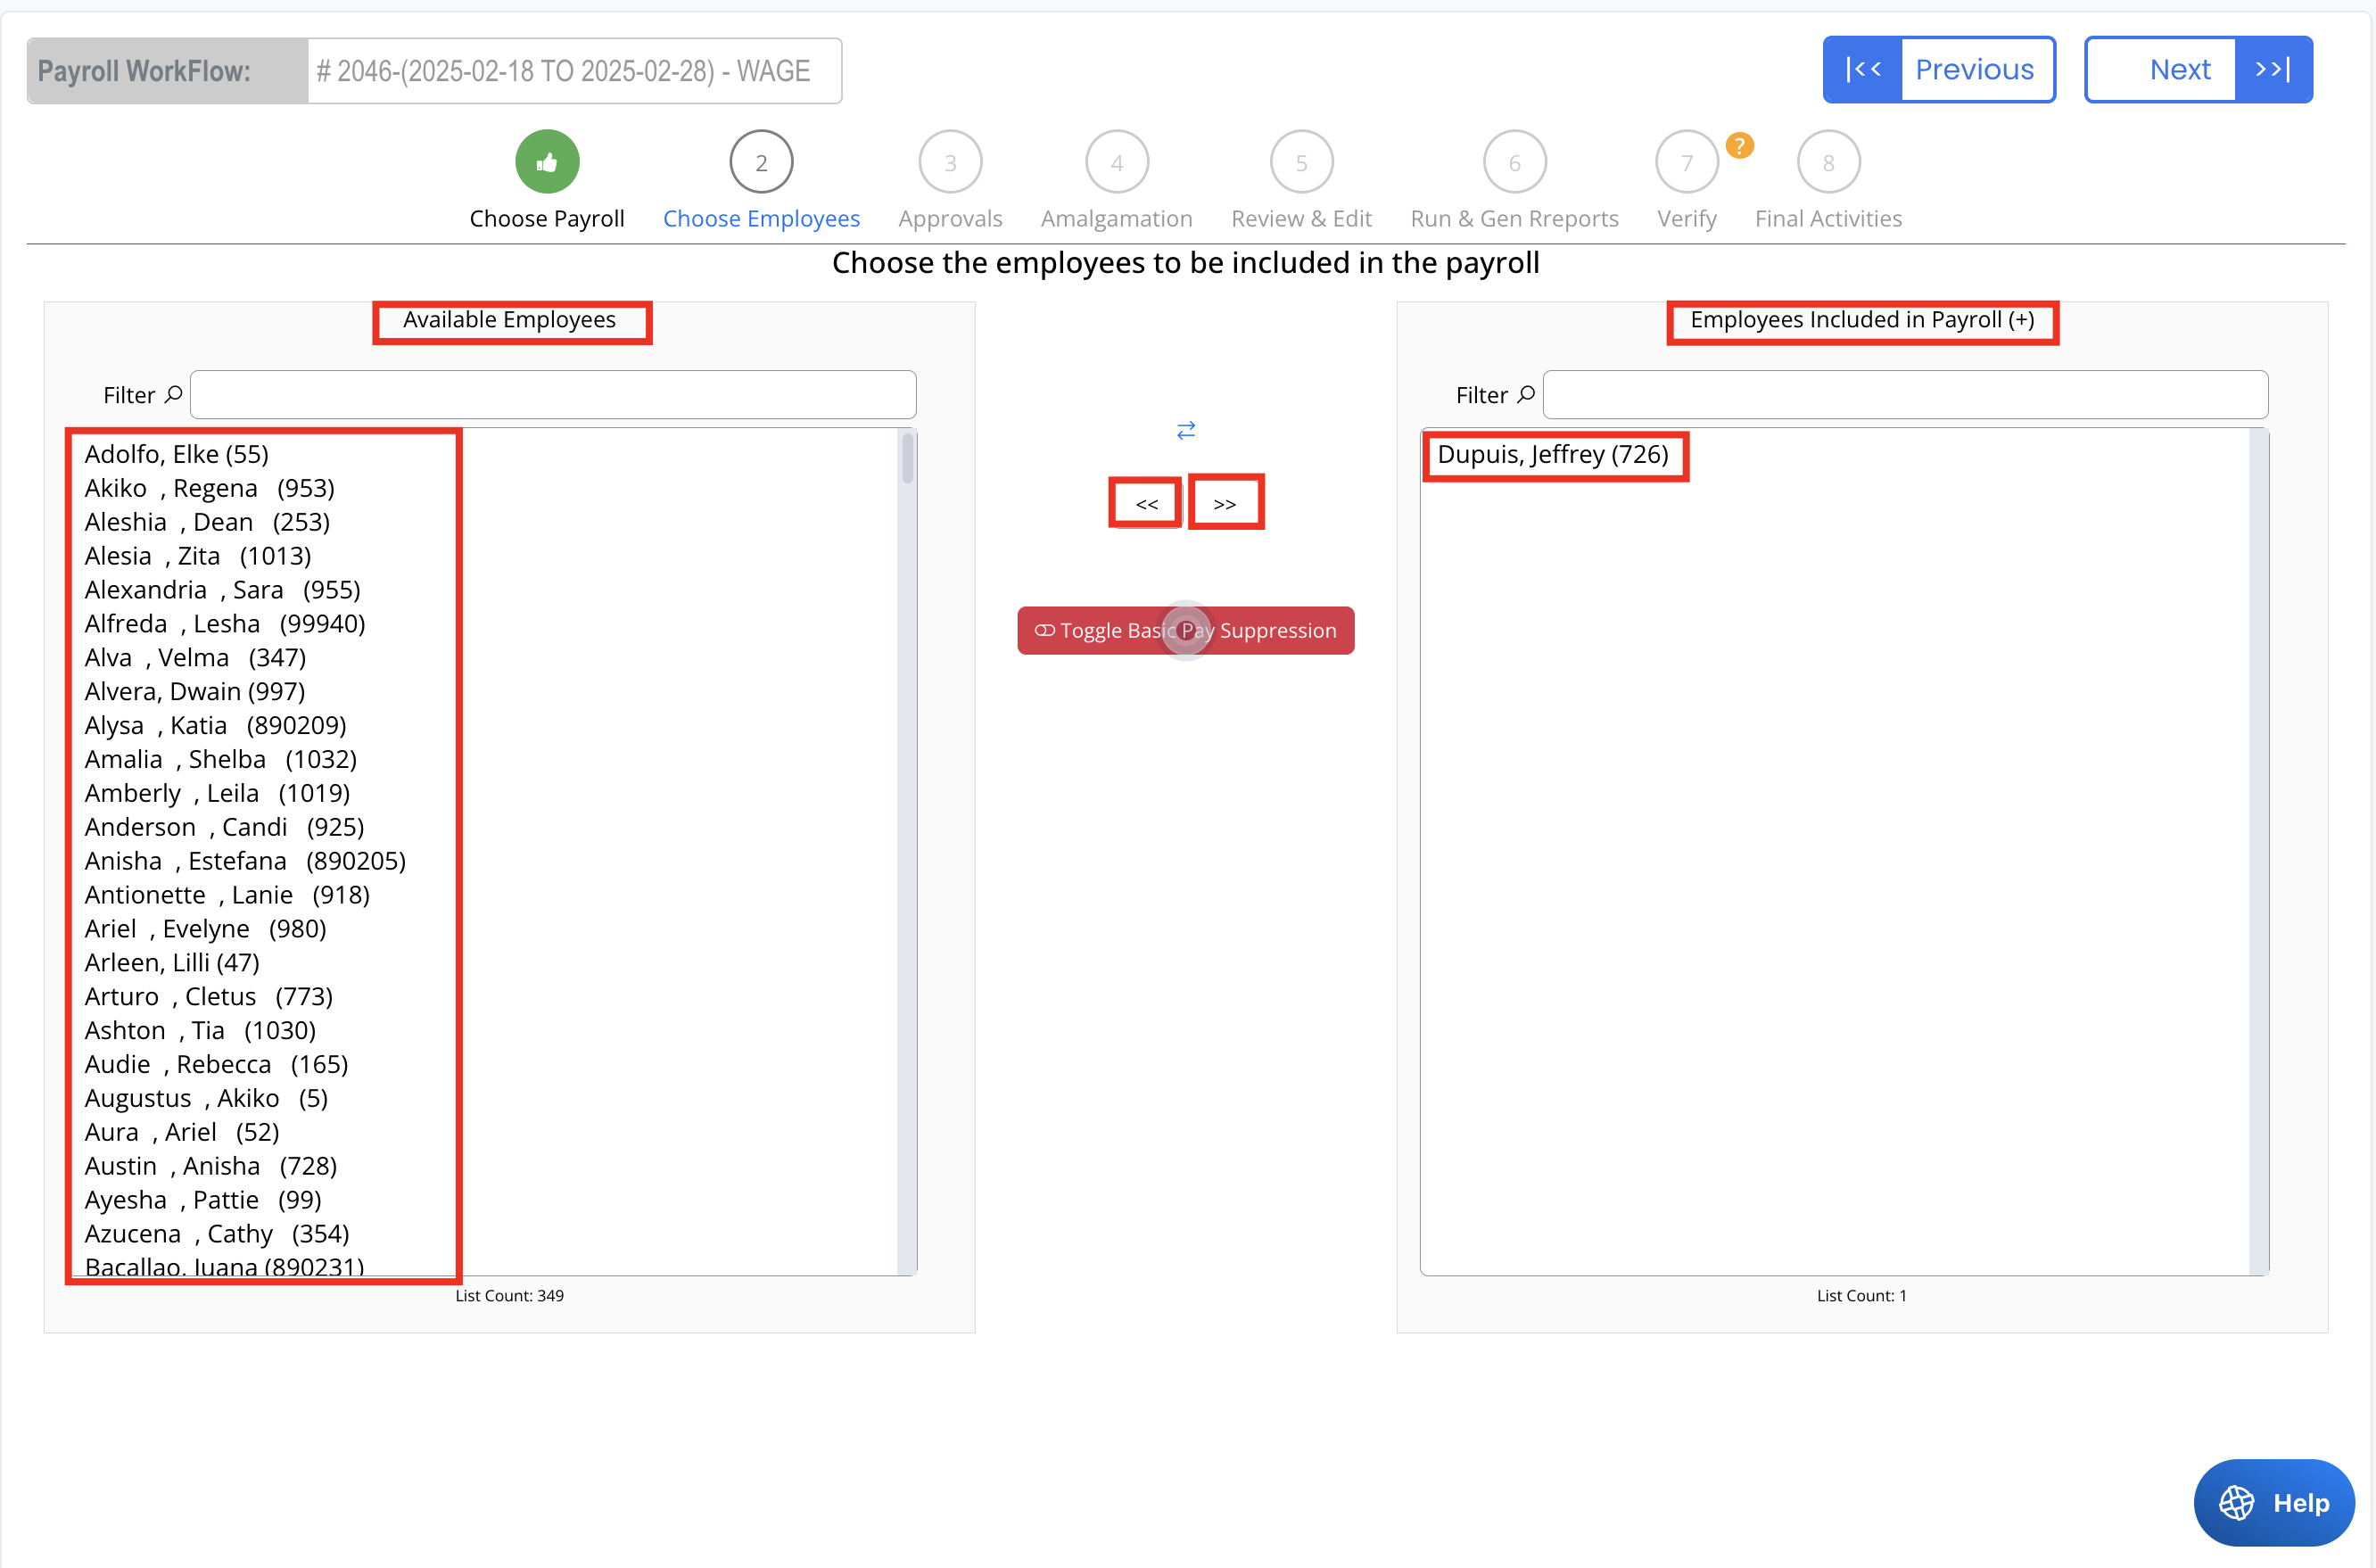
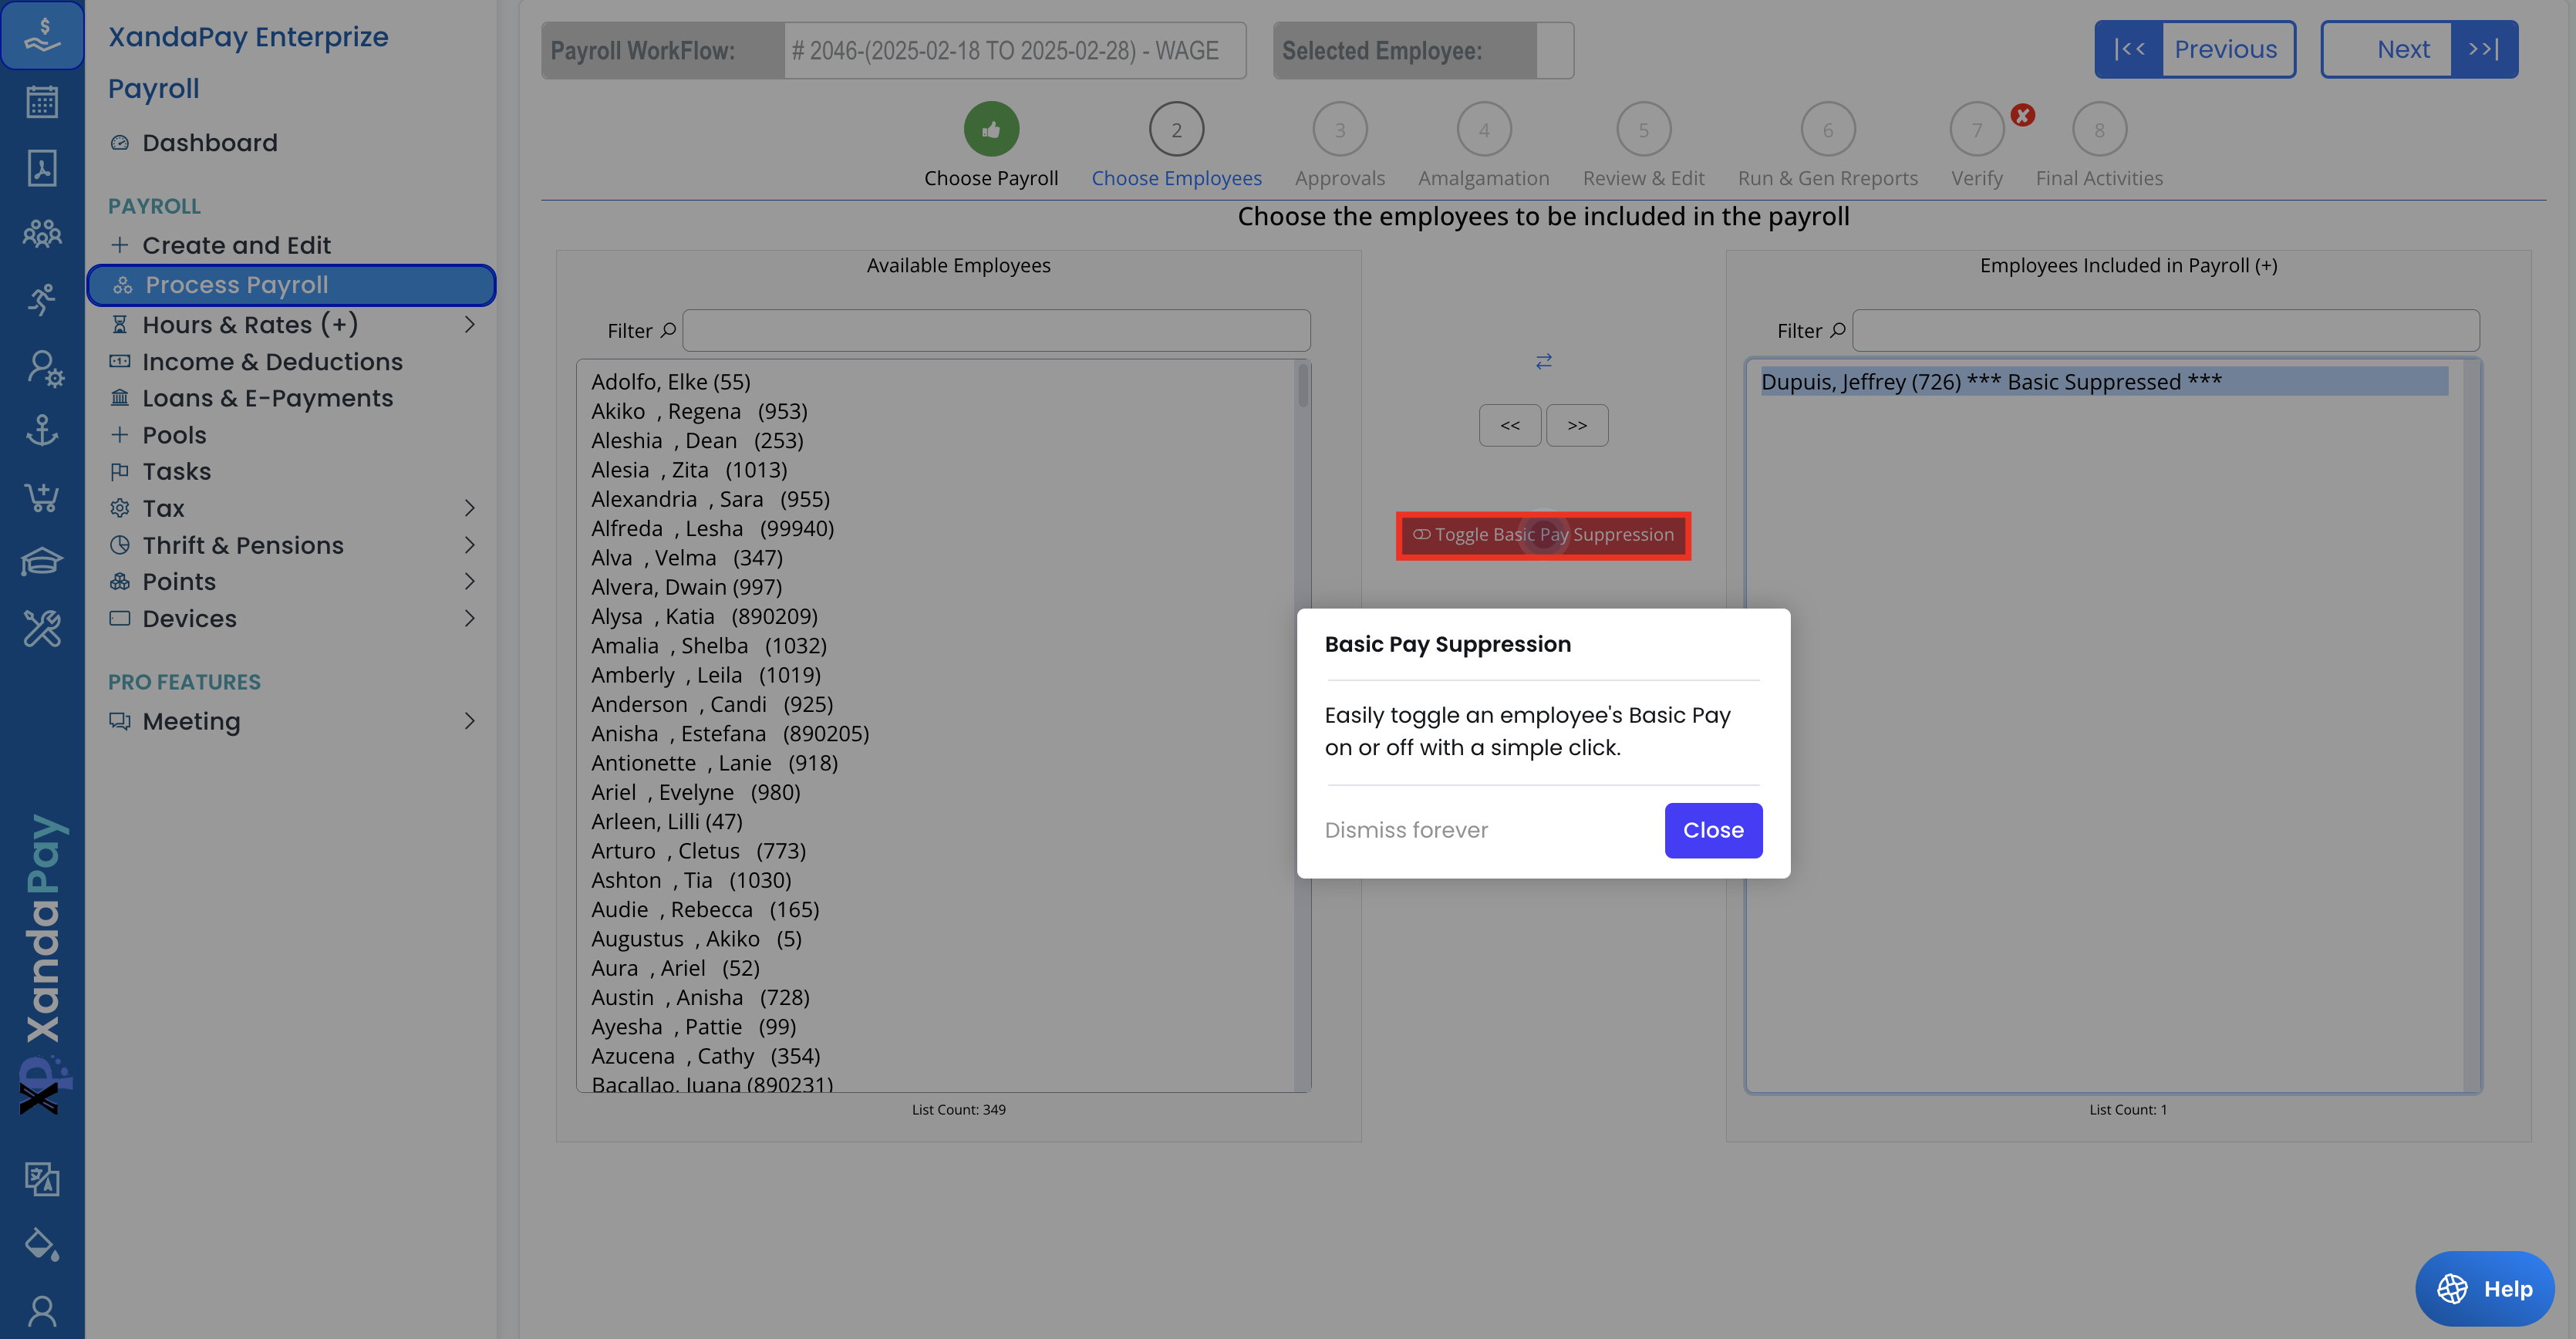
- If needed, click Toggle Basic Pay Suppression to toggle the employees basic pay on or off.
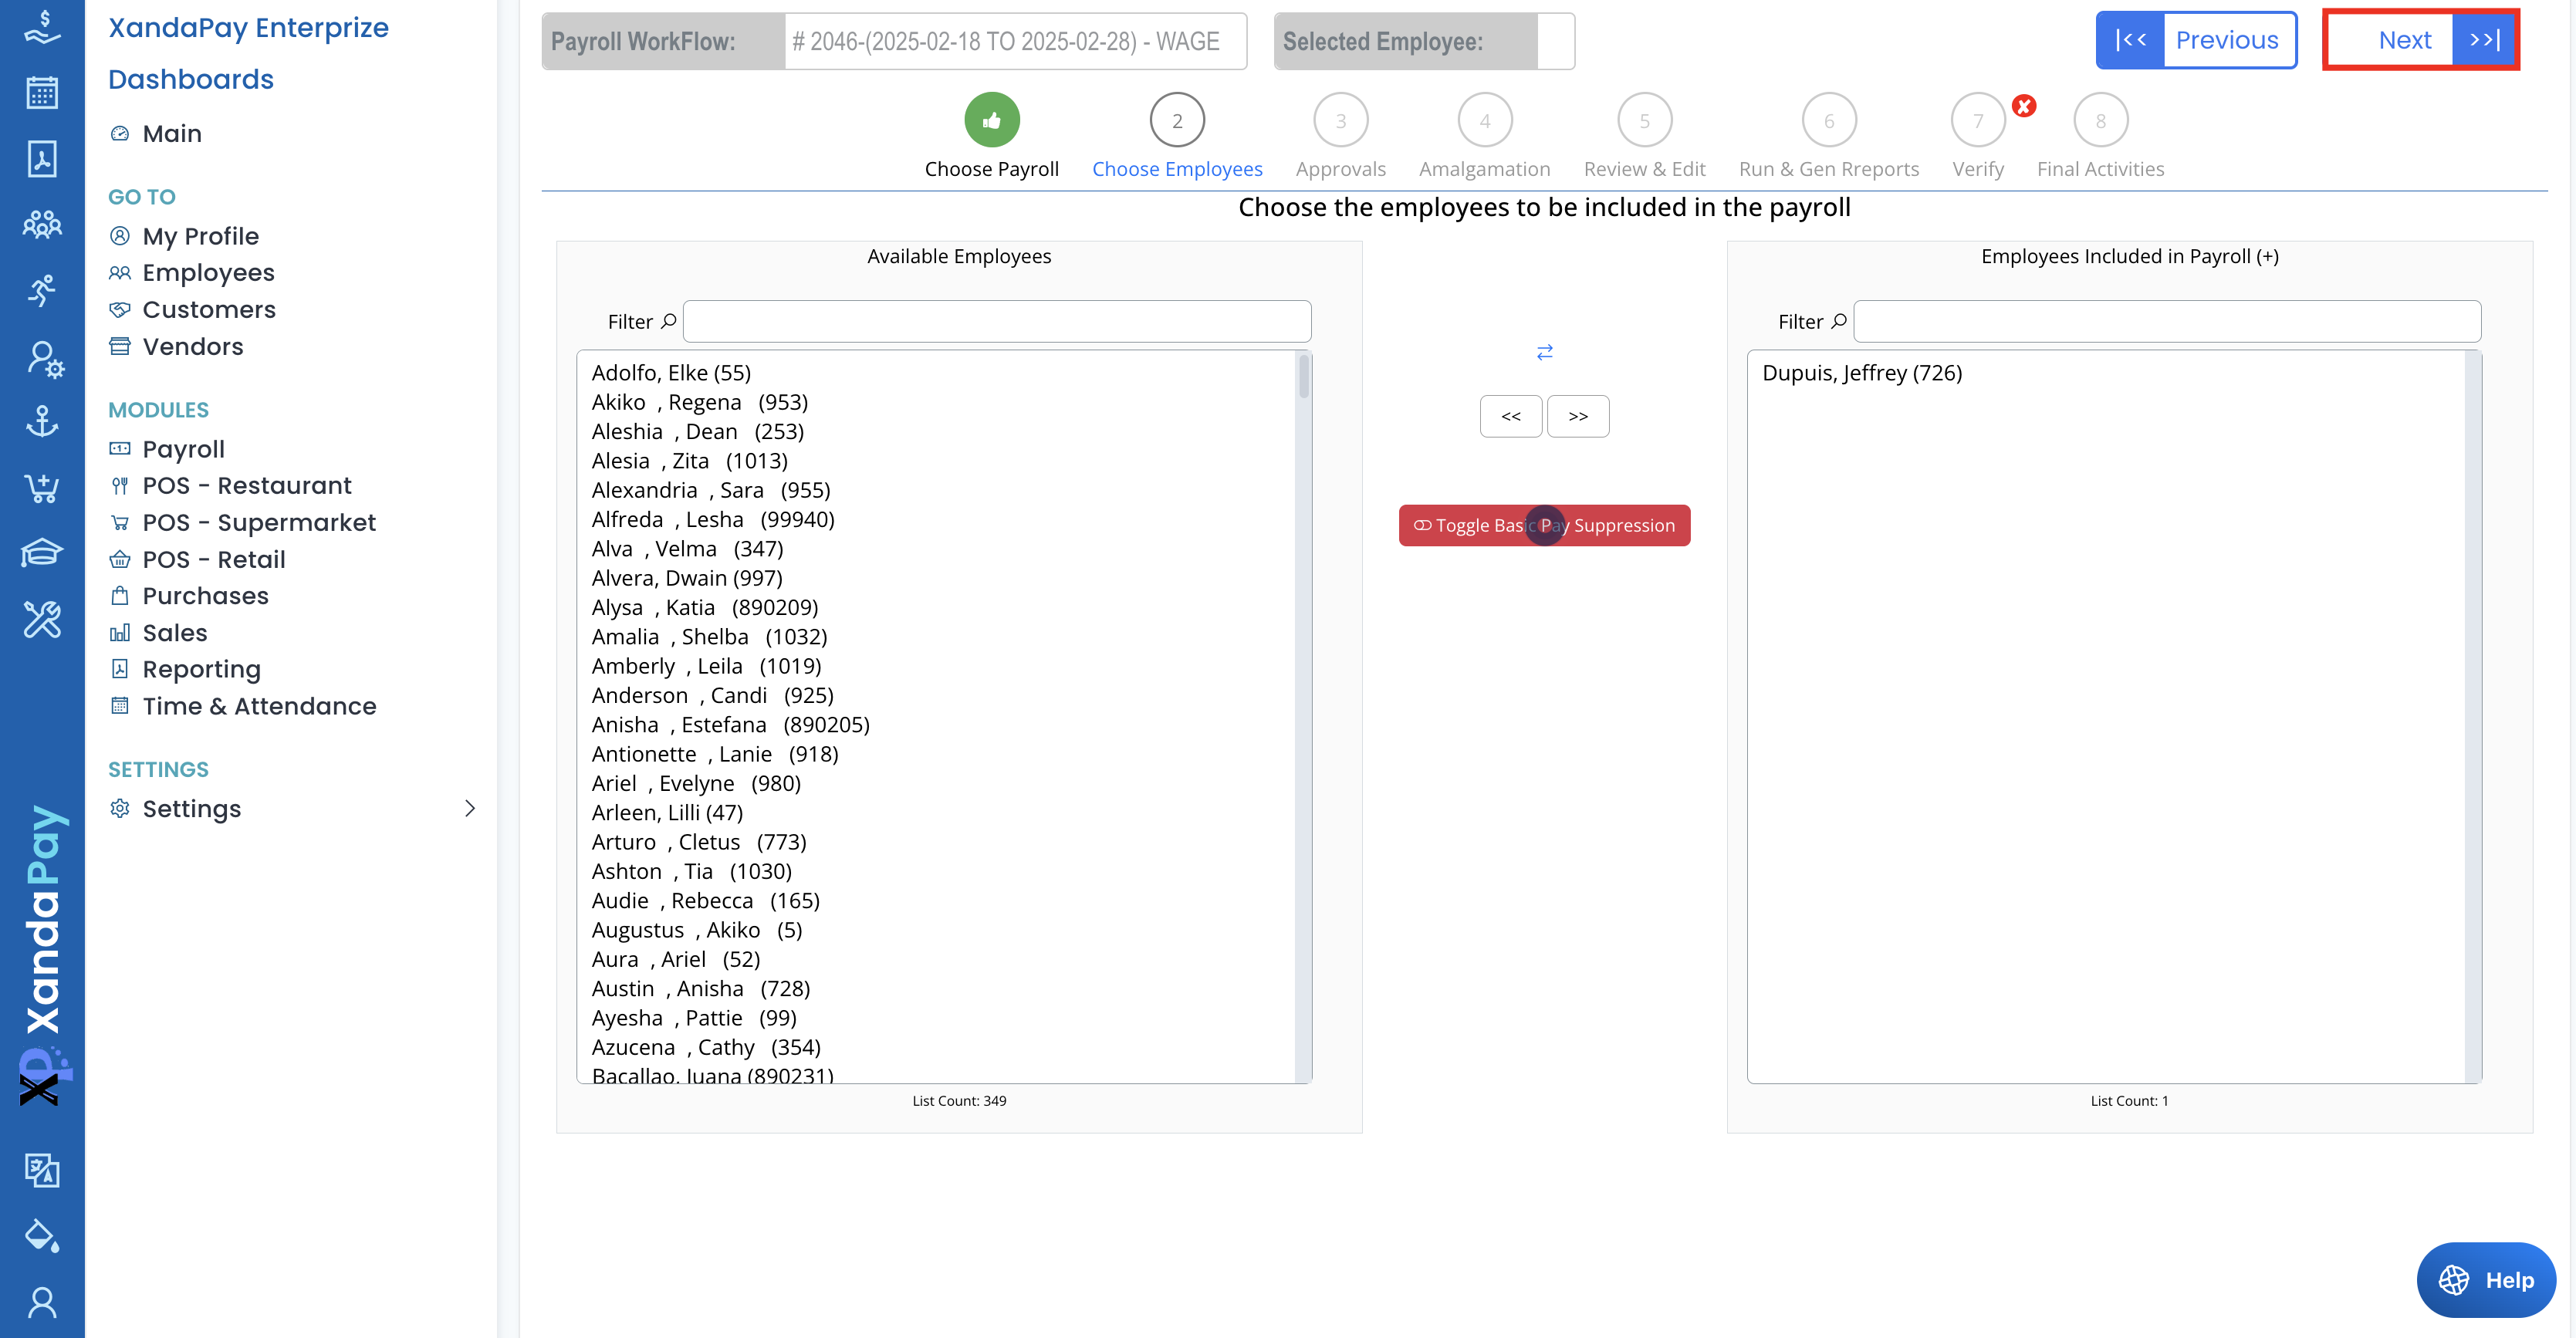
- Click Next to move forward.
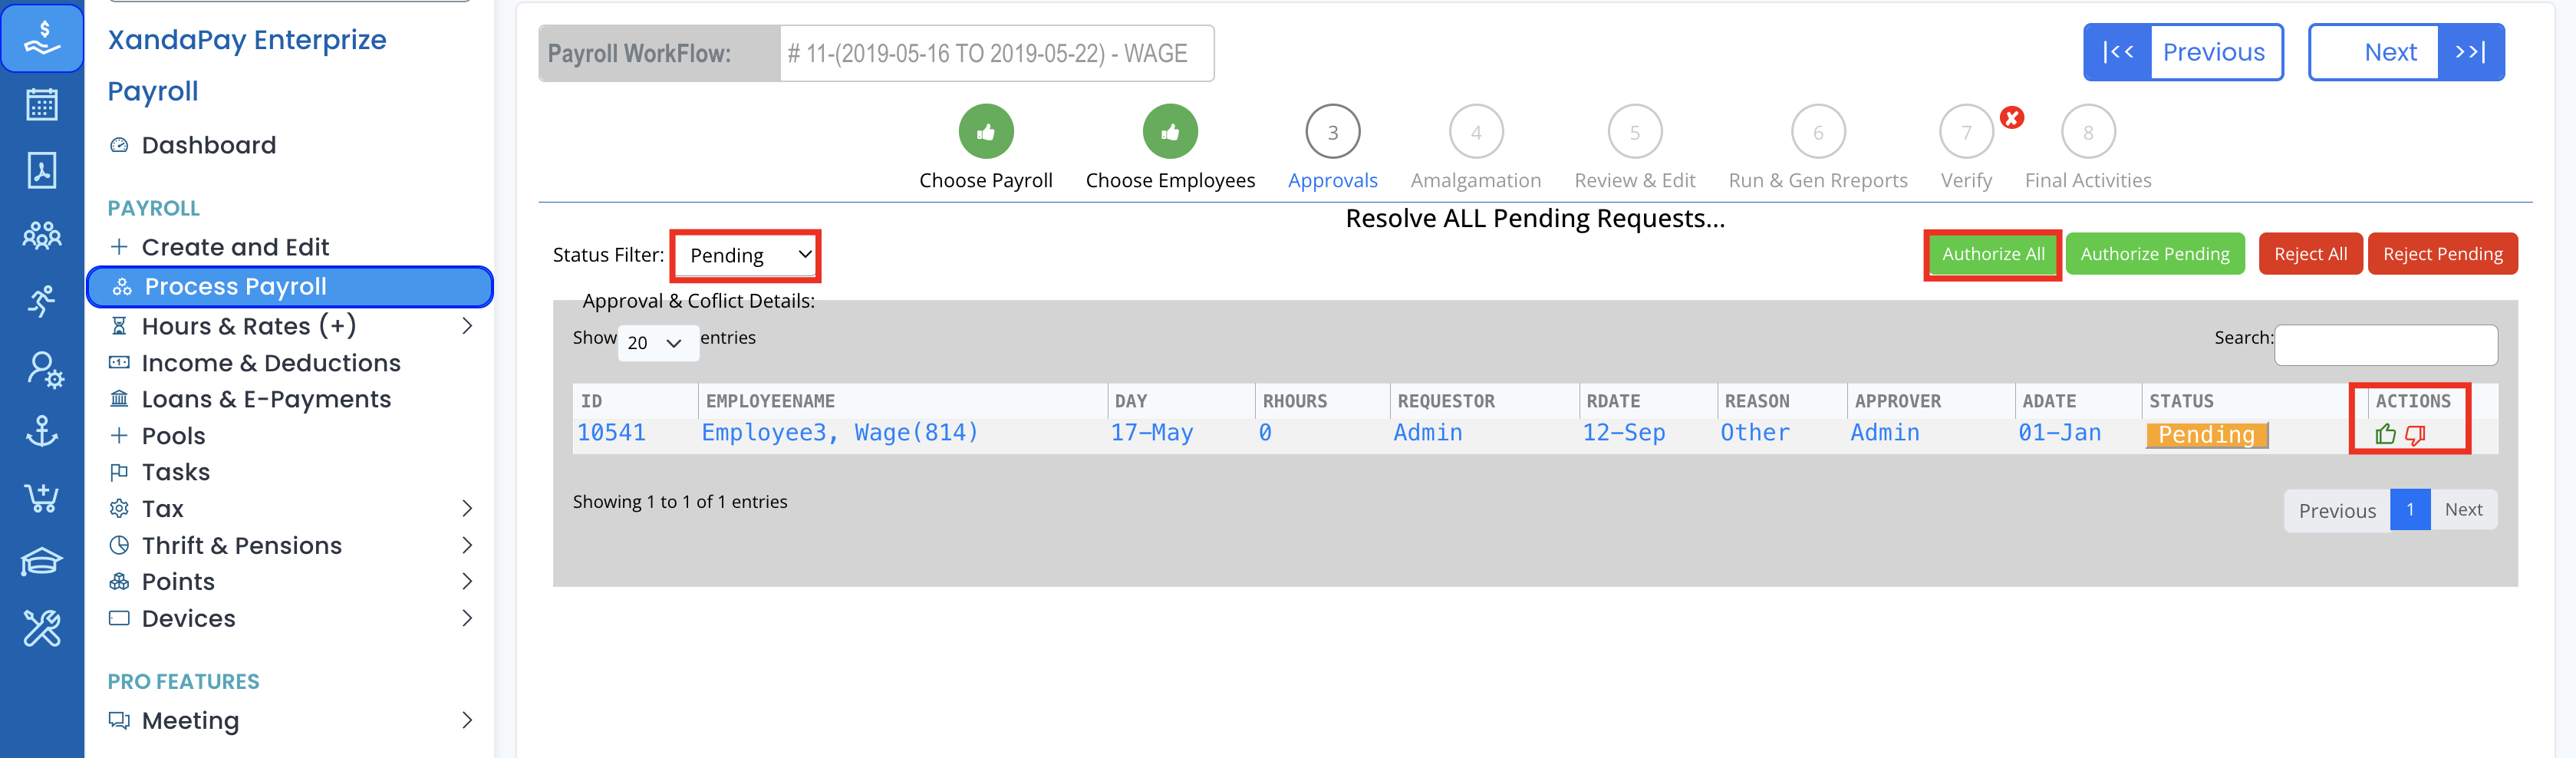
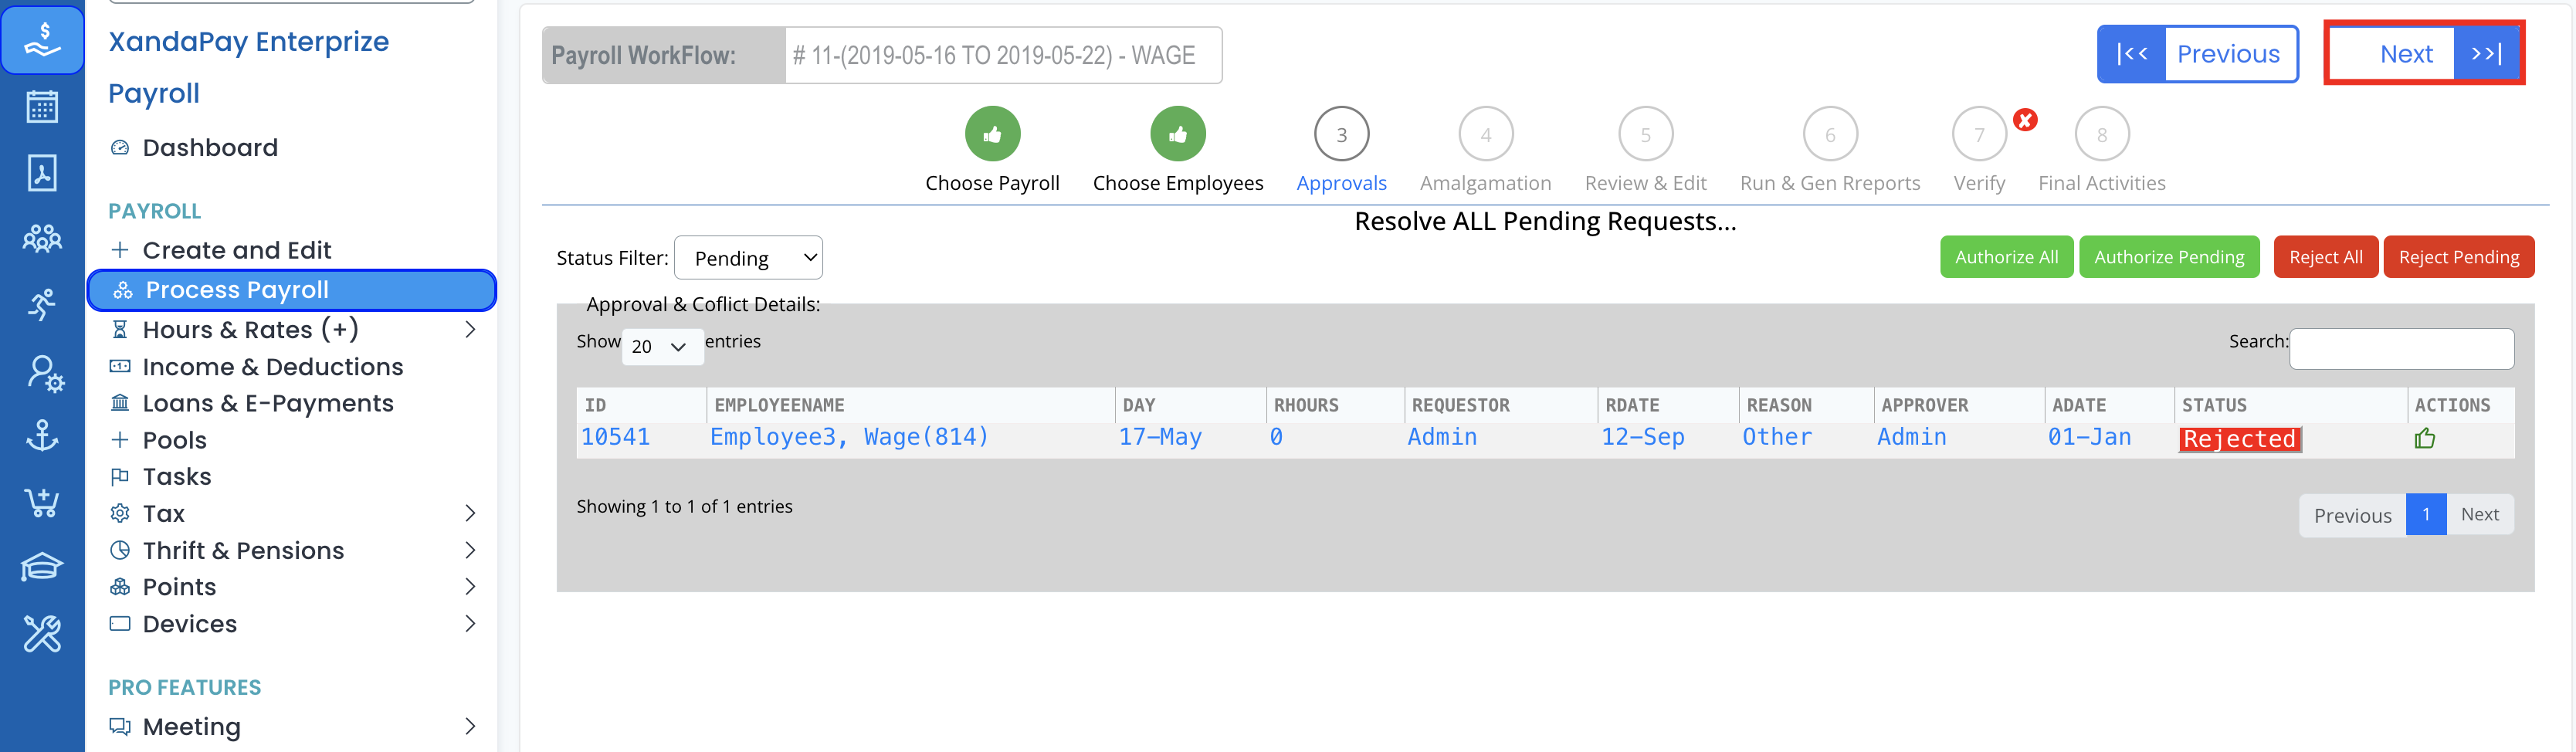
Step 3: Approvals
- Review all pending approval requests related to time tracking, overtime, or other payroll adjustments.
- Use the Authorize All button to approve all pending requests.
- Alternatively, approve or reject individual requests using the Approve (✅) or Reject (❌) buttons
- Click Next when all approvals are completed.
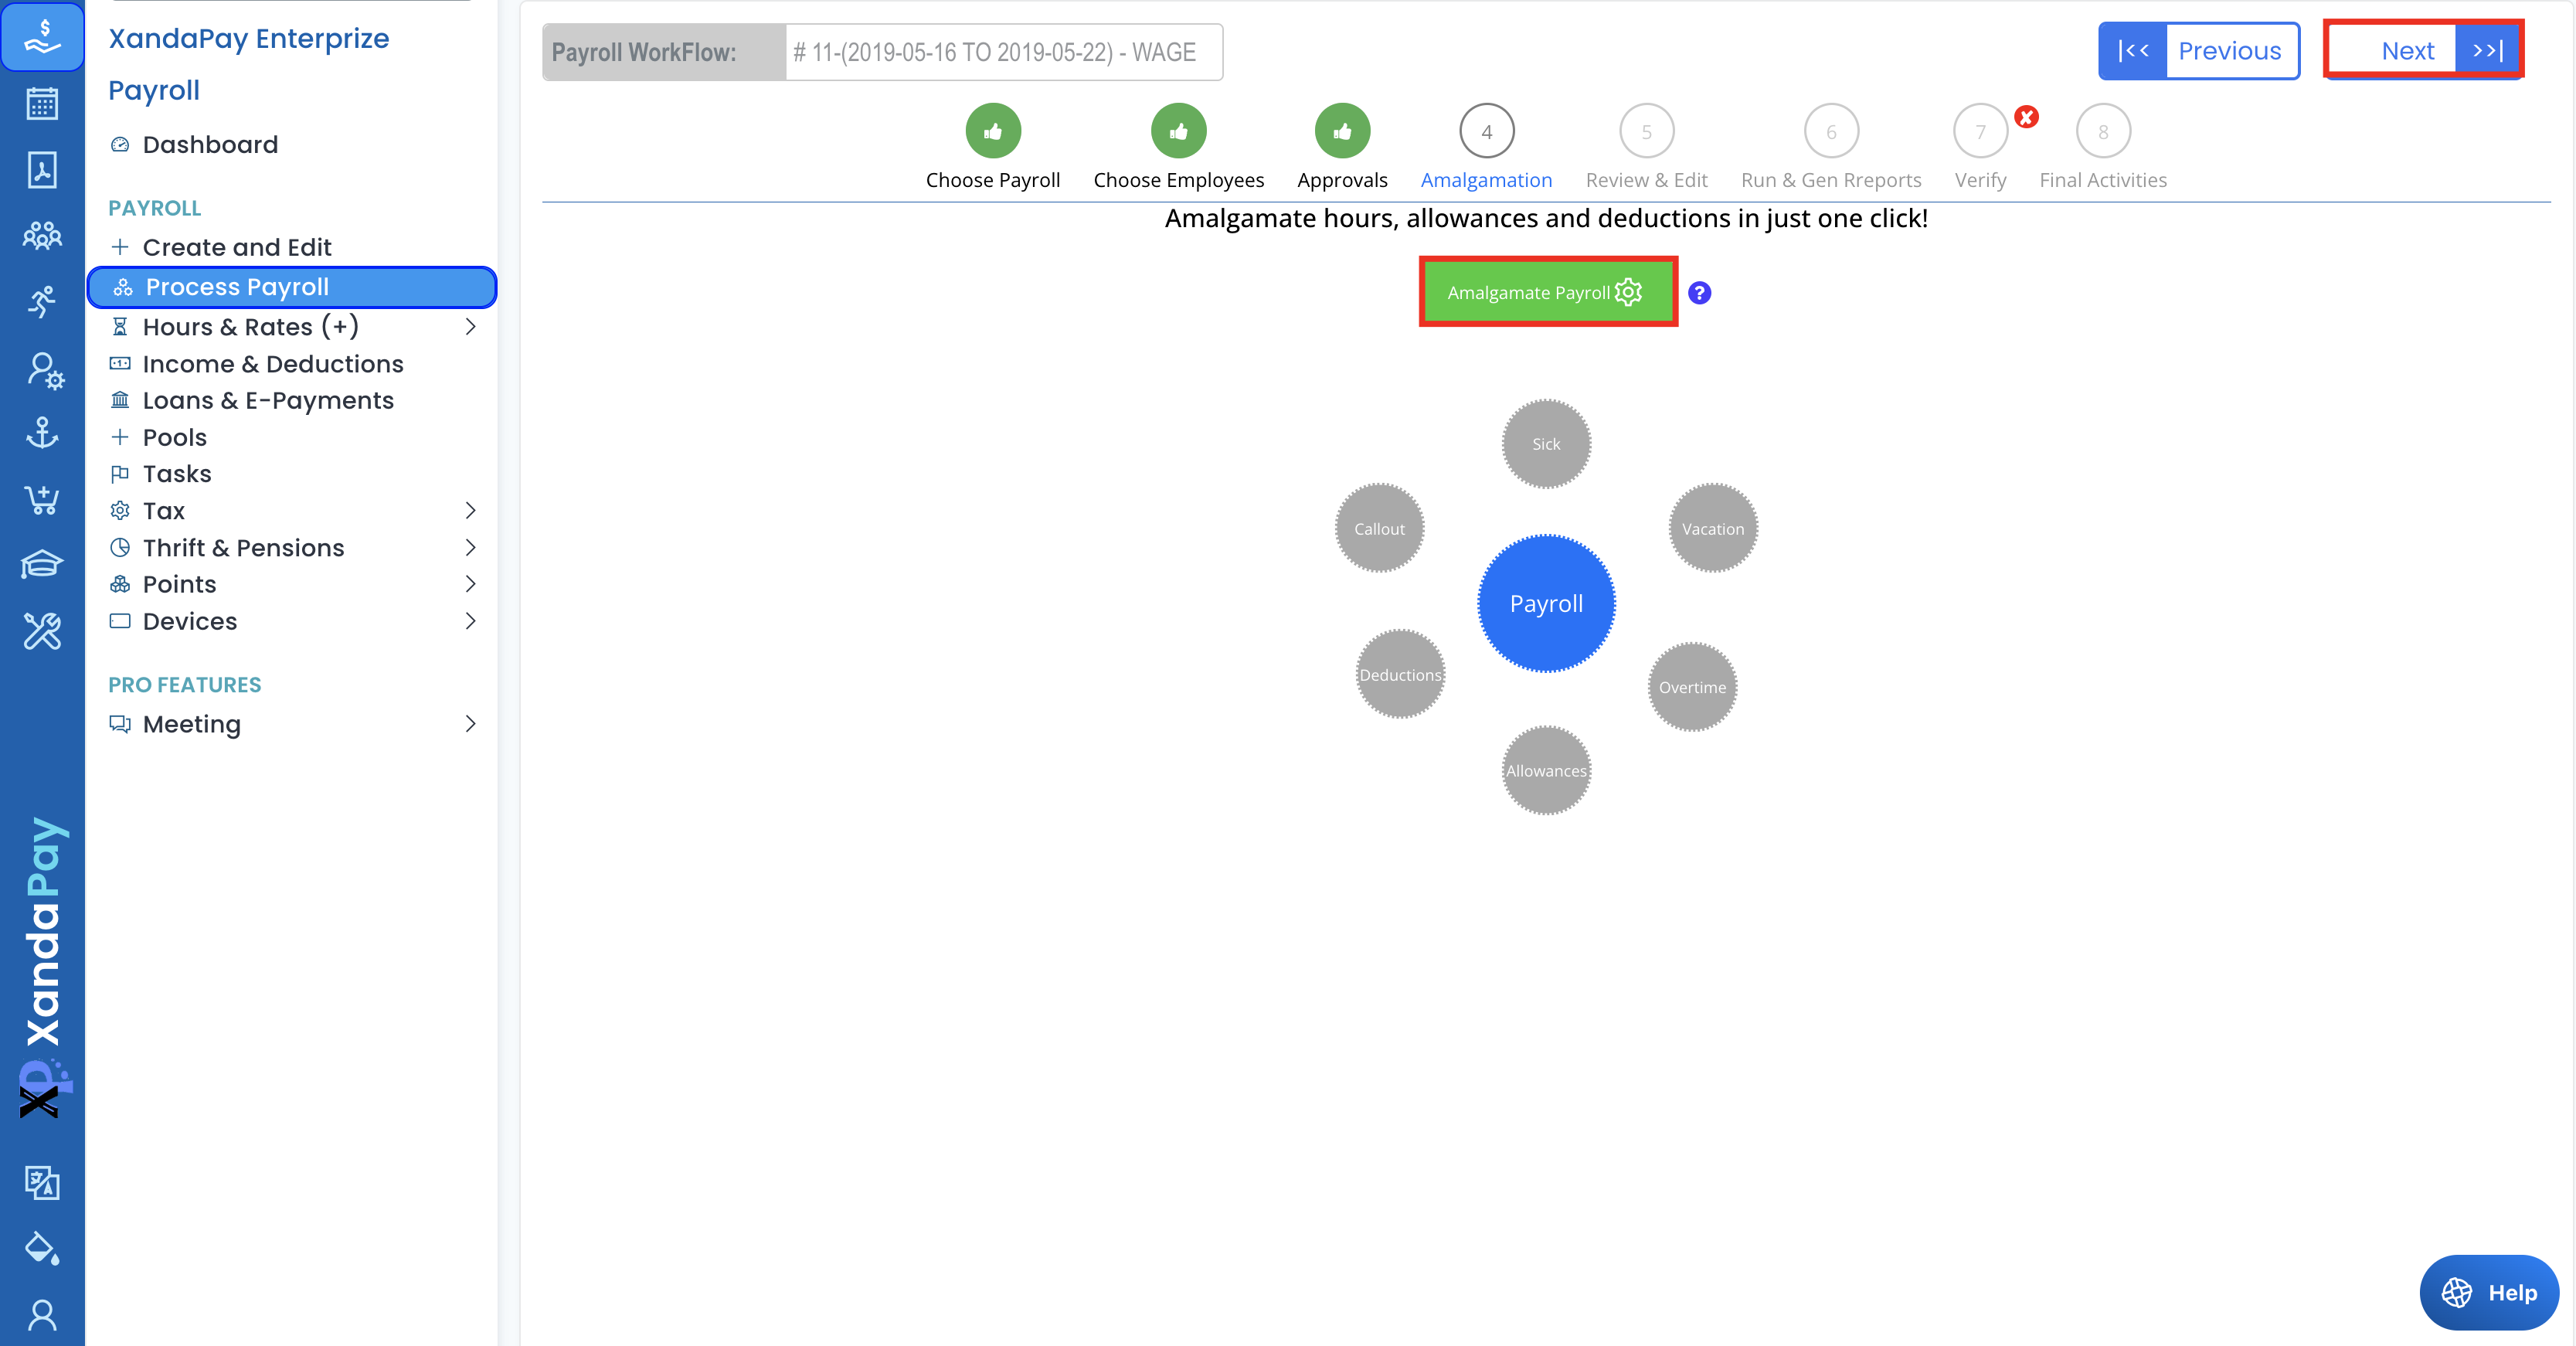
Step 4: Amalgamation
- Click the Amalgamate Payroll button to merge all approved hours, allowances, and deductions.
- The system will automatically calculate payroll items, including:
- Regular hours
- Overtime
- Deductions (e.g., loans, taxes)
- Allowances (e.g., bonuses, stipends)
- Once amalgamation is complete, click Next.
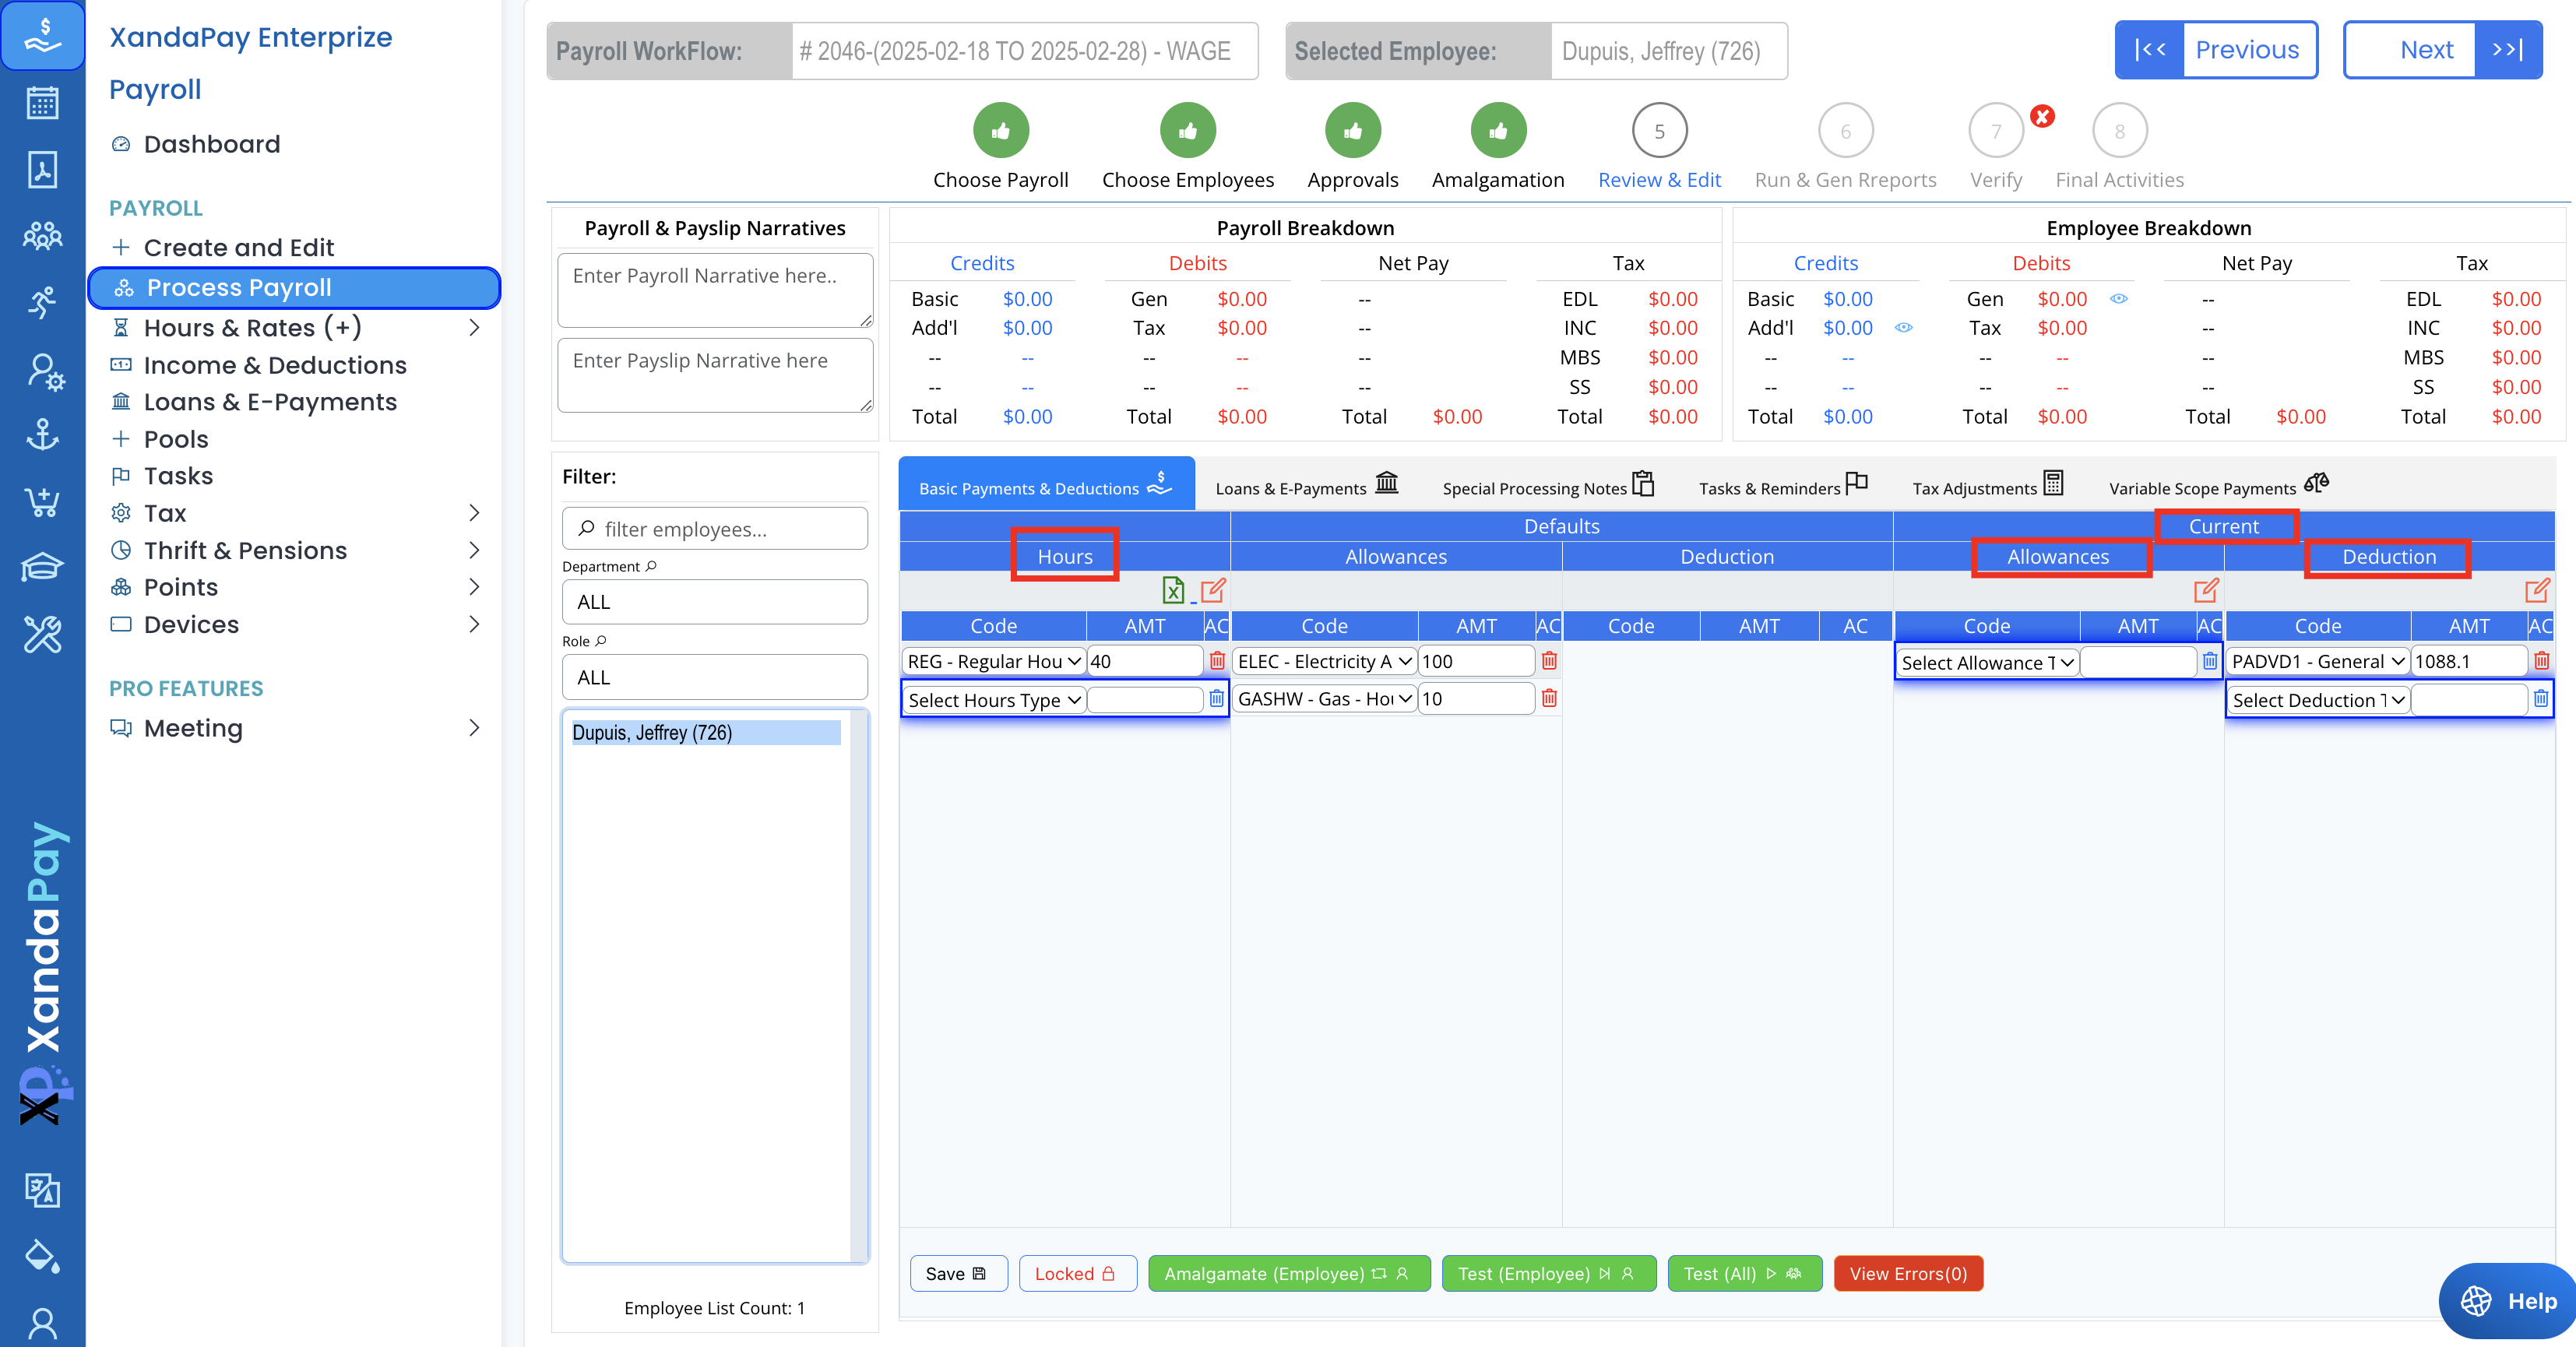
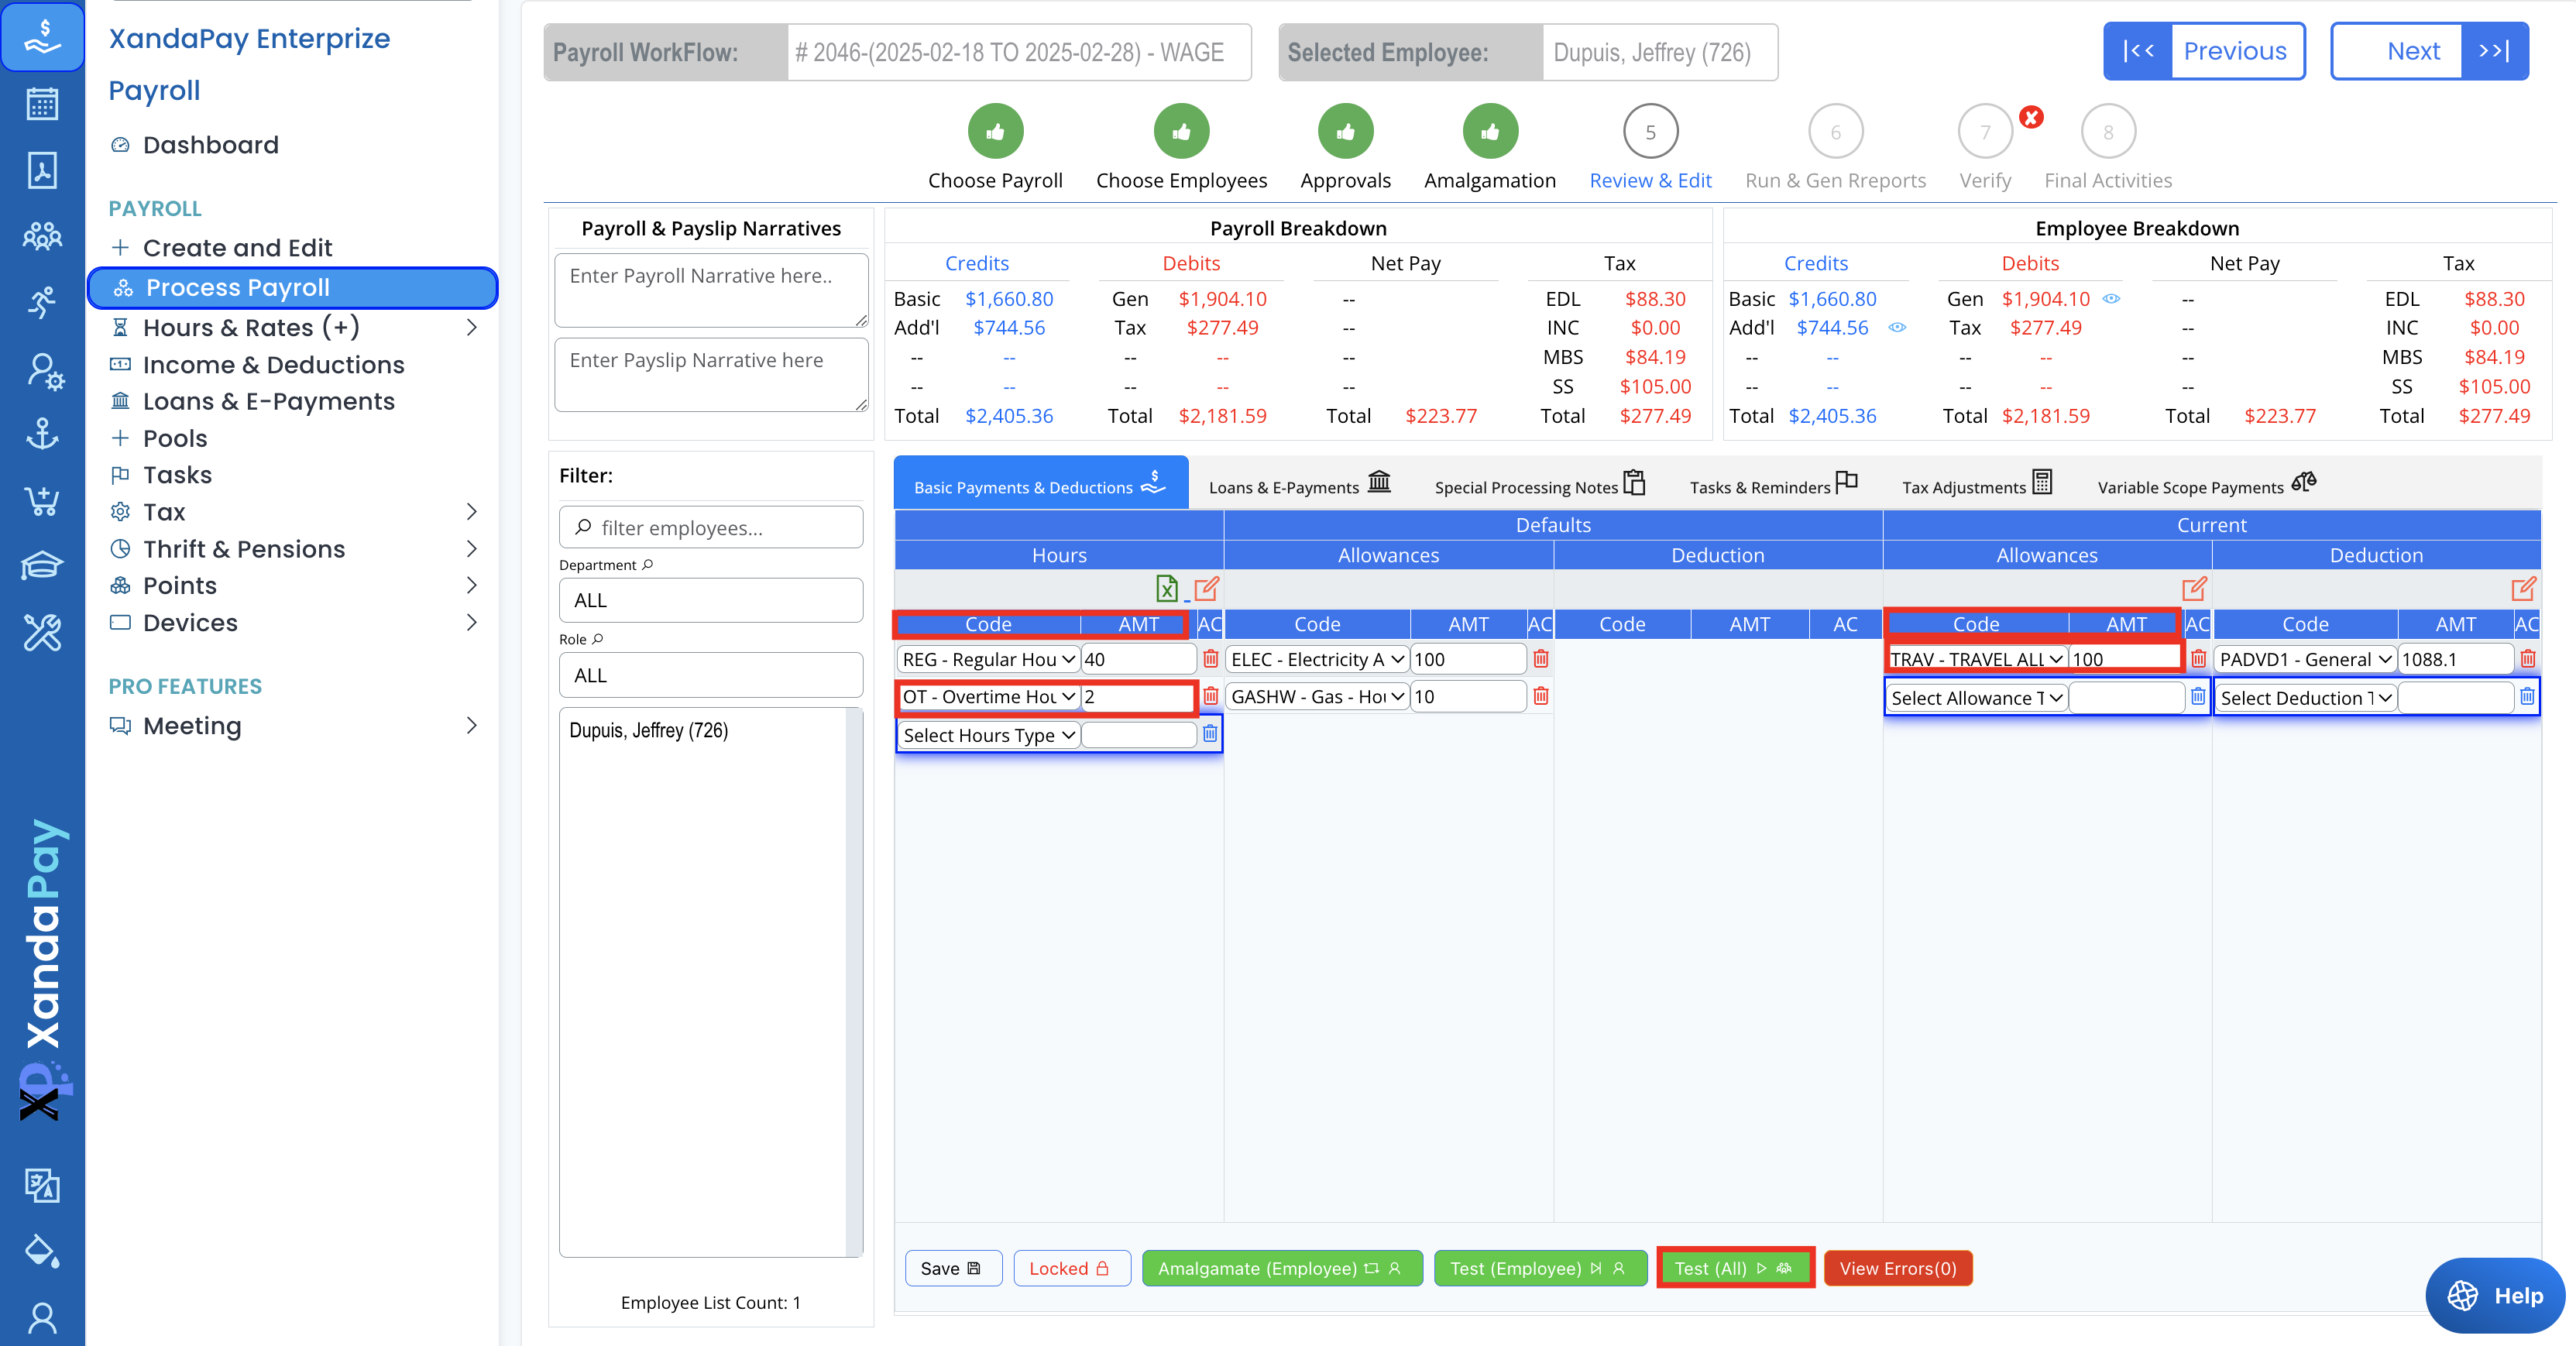
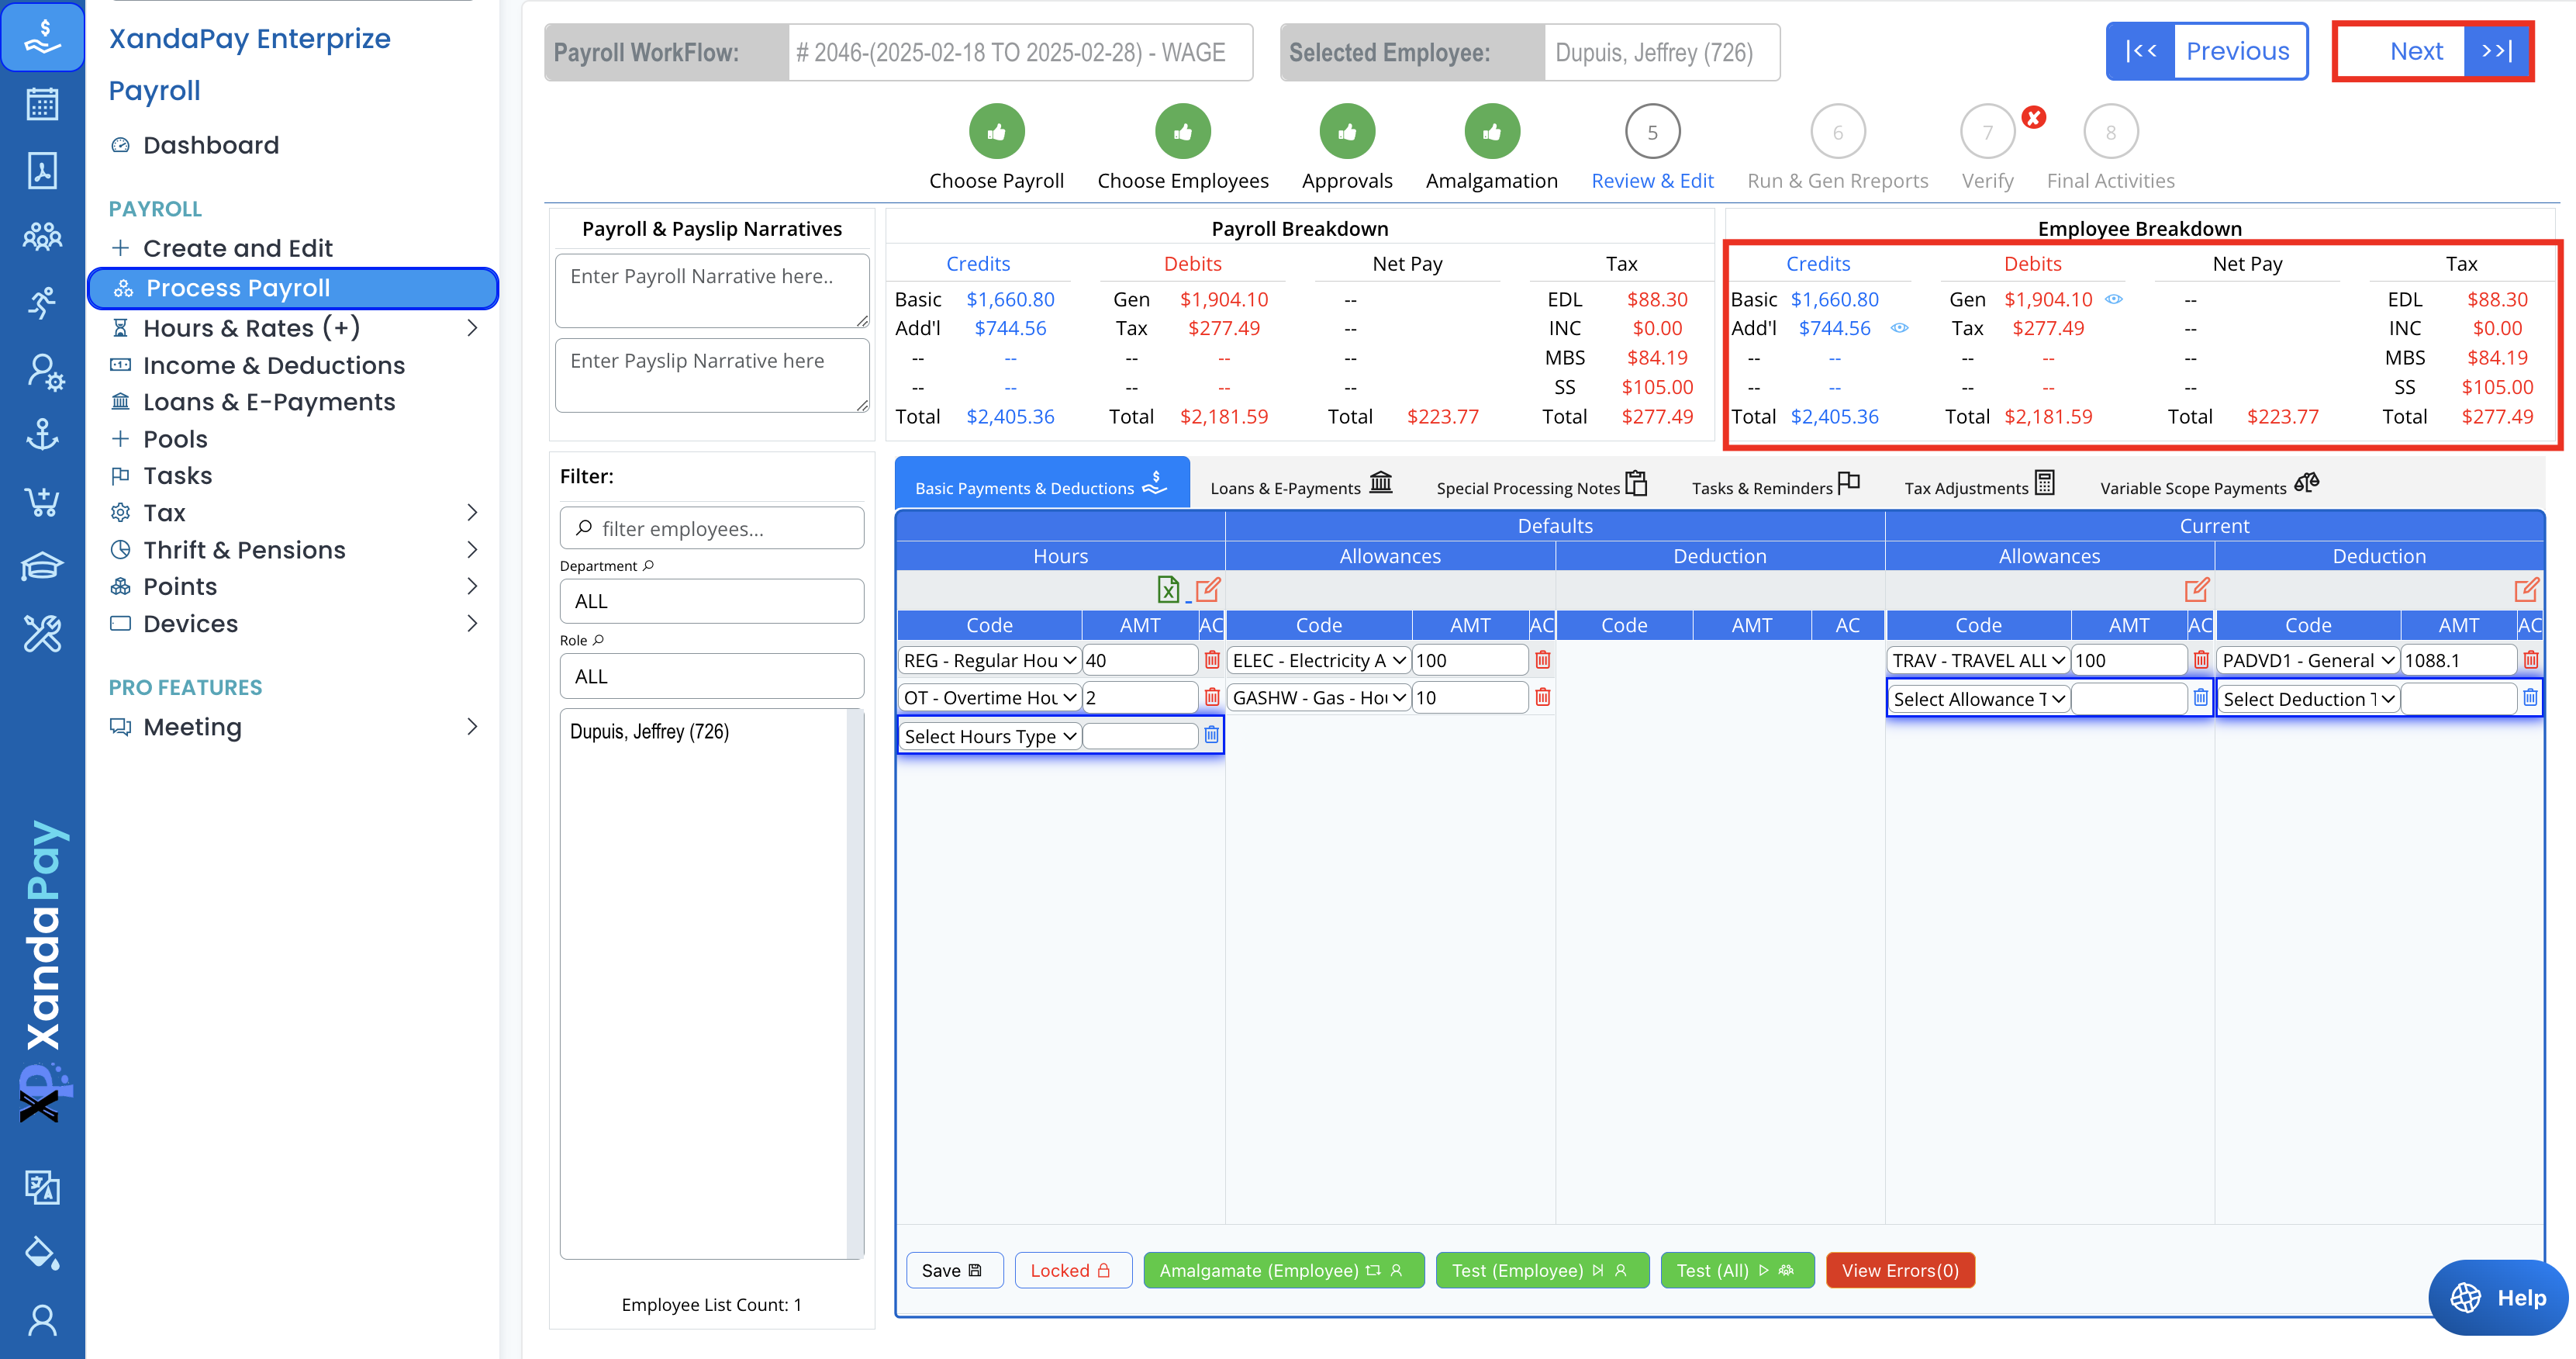
Step 5: Review & Edit Payroll
- This step provides a detailed payroll breakdown for each employee.
- Adjust any of the following as needed:
- Hours (Regular, Overtime, Vacation, Sick Leave)
- Allowances (Bonuses, shift allowances)
- Deductions (Loans, taxes)
- To modify, select the appropriate Code and enter the Amount (AMT).
- Use the Test (Employee) or Test (All Employees) button to recalculate payroll after making changes.
- Click Next once payroll data is accurate.
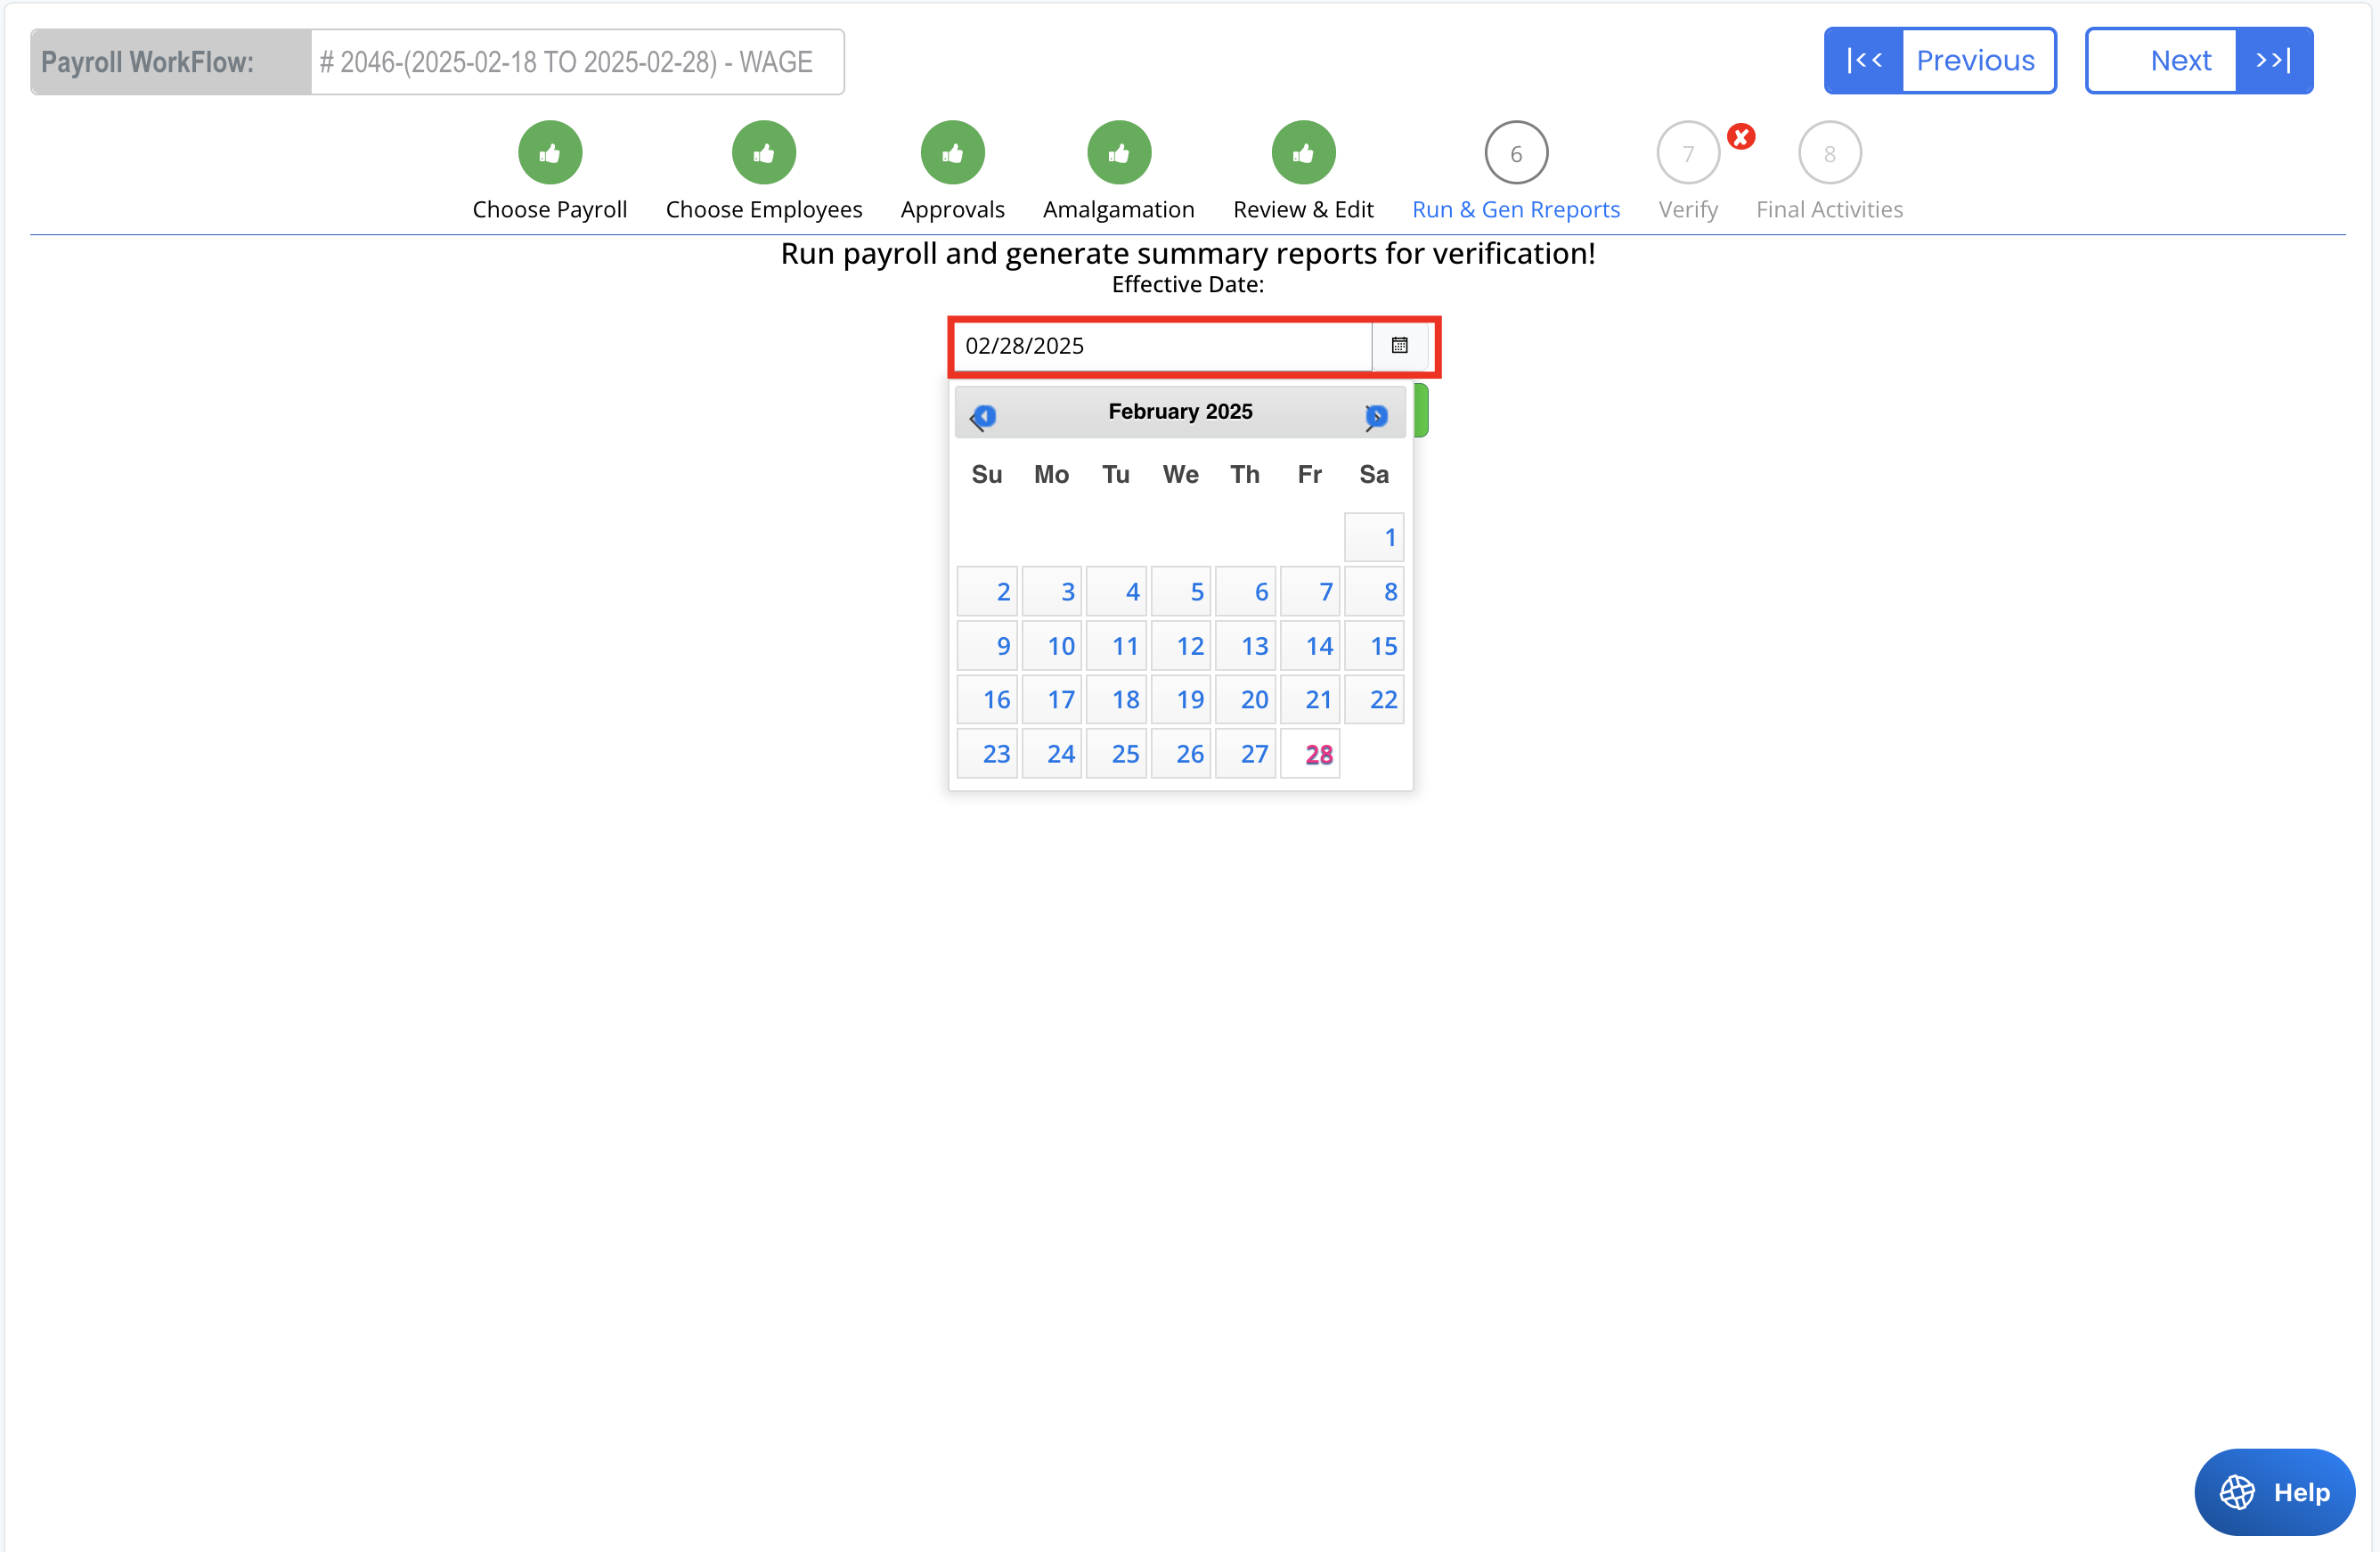
Step 6: Run & Generate Reports
- Set the Effective Date for the payroll.
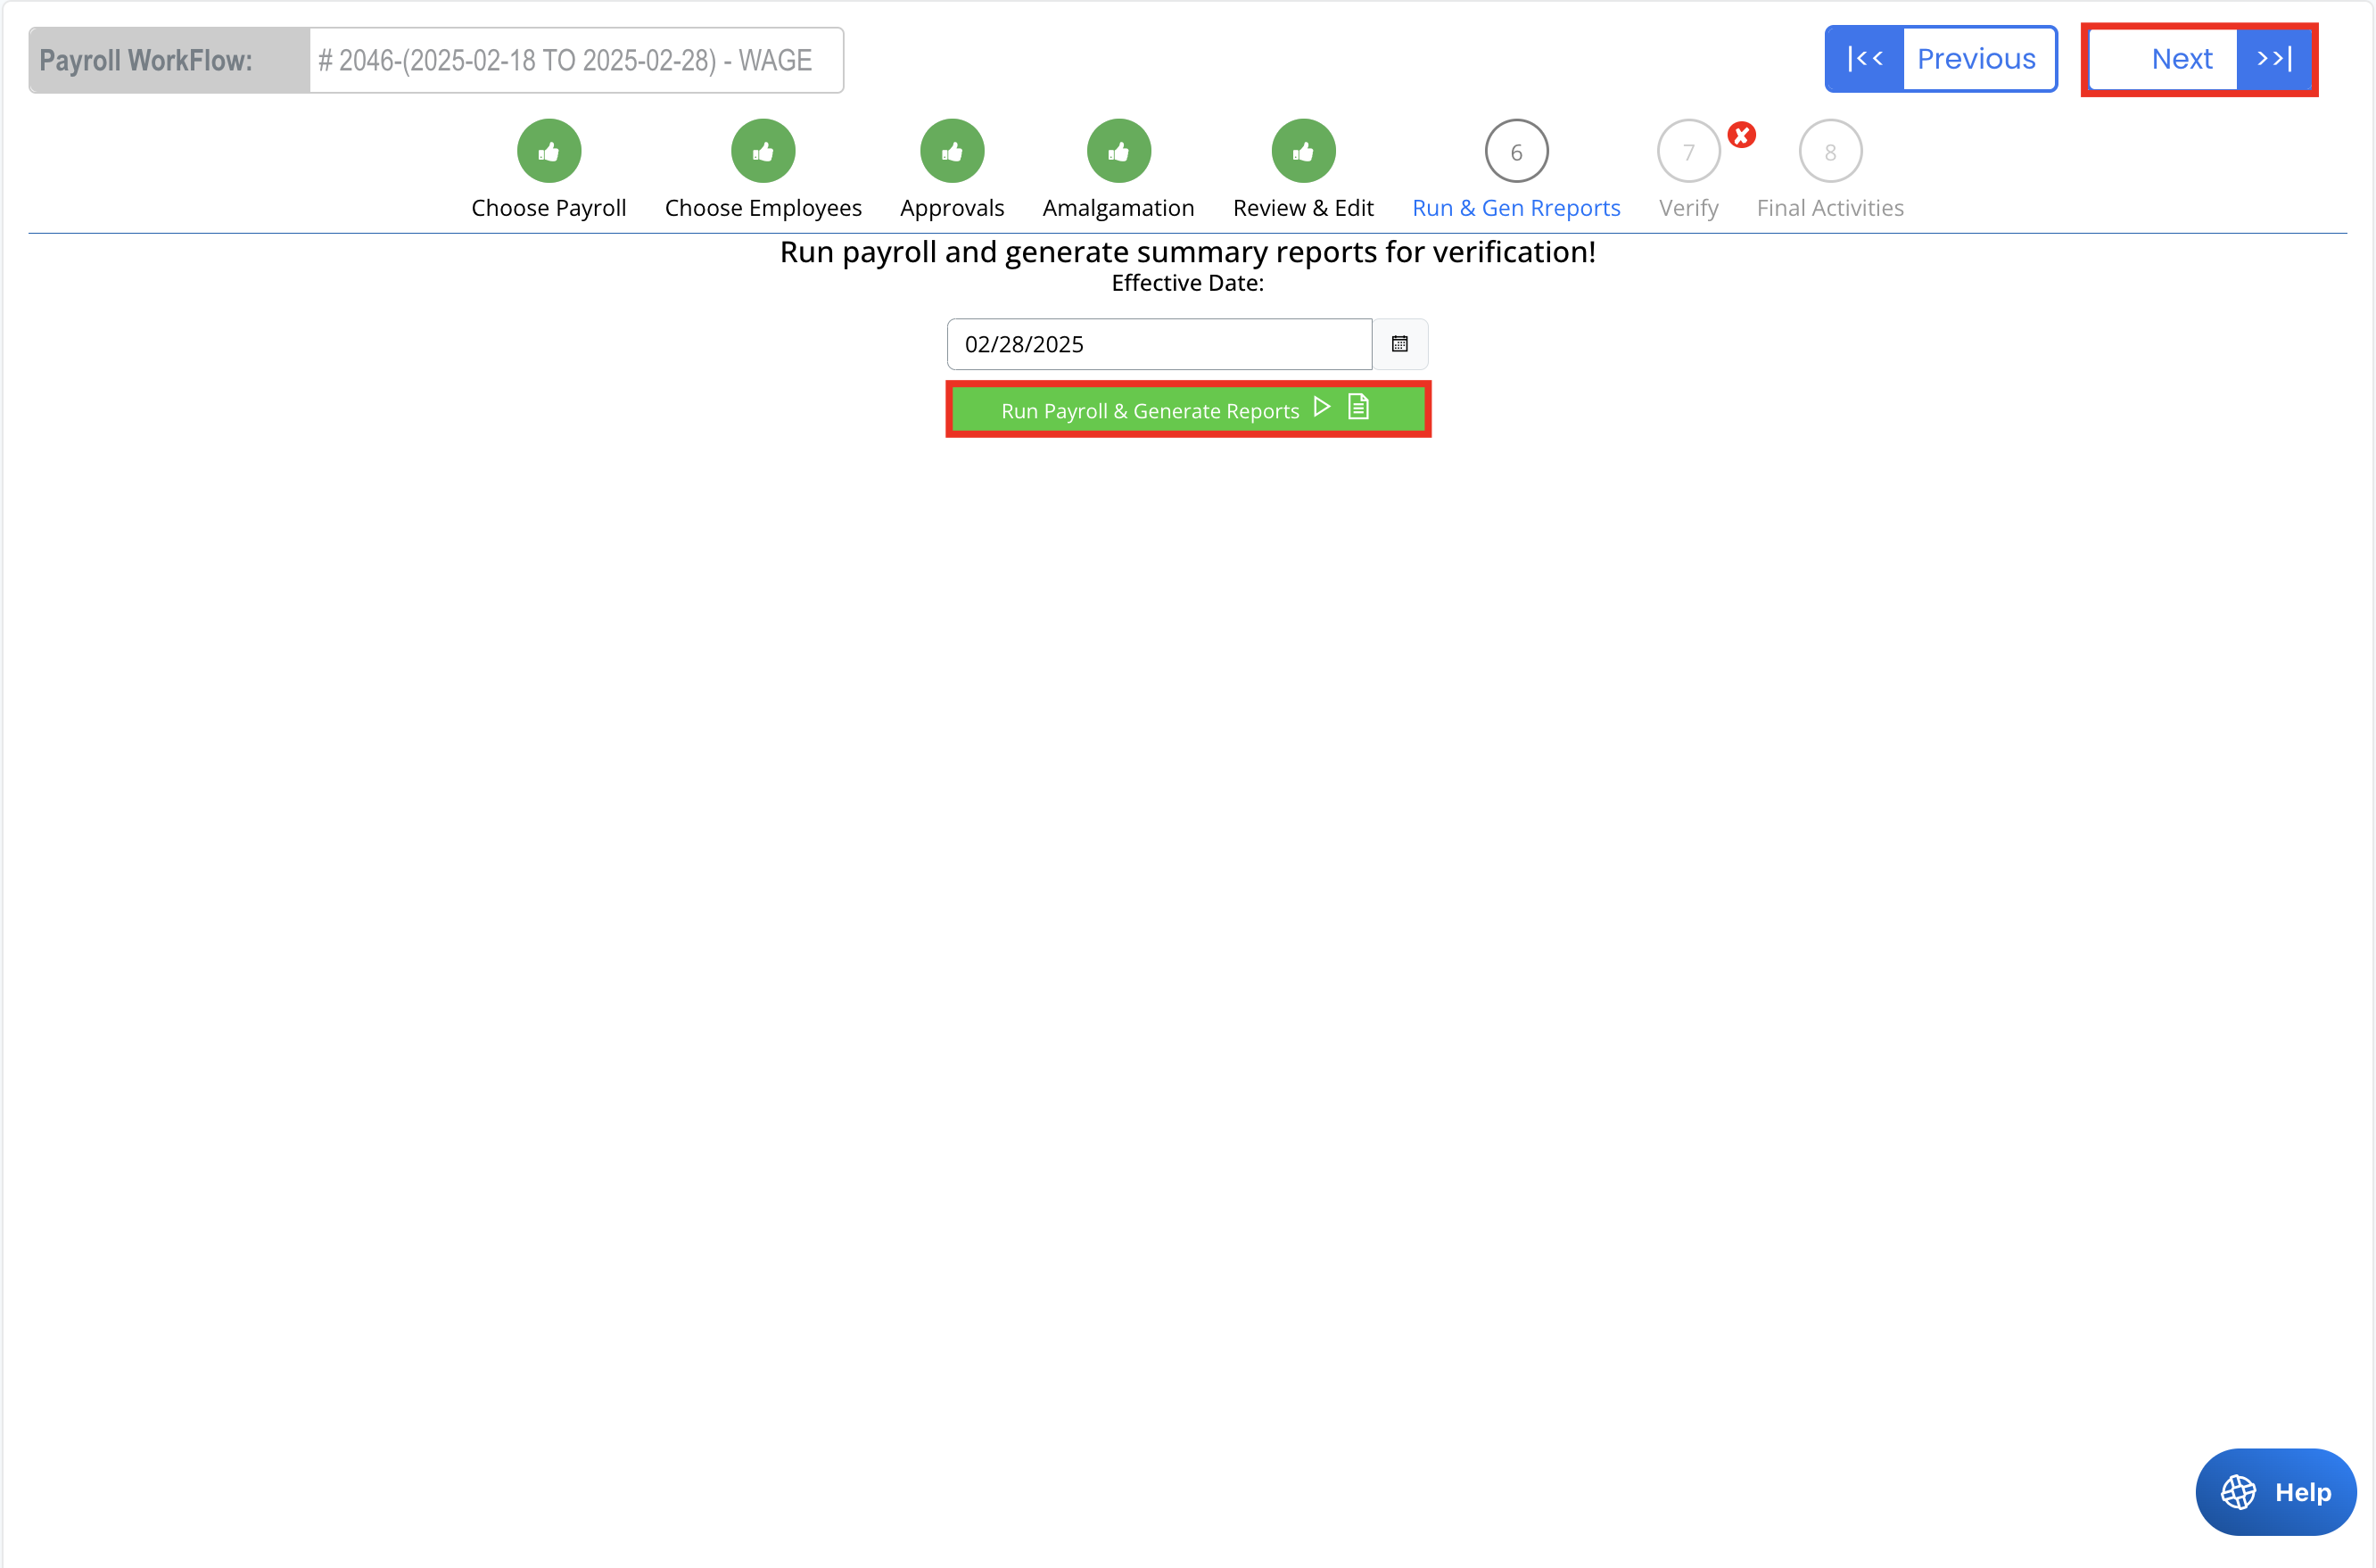
- Click Run Payroll & Generate Reports to process calculations.
- The system will generate various payroll reports, including:
- Payslips
- Bank payment reports
- Tax deductions
- Click Next once the reports are generated.
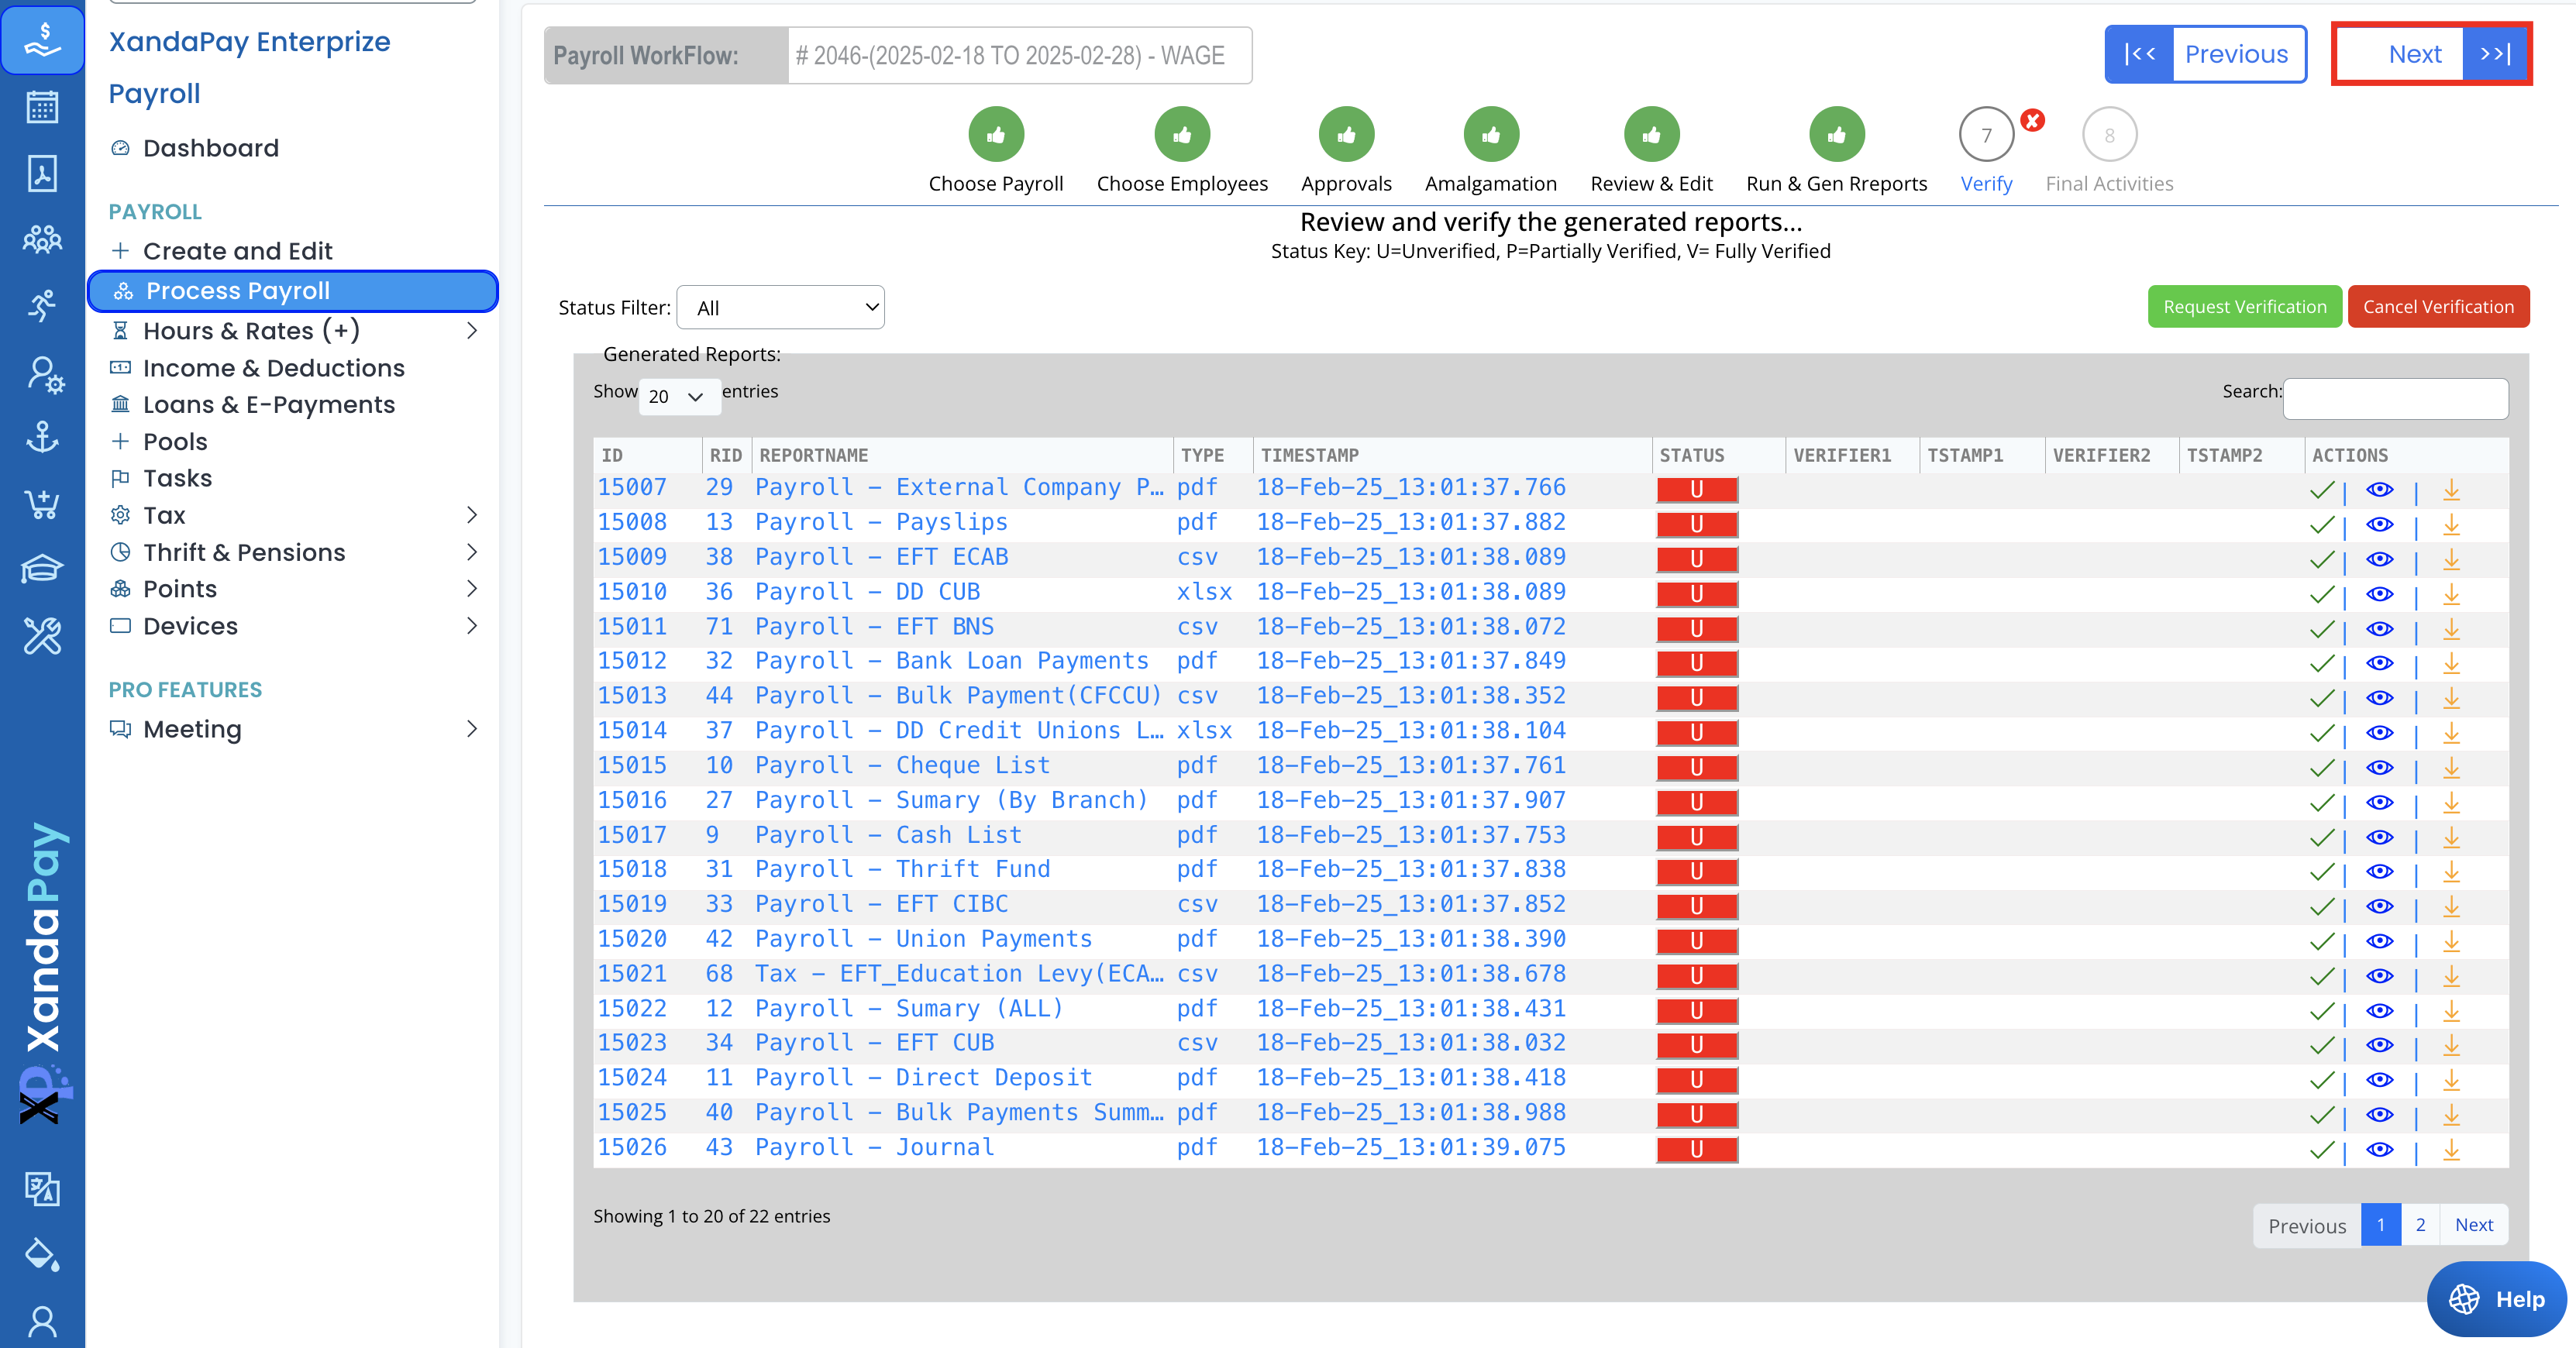
Step 7: Verify Payroll Reports
- Review all generated reports in the Verification screen.
- Check report status:
- U (Unverified) – Requires review
- P (Partially Verified) – Partially approved
- V (Verified) – Fully approved
- Click on the View (👁) icon or the Download (⬇️) icon to inspect individual reports.
- Click the Request Verification (if applicable) button when all reports are ready.
- Click Next after verification.
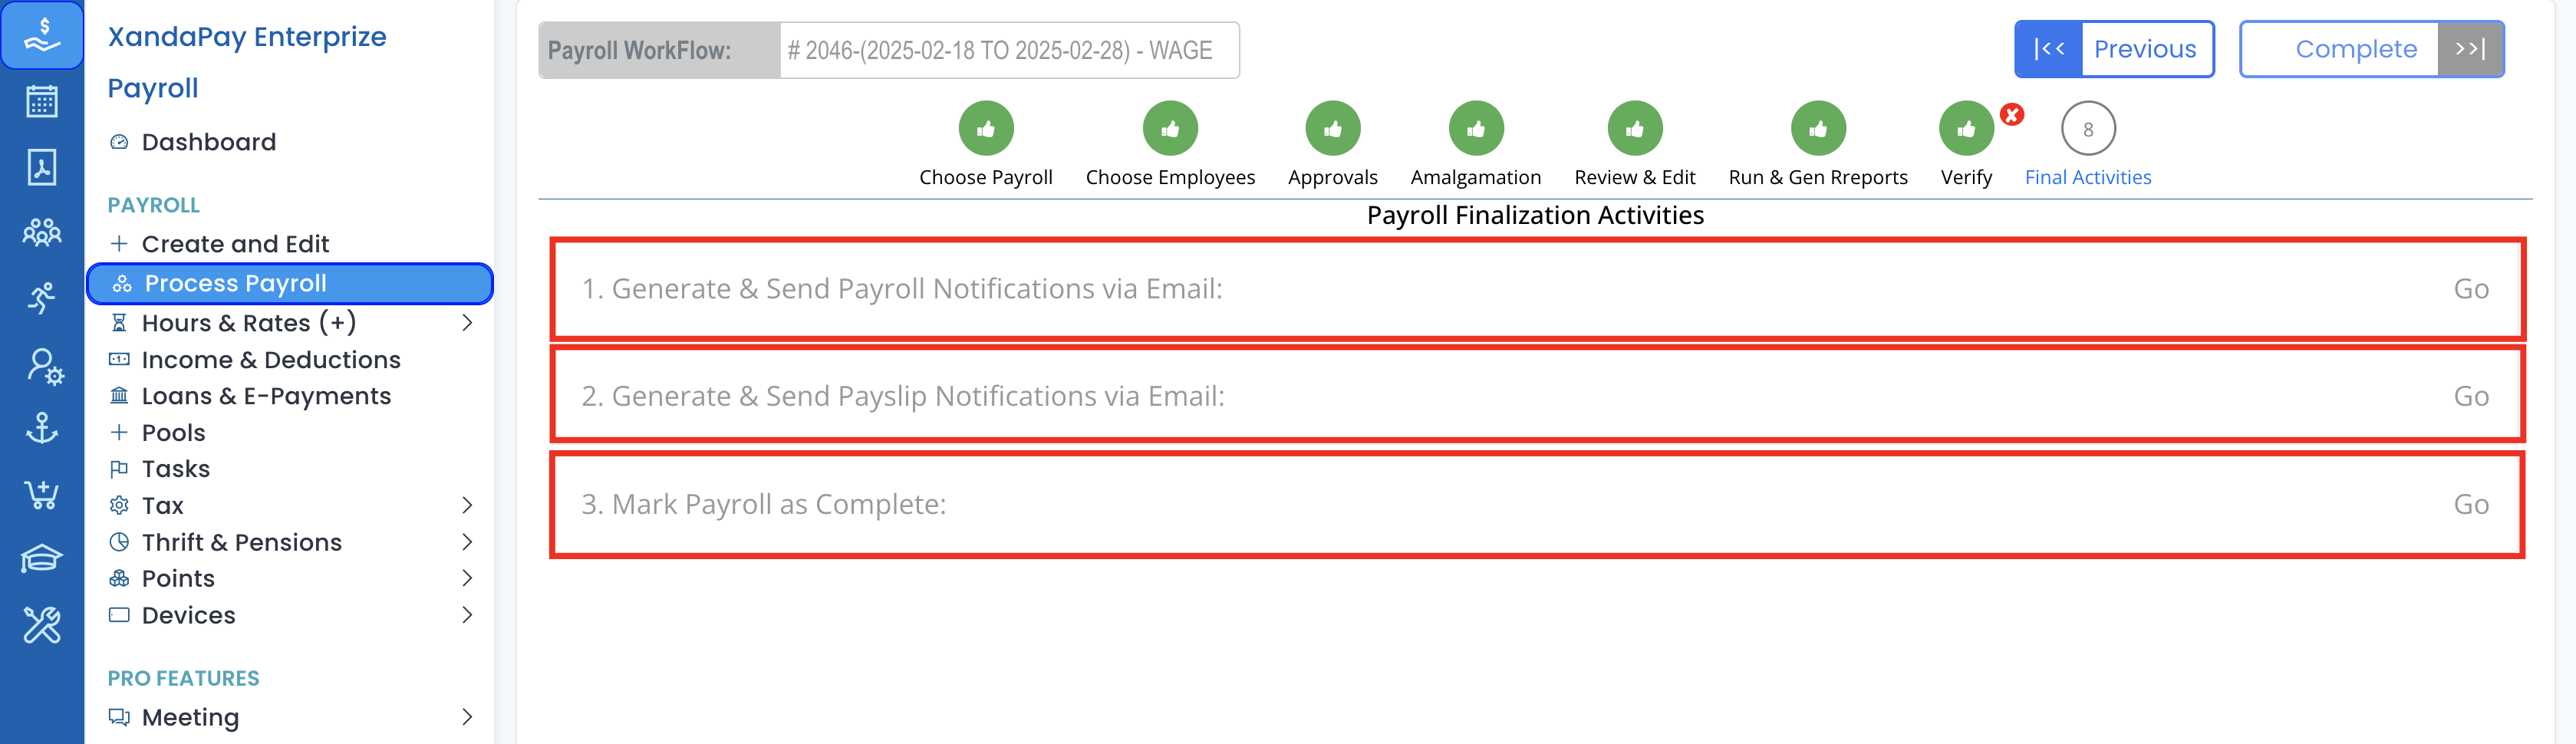
Step 8: Final Activities
- Complete the final payroll processing steps:
- Generate & Send Payroll Notifications via Email (Click Go)
- Generate & Send Payslip Notifications via Email (Click Go)
- Mark Payroll as Complete (Click Go)
- Click Complete to finalize the payroll.
Key Notes
✅ Ensure all pending approvals are resolved before proceeding.
✅ Double-check payroll calculations before running reports.
✅ All reports must be verified before payroll is finalized.
With these steps completed, payroll processing in XandaPay is successfully finalized! 🚀