
How to Add Employee to User Defined Group
The User Defined Groups (UDG) feature in XandaPay allows you to categorize employees into custom groups based on business needs. This can be used for payroll processing, scheduling, reporting, and other organizational purposes.
Step 1: Navigate to the UDG Tab
- Log in to your XandaPay portal.
- Open the Employees module.
- Select the employee for whom you want to manage UDGs.
- Click on the UDG tab at the top.
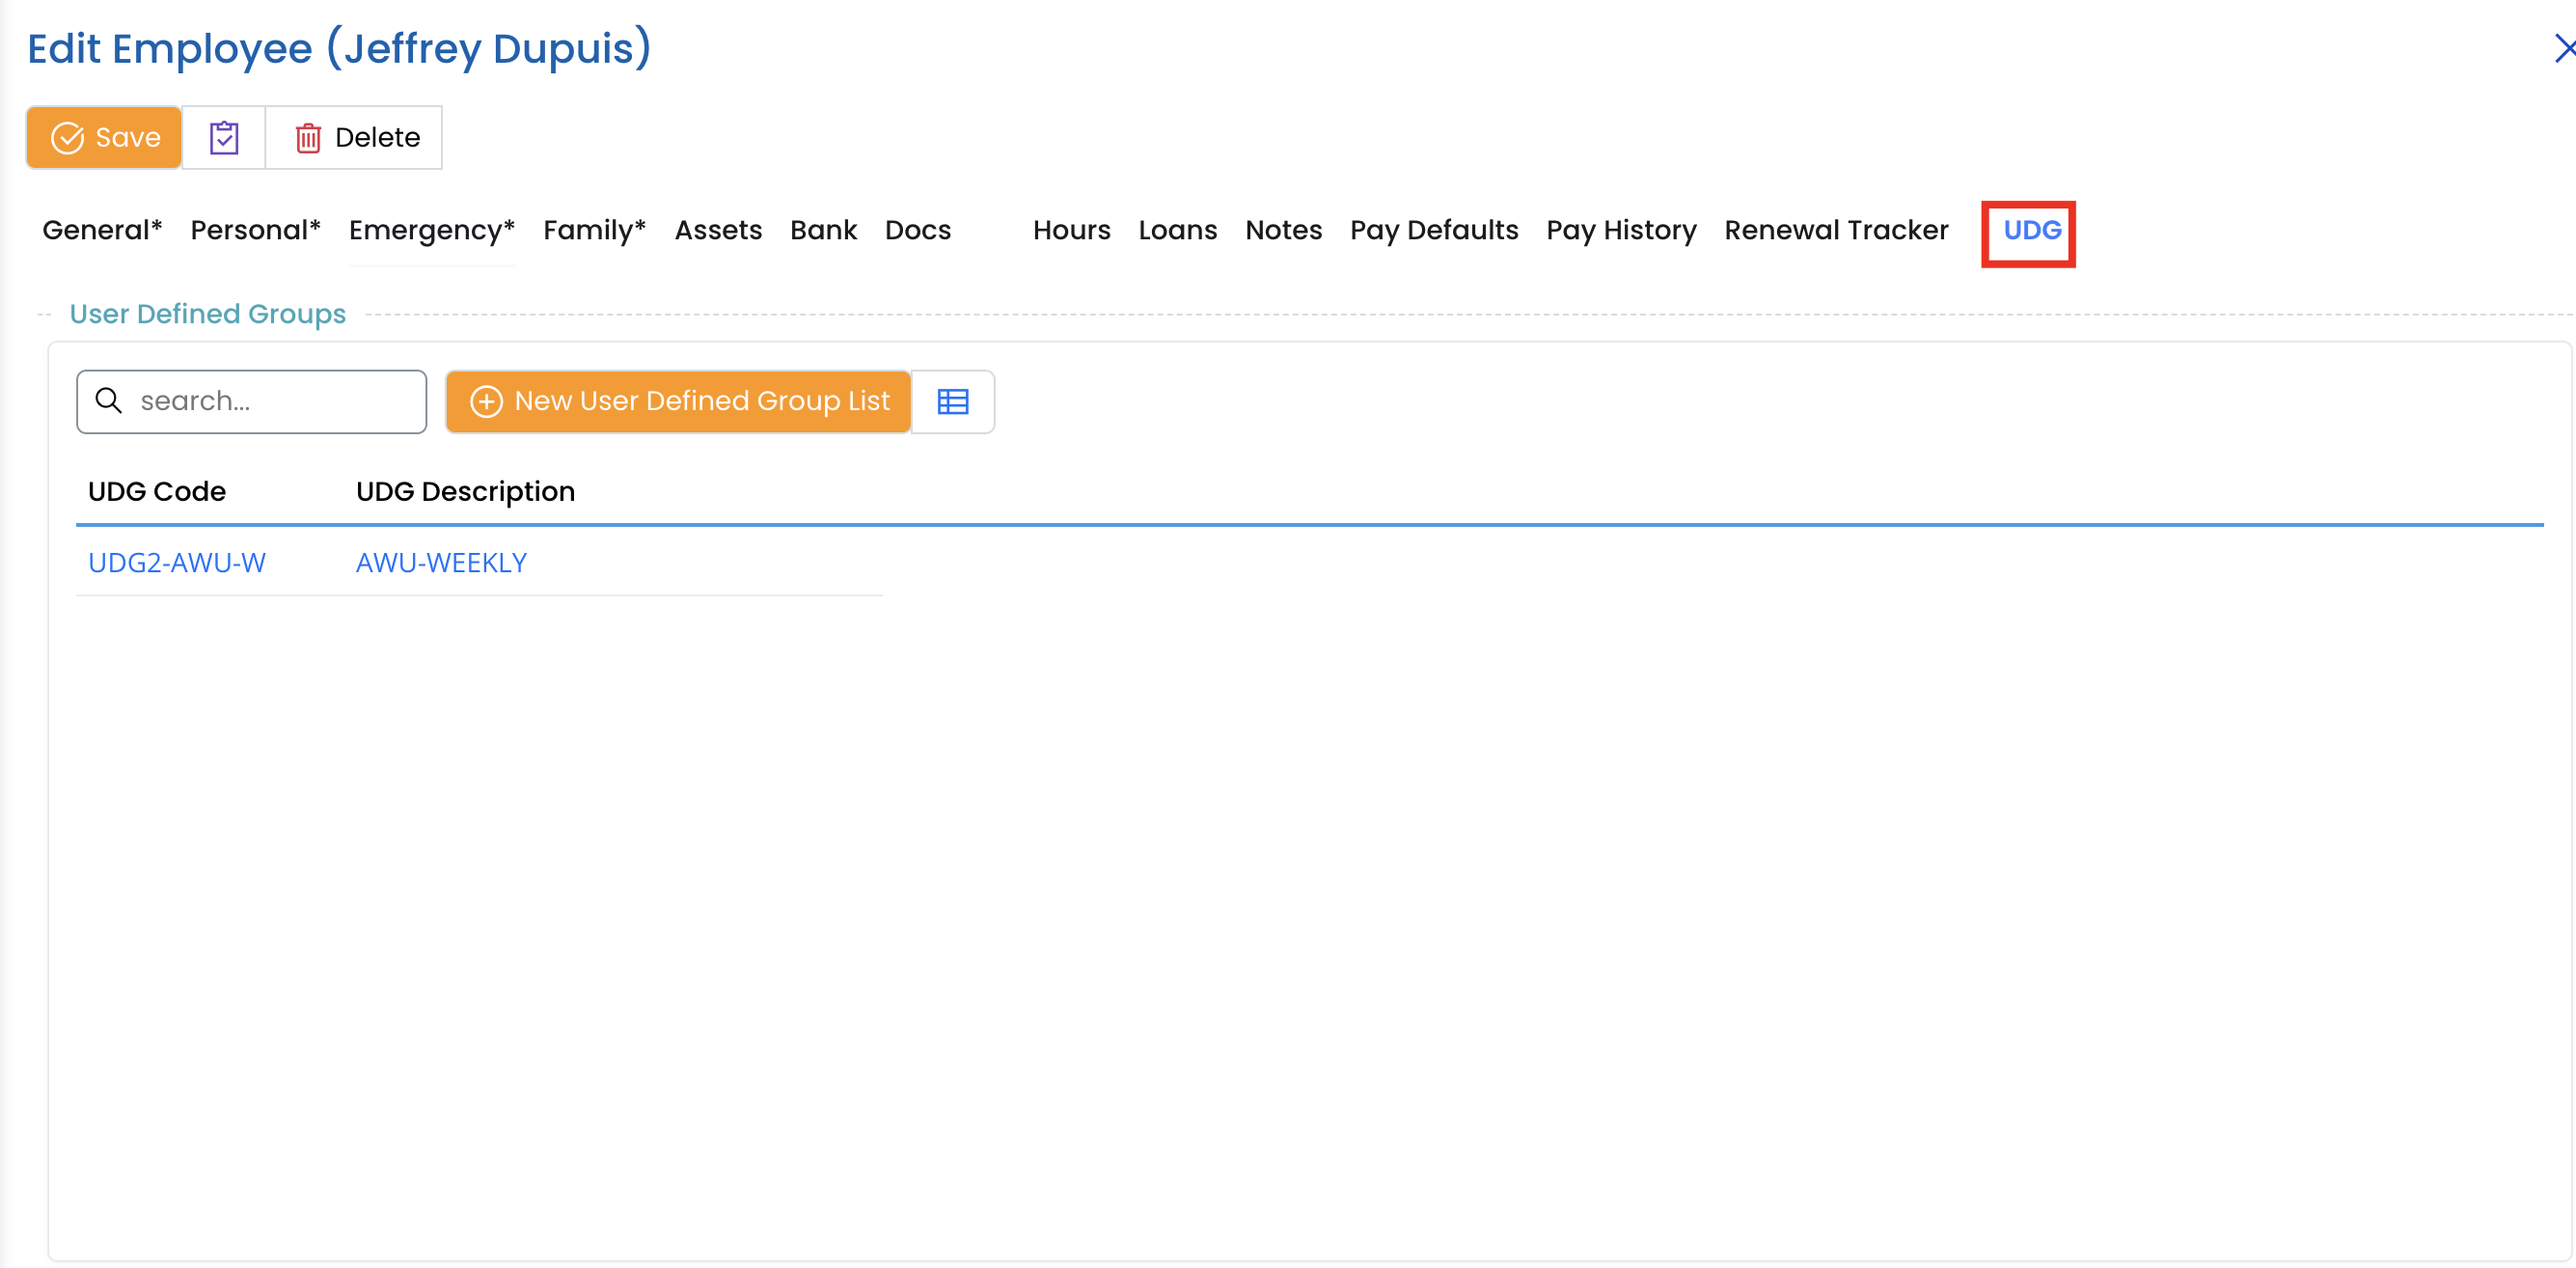
Step 2: Understanding the UDG Table
The User Defined Groups table consists of:
- UDG Code: A unique identifier for the user-defined group.
- UDG Description: The name or description of the group (e.g., "AWU-WEEKLY").
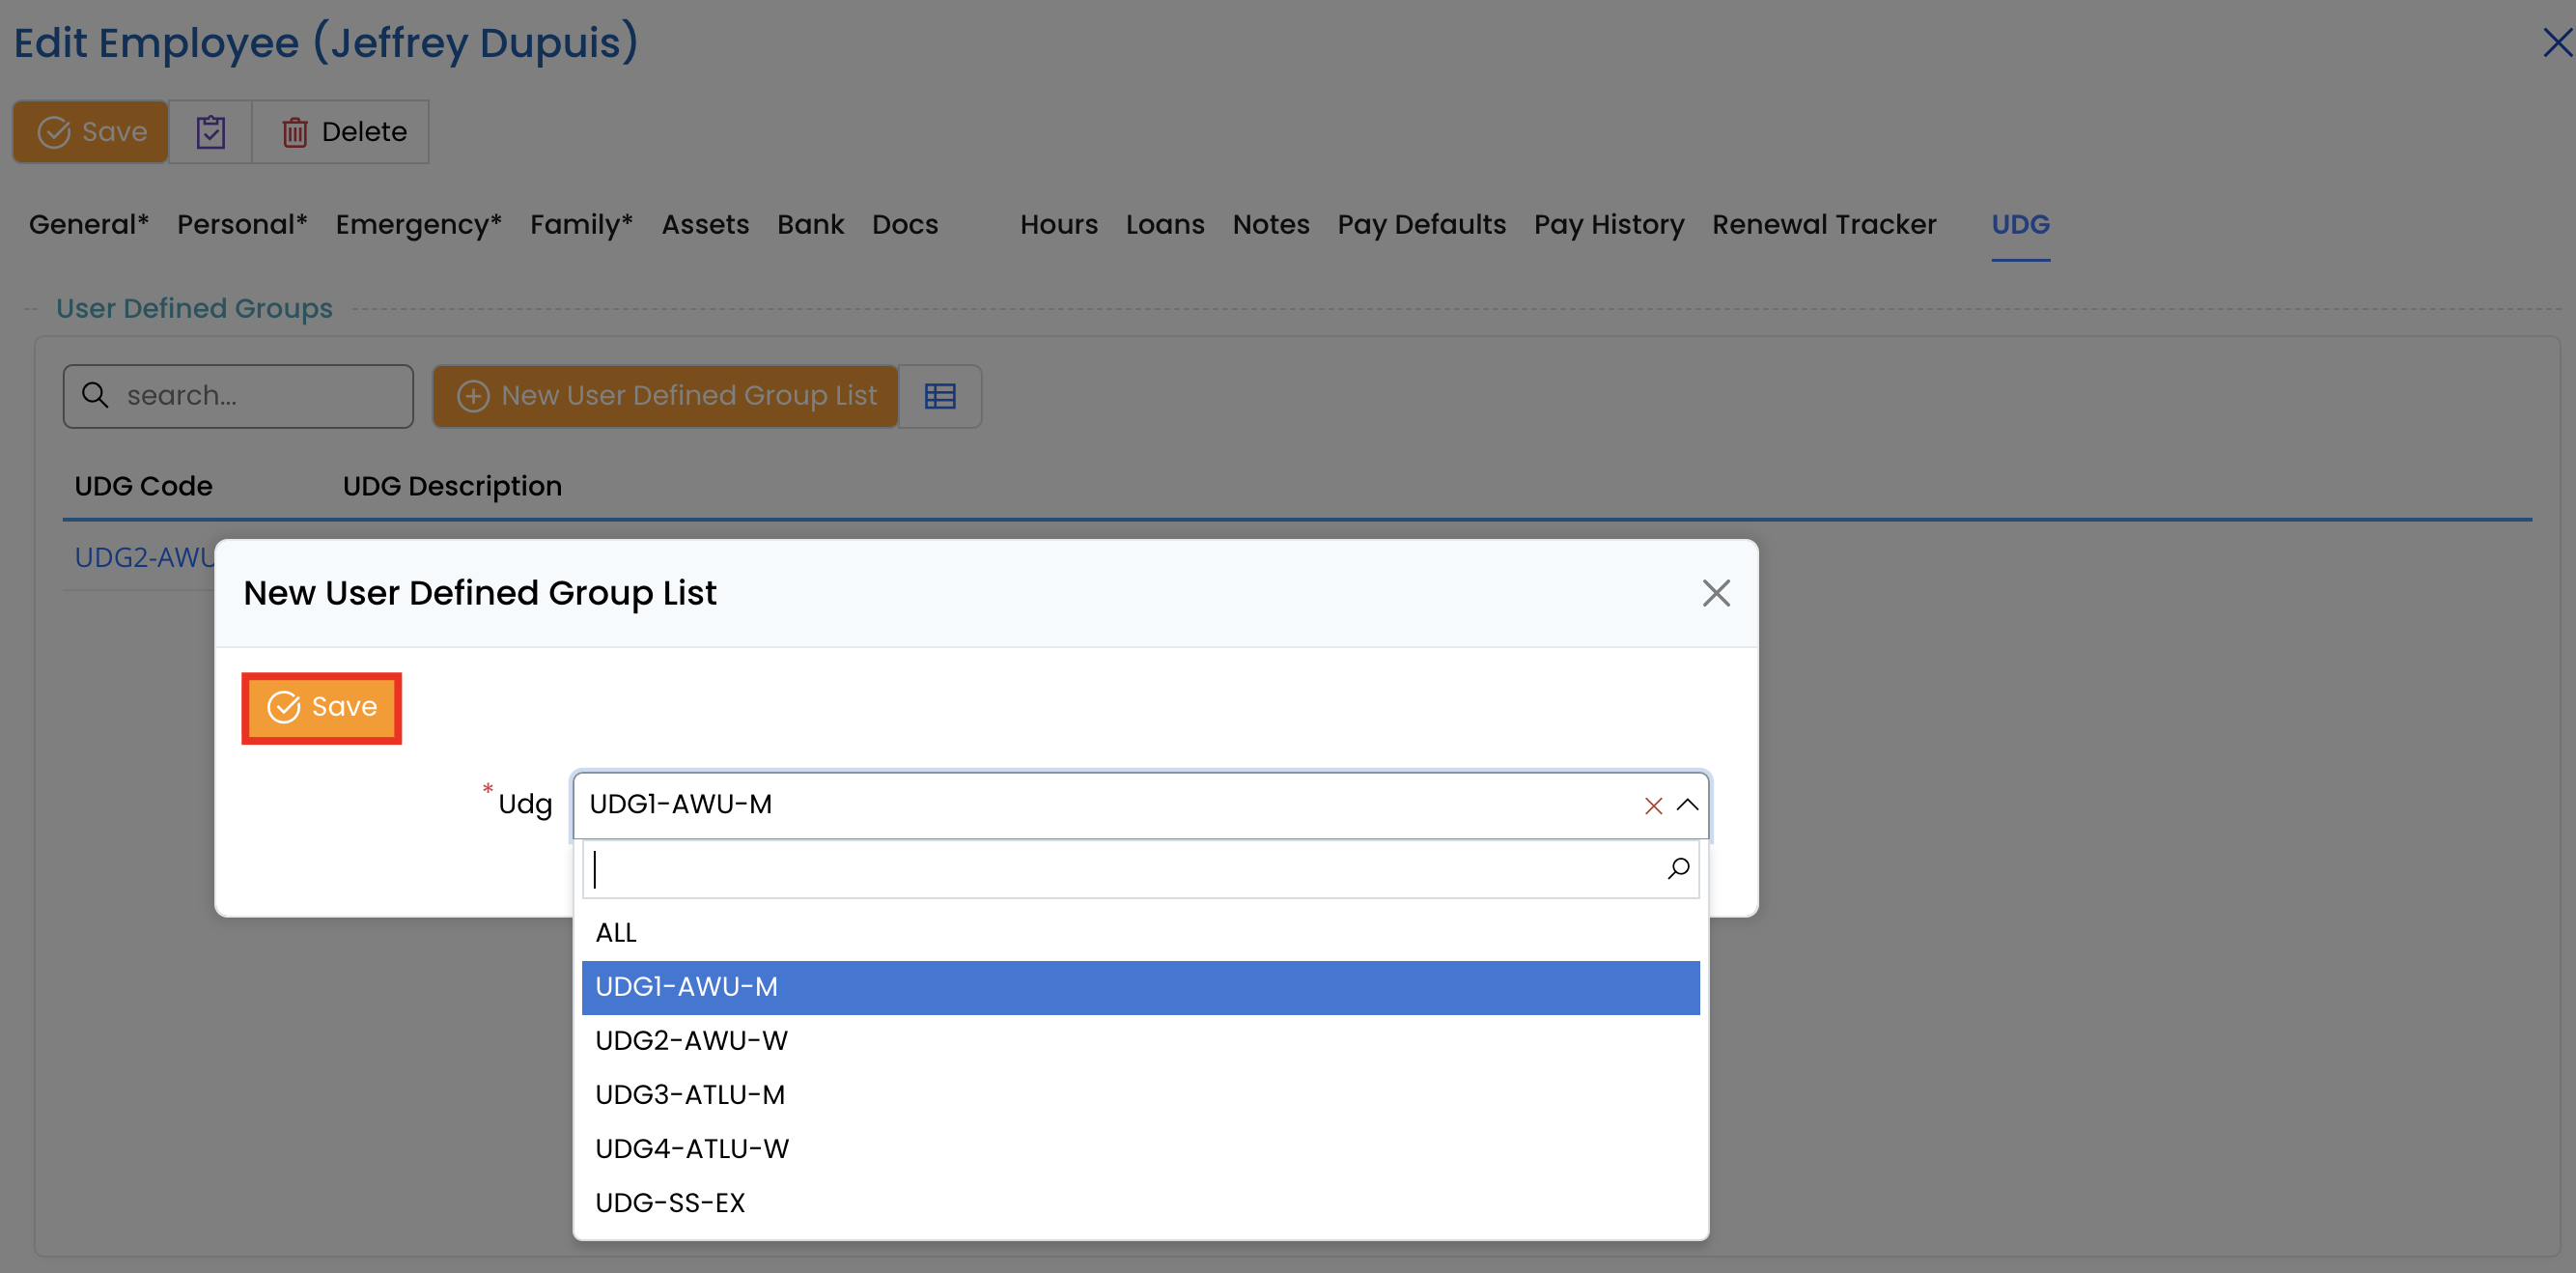
Step 3: Adding a New User Defined Group
Click the New User Defined Group List button.

- Select or enter the relevant UDG Code and UDG Description based on company needs.
- Click Save to add the group.
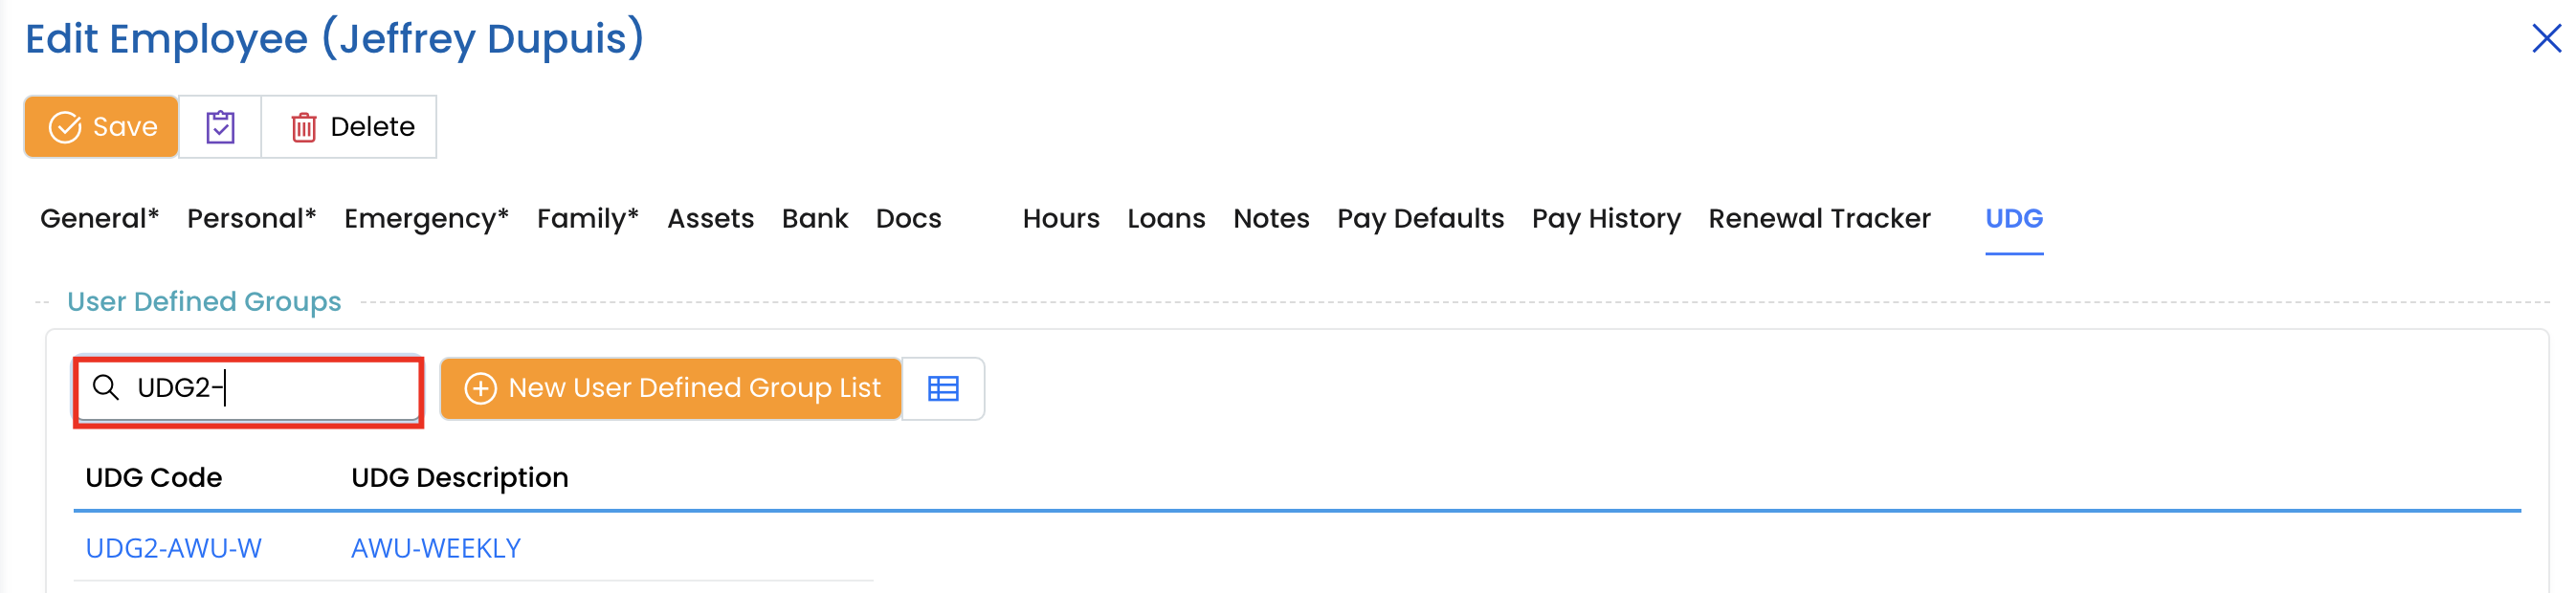
Step 4: Searching and Filtering UDG Records
- Use the Search bar to quickly find a UDG by entering part of its code or description.
Step 5: Managing User Defined Groups
- Employees can belong to multiple UDGs depending on the organization’s classification system.
- UDGs can be used for filtering reports, custom payroll processing etc...
- Keep UDGs updated to ensure employees are categorized correctly.
Additional Notes
- UDGs are customizable and can be structured based on departments, role or any other criteria that fit company operations.
- Ensure that UDG descriptions are clear and consistent across employees for easy identification.