
How to Add Documents
The Docs tab in XandaPay allows HR to store and manage employee-related documents. Keeping track of documents ensures proper record-keeping, compliance, and easy retrieval when necessary.
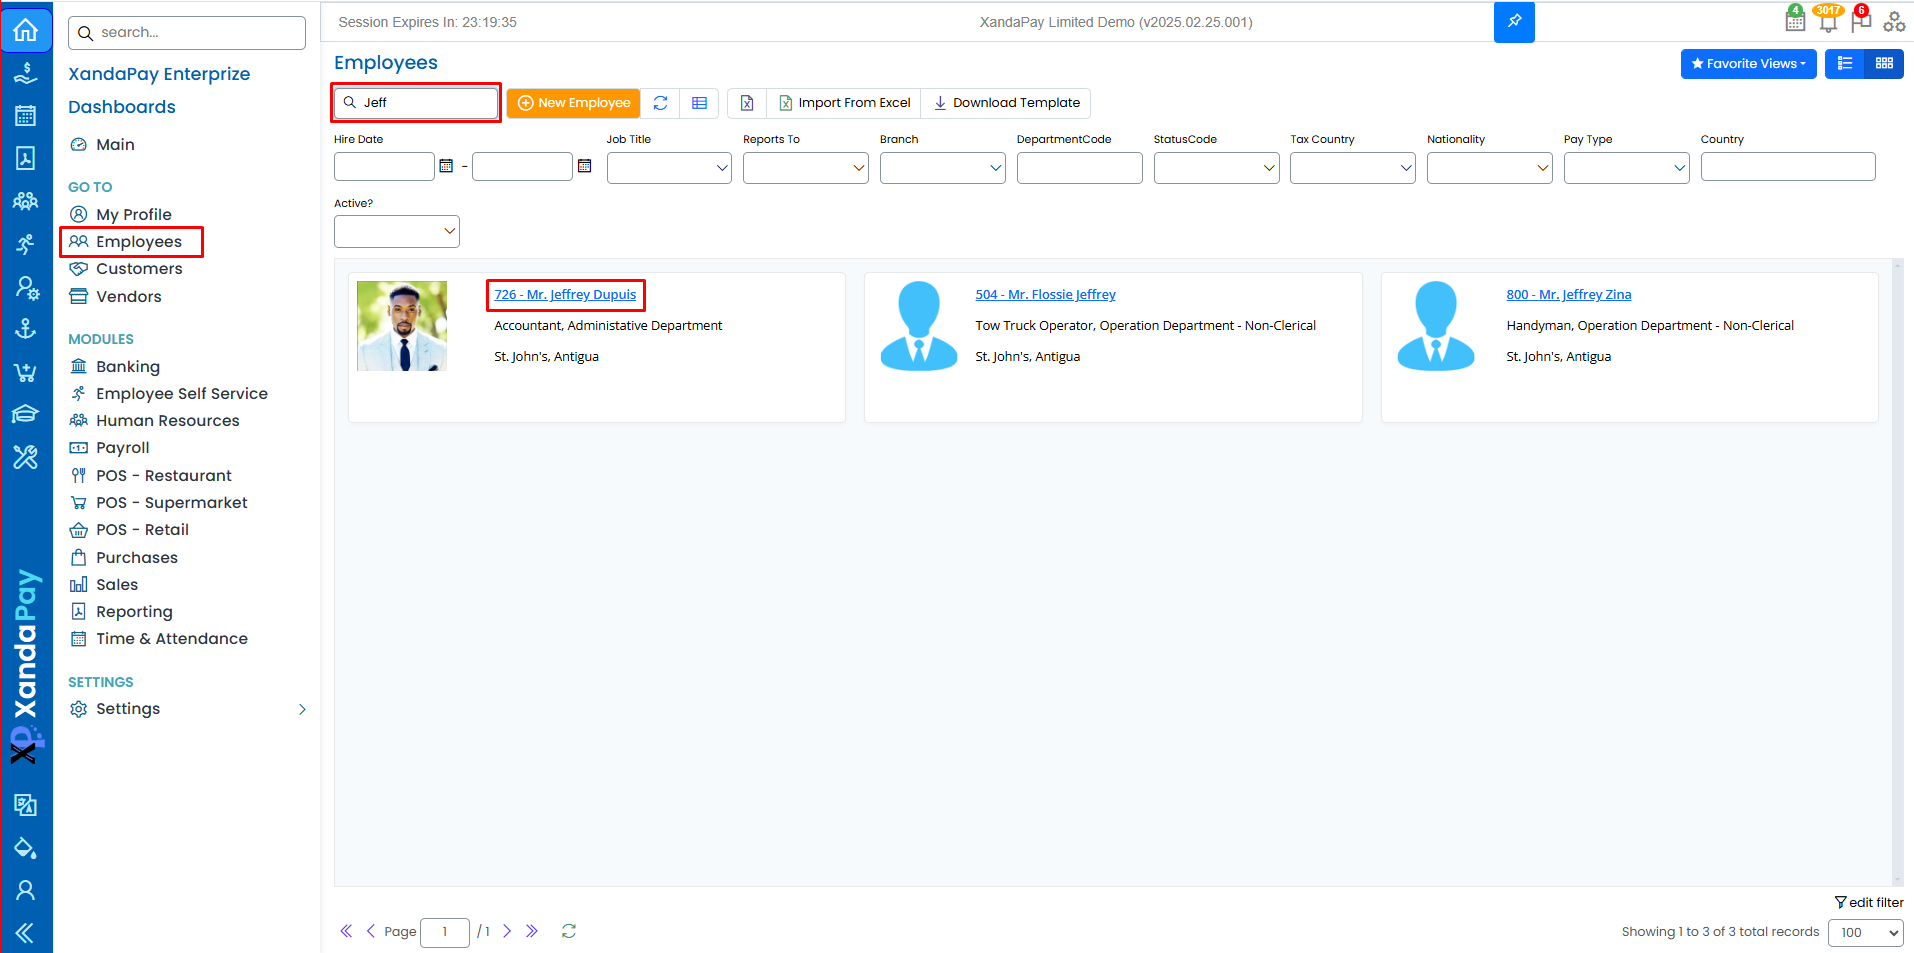
Step 1: Navigate to the Docs Tab
- Log in to your XandaPay portal.
- Open the Employees module.
- Select the employee whose documents you want to manage or add a New Employee.
- Click on the Docs tab at the top.
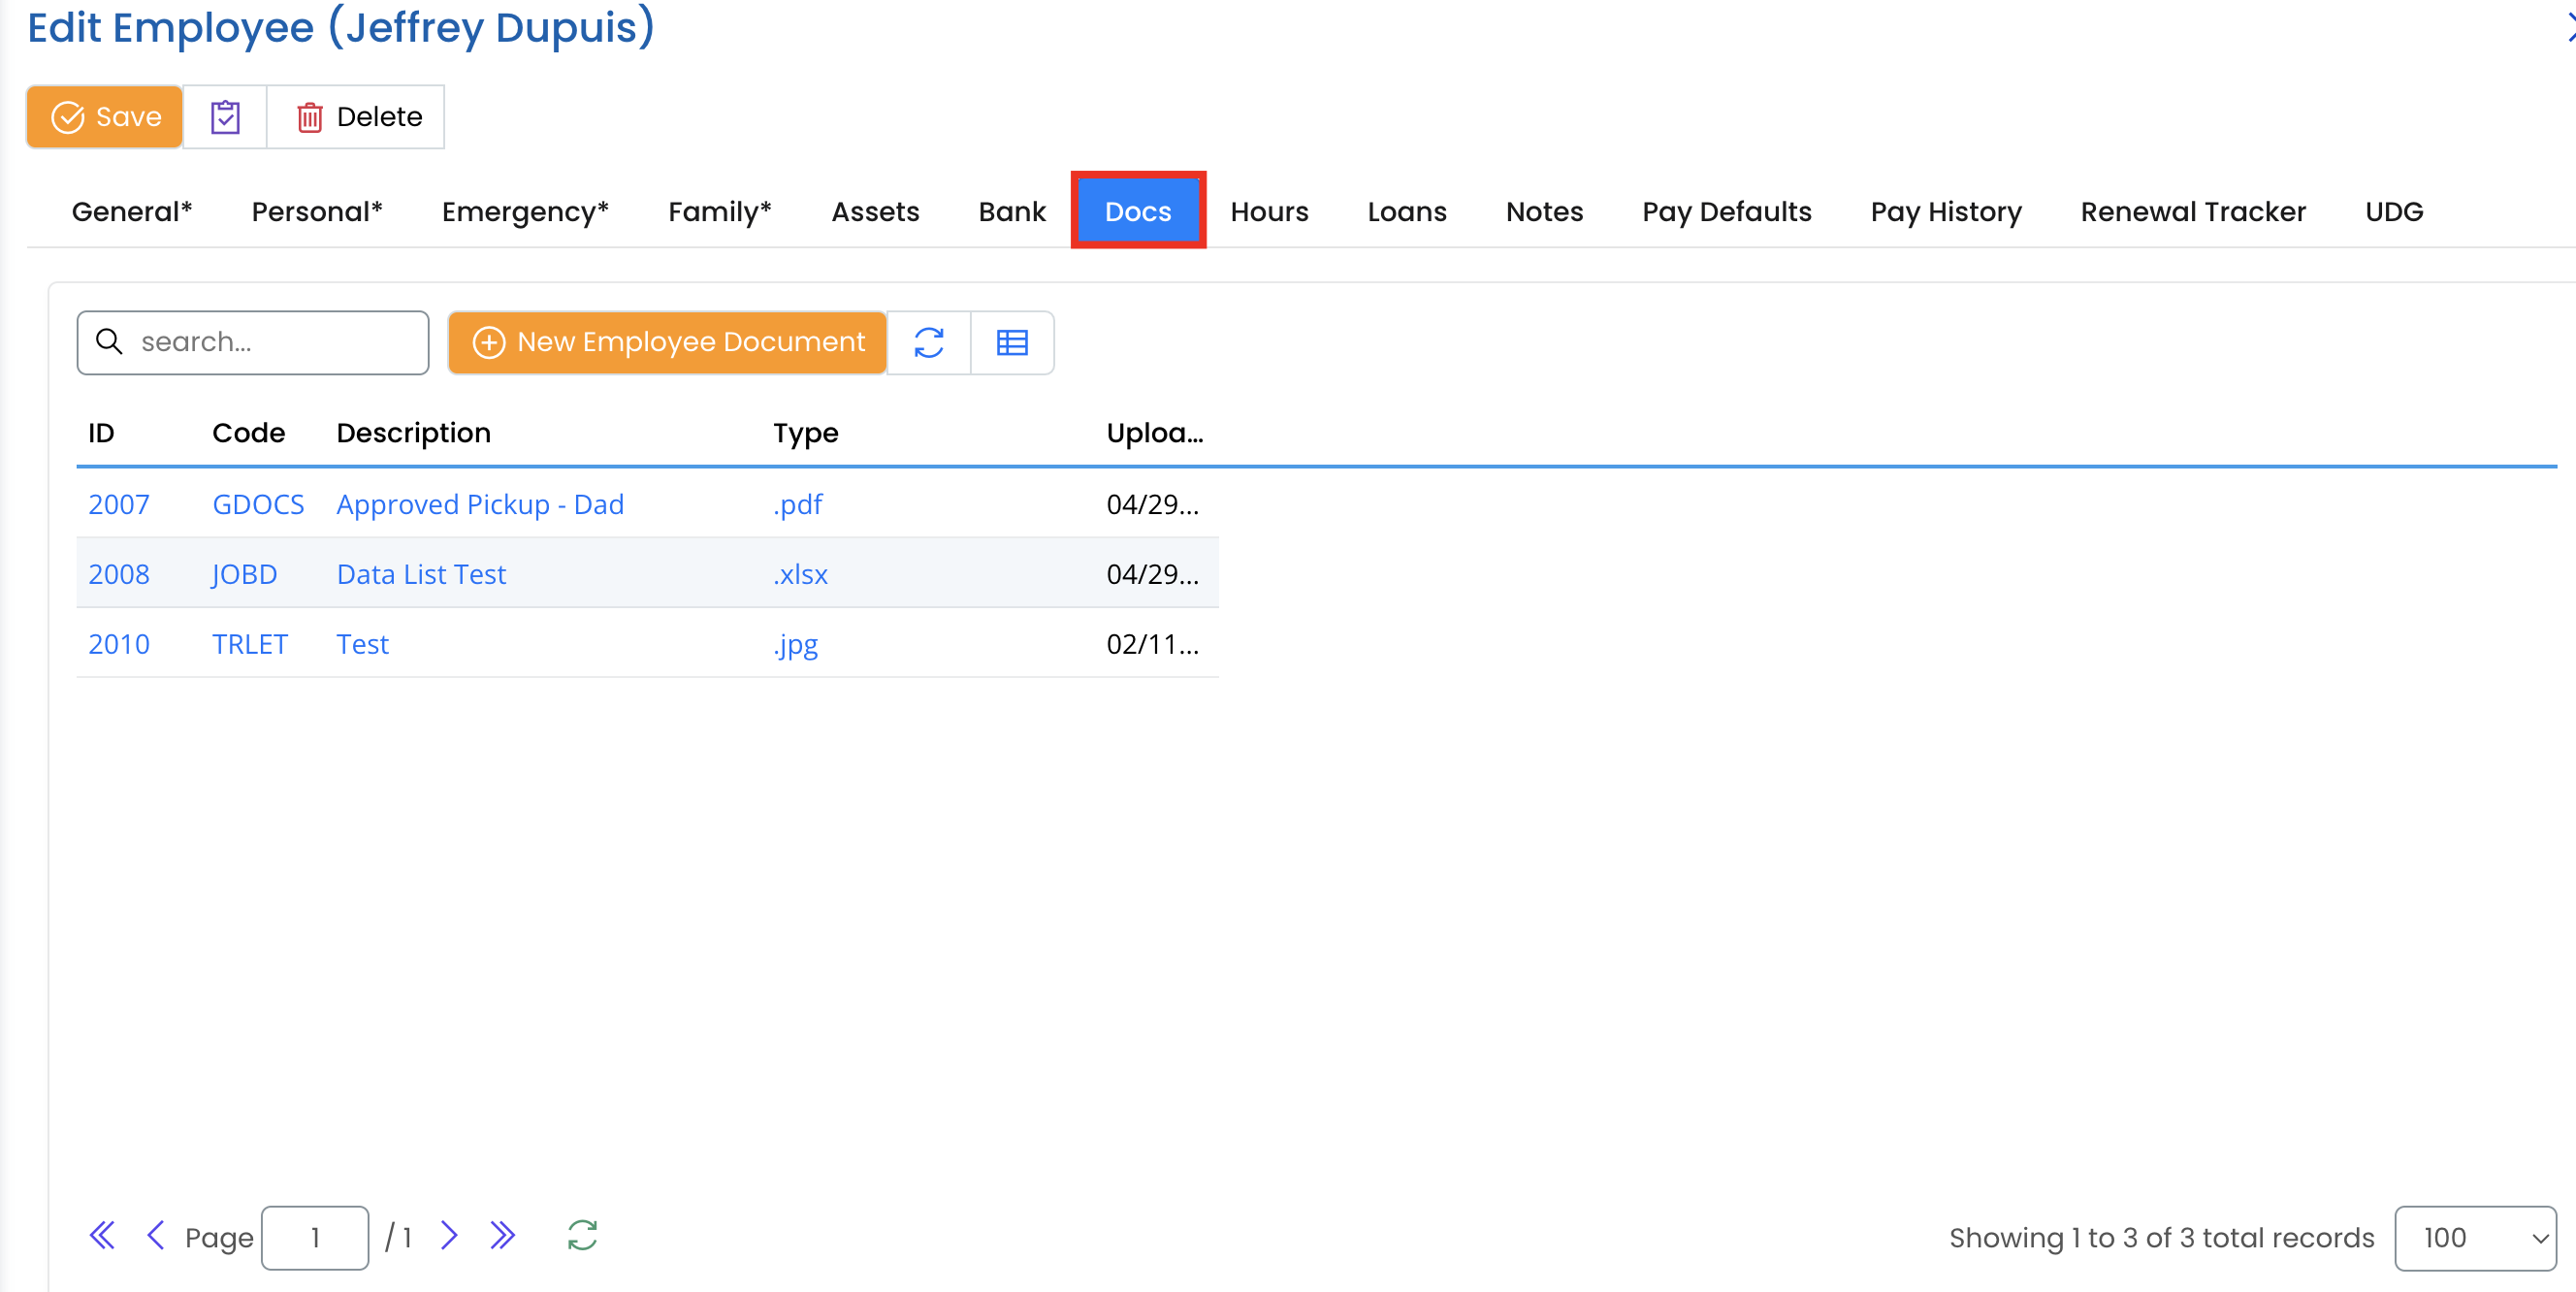 Step 2: Add a New Document
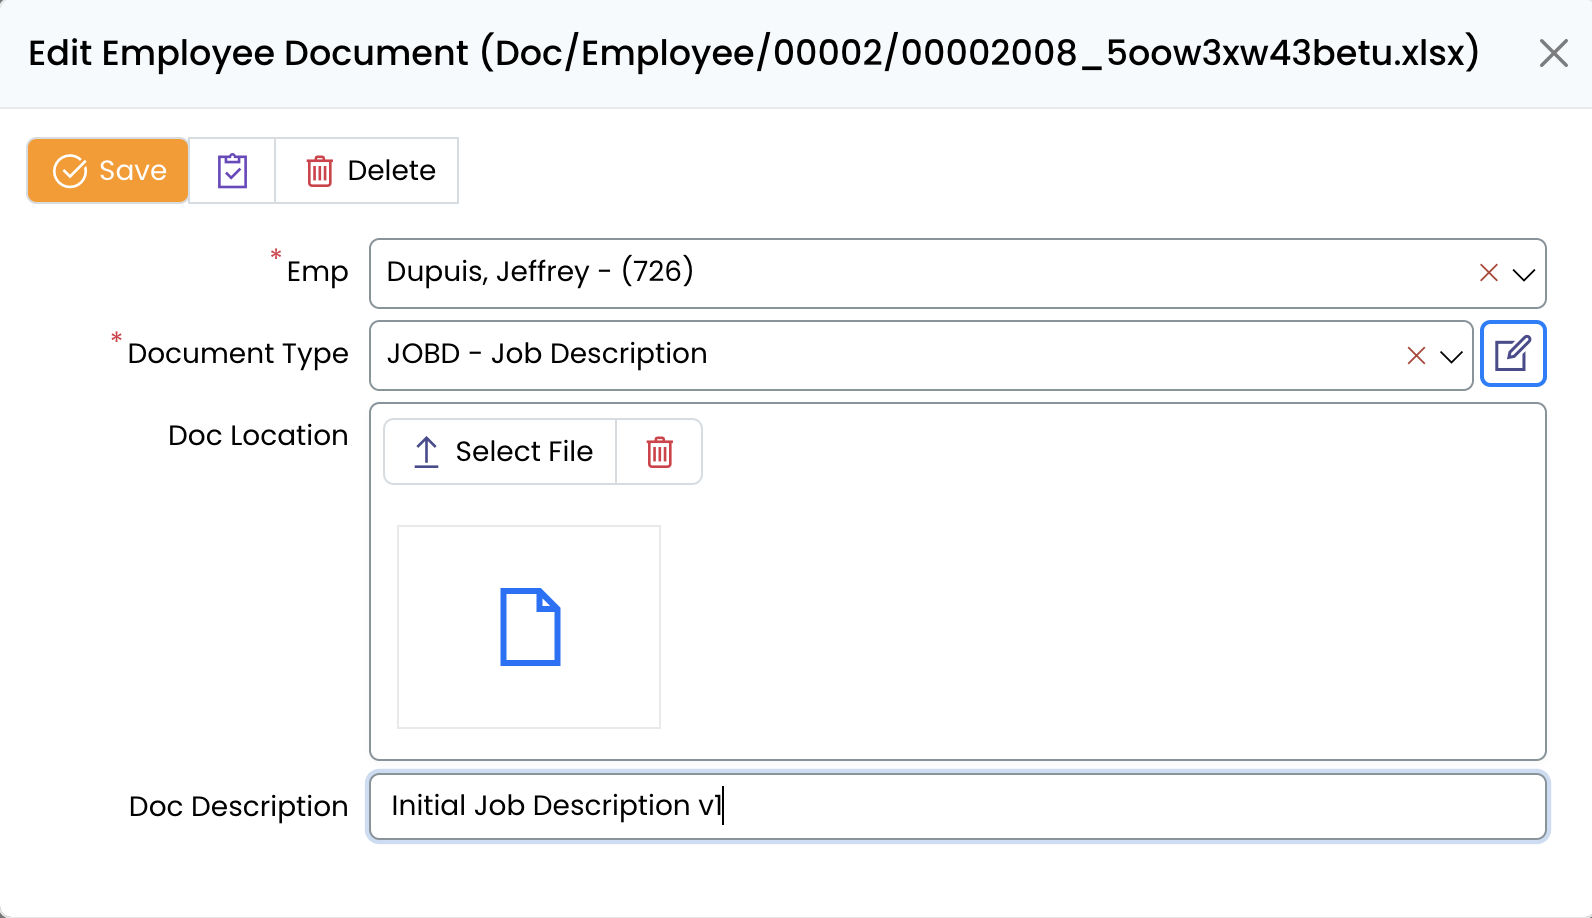
- Click the + New Employee Document button.
- Enter the following details:
- Code: Assign a unique code to the document for easy identification.
- Description: Provide a brief description of the document.
- Type: The file format (e.g., PDF, XLSX, JPG).
- Upload Date: The date the document was uploaded.
- Upload the document file.
Step 3: Save and Manage Documents
- Review the entered details for accuracy.
- Click the Save button to store the document.
- The document will now appear in the Docs tab list with its corresponding ID, Code, Description, Type, and Upload Date.
Additional Notes
- Documents can be searched using the search bar.
- You can manage the uploaded documents by editing or deleting them when necessary.
- The document list displays up to 100 records per page.
- Once document management is complete, you can proceed to other sections like Bank, Assets, Hours, Loans, and Notes to further build the employee’s profile. 🚀