
Managing Tax Annotations
Tax Annotations allow you to adjust employee tax records. These annotations appear on the relevant tax remittance reports.
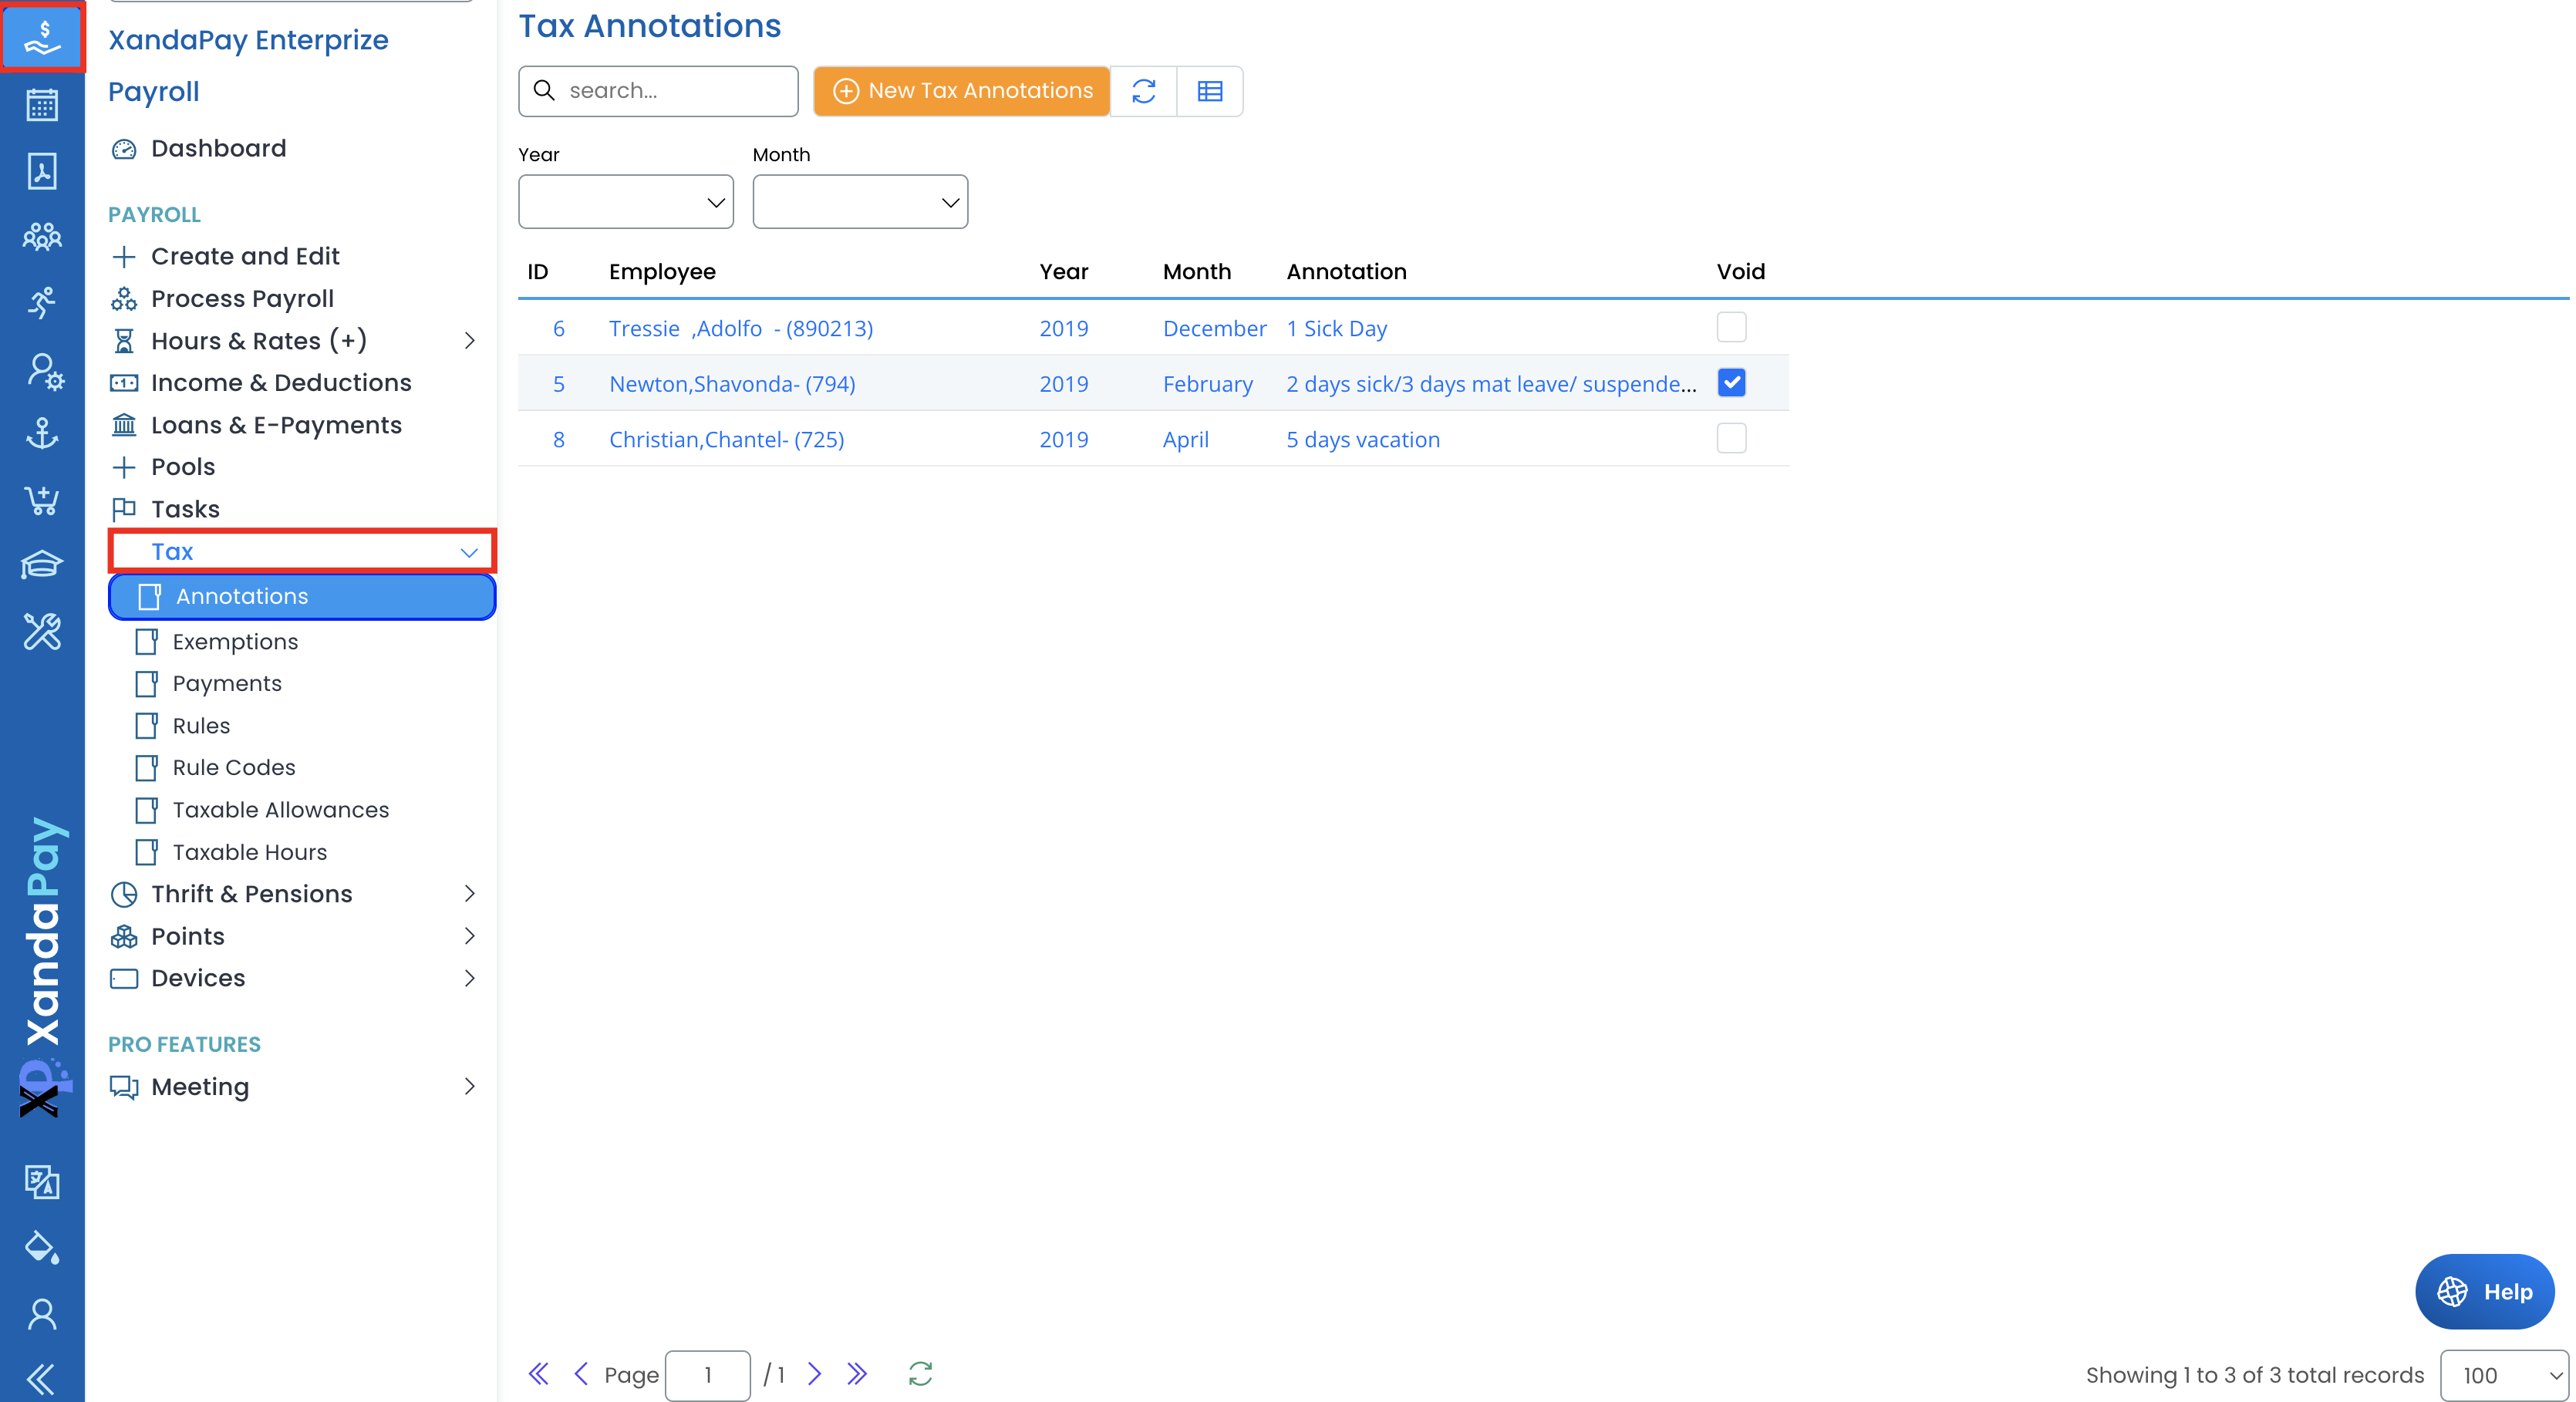
Accessing the Tax Annotations Page
- Log in to XandaPay and navigate to the Payroll module.
- Under Tax, click on Annotations.
- You will see a list of existing annotations for employees, showing the Year, Month, Annotation Amount, and Void Status.
Adding a New Tax Annotation
- Click on New Tax Annotations.
- In the popup form:
- Select Employee: Choose the employee to apply the annotation to.
- Select Year: Pick the tax year for the annotation.
- Select Month: Choose the relevant month for the adjustment.
- Enter Annotation: Input the description (e.g., 5 Vacation Days or 1 Sick Day).
- (Optional) Check "Void" if the annotation is no longer valid.
- Click Save to apply the annotation.

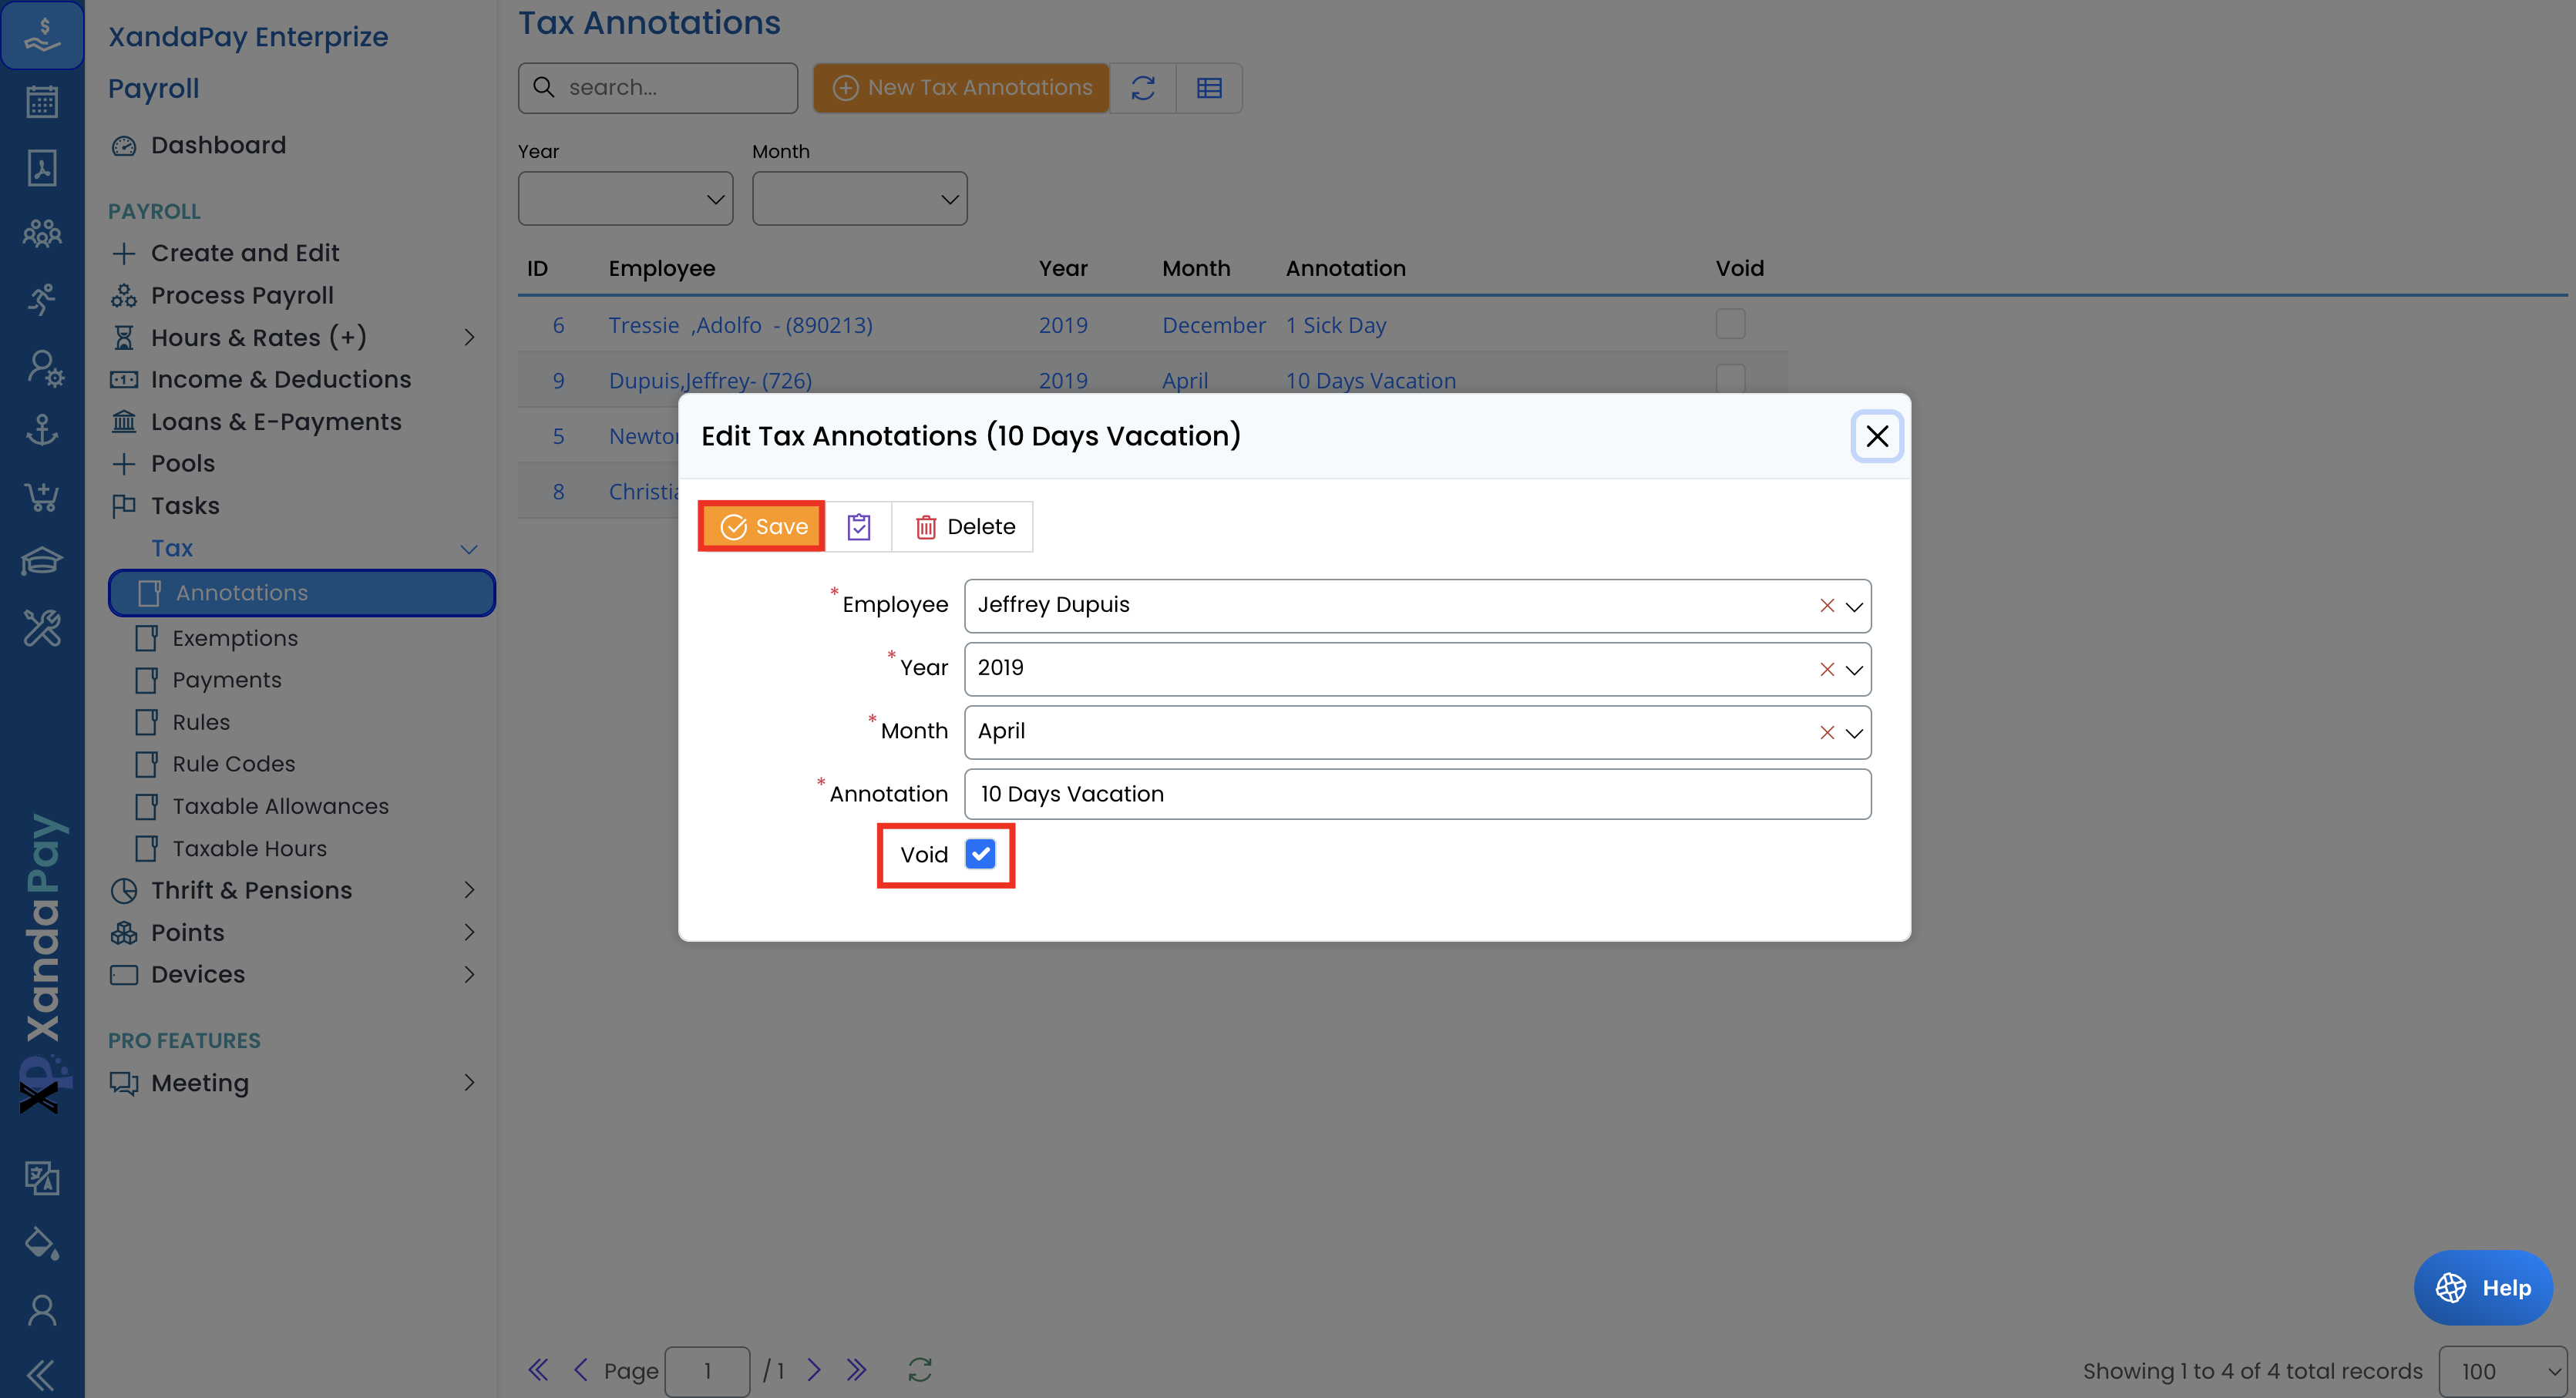
Editing an Existing Tax Annotation
- Locate the annotation in the list and click on the employee’s name.
- In the Tax Annotation dialog:
- Update the Employee, Year, Month, or Annotation Amount as needed.
- To void the annotation, check the Void box.
- Click Save to update the record.
Deleting a Tax Annotation
- Open an annotation by clicking on an employee’s name.
- Click Delete and confirm the action.

⚠ Warning: Deleting tax annotations is a permanent action and cannot be undone.
Important Notes
- Voided annotations will not impact tax remittance reports.
- Ensure the correct month and year are selected, as incorrect entries could affect tax filings.
By following these steps, you can effectively manage employee tax annotations within XandaPay. 🚀